Building an Ionic App with Firebase Authentication & File Upload using AngularFire 7 Last update: 2022-02-22
If you want a full blown cloud backend for your Ionic app, Firebase offers everything you need out of the box so you can setup your Ionic app with authentication and file upload in minutes!
Get the Code 🔐
Receive all the files of the tutorial right to your inbox and subscribe to my weekly no BS newsletter!
In this tutorial we will implement the whole flow from connecting our Ionic app to Firebase, adding user authentication and protecting pages after a login to finally selecting an image with Capacitor and uploading it to Firebase cloud storage!
All of this might sound intimidating but you will see, it’s actually a breeze with these tools. To handle our Firebase interaction more easily we will use the AngularFire library version 7 which works with the Firebase SDK version 9 which I used in this post.
Note: At the time writing there was a problem when running the app on iOS devices - read until the end for a solution!
Creating the Firebase Project
Before we dive into the Ionic app, we need to make sure we actually have a Firebase app configured. If you already got something in place you can of course skip this step.
Otherwise, make sure you are signed up (it’s free) and then hit Add project inside the Firebase console. Give your new app a name, select a region and then create your project!
Once you have created the project you can see the web configuration which looks like this:
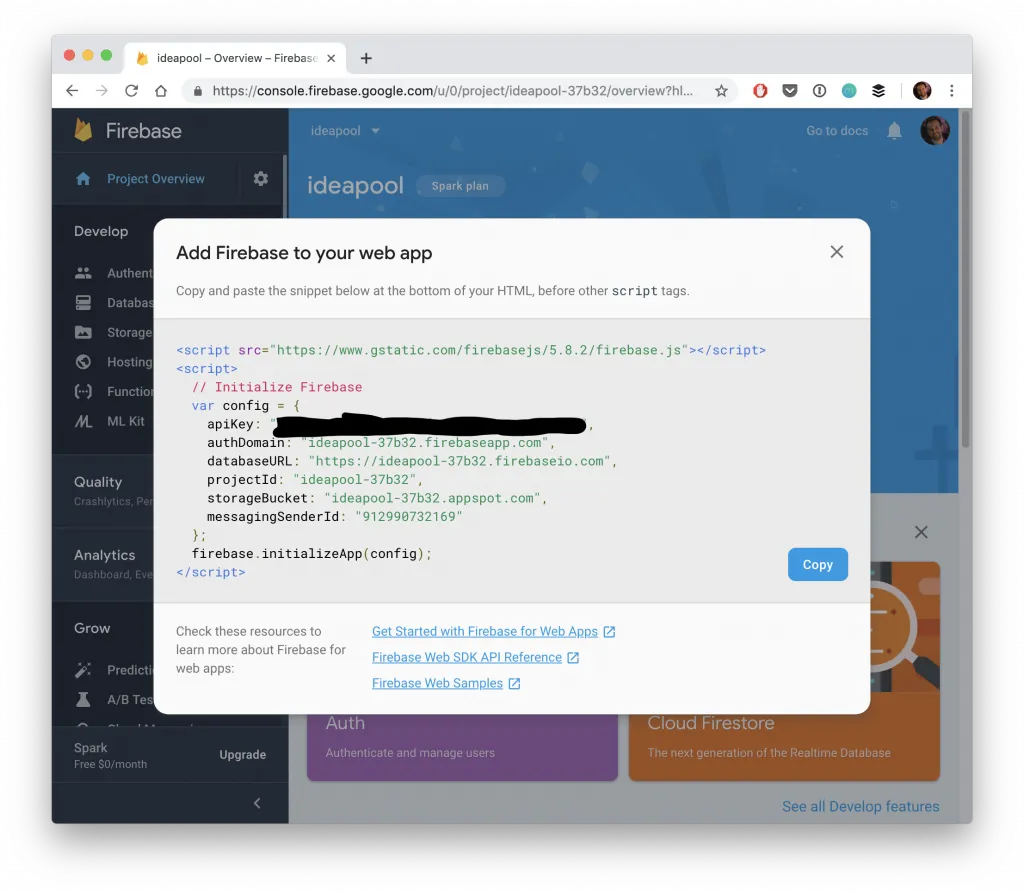
If it’s a new project, click on the web icon below ”Get started by adding Firebase to your app” to start a new web app and give it a name, you will see the configuration in the next step now.
Leave this config block open just for reference, it will hopefully be copied automatically later by a schematic.
Additionally we have to enable the database, so select Firestore Database from the menu and click Create database.
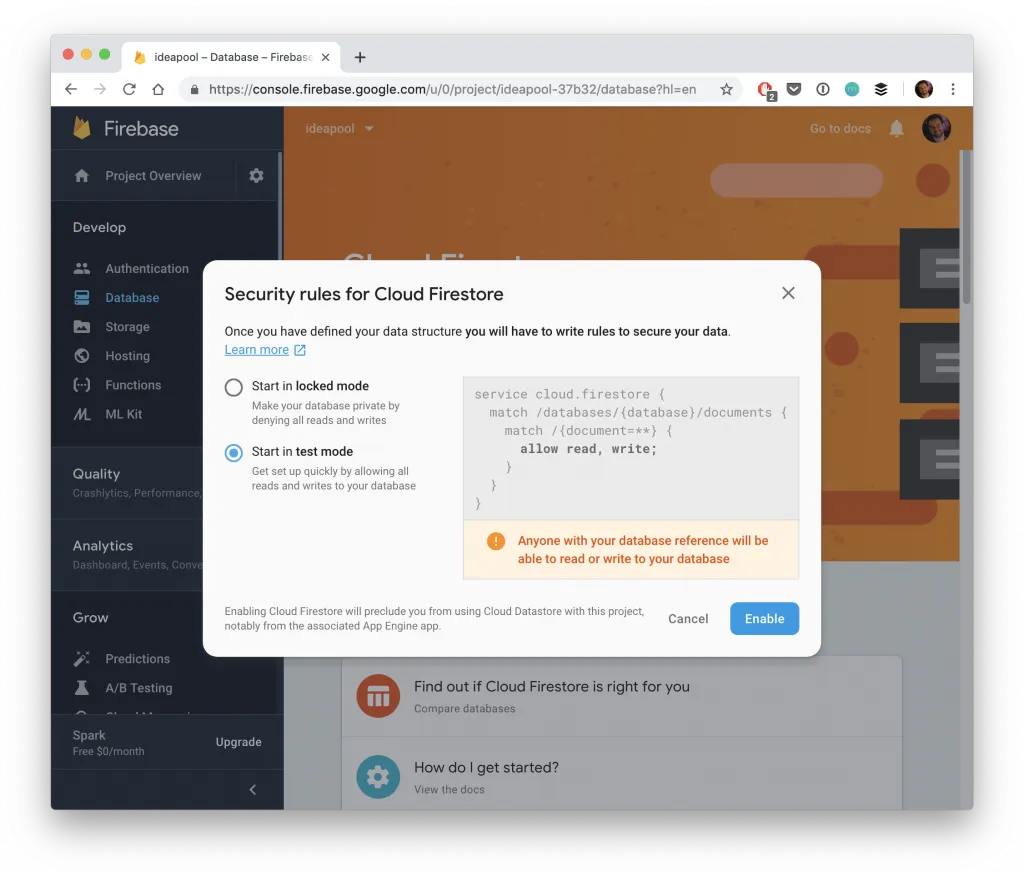
Here we can set the default security rules for our database and because this is a simple tutorial we’ll roll with the test mode which allows everyone access.
Because we want to work with users we also need to go to the Authentication tab, click Get started again and activate the Email/Password provider. This allows us to create user with a standard email/ps combination.

The last step is enabling Storage in the according menu entry as well, and you can go with the default rules because we will make sure users are authenticated at the point when they upload or read files.
The rules should look like this:
rules_version = '2';
service firebase.storage {
  match /b/{bucket}/o {
    match /{allPaths=**} {
      allow read, write: if request.auth != null;
    }
  }
}Note: For real applications you need to create secure rules for storage and your Firestore database, otherwise people can easily access all your data from the outside!
You can learn more about Firebase and security rules inside the Ionic Academy.
Starting our Ionic App & Firebase Integration
Now we can finally begin with the actual Ionic app, and all we need is a blank template, an additional page and two services for the logic in our app:
ionic start devdacticFire blank --type=angular
cd ./devdacticFire

ionic g page login
ionic g service services/auth
ionic g service services/avatar

# For image upload with camera
npm i @capacitor/camera
npm i @ionic/pwa-elements

ng add @angular/fire
Besides that we can already install the Capacitor camera package to capture images later (and the PWA elements for testing on the browser).
To use those PWA elements, quickly bring up your src/main.ts and import plus call the defineCustomElements function:
import { enableProdMode } from '@angular/core';
import { platformBrowserDynamic } from '@angular/platform-browser-dynamic';

import { AppModule } from './app/app.module';
import { environment } from './environments/environment';
import { defineCustomElements } from '@ionic/pwa-elements/loader';

if (environment.production) {
	enableProdMode();
}

platformBrowserDynamic()
	.bootstrapModule(AppModule)
	.catch((err) => console.log(err));

defineCustomElements(window);
The last command is the most important as it starts the AngularFire schematic, which has become a lot more powerful over the years! You should select the according functions that your app needs, in our case select Cloud Storage, Authentication and Firestore.
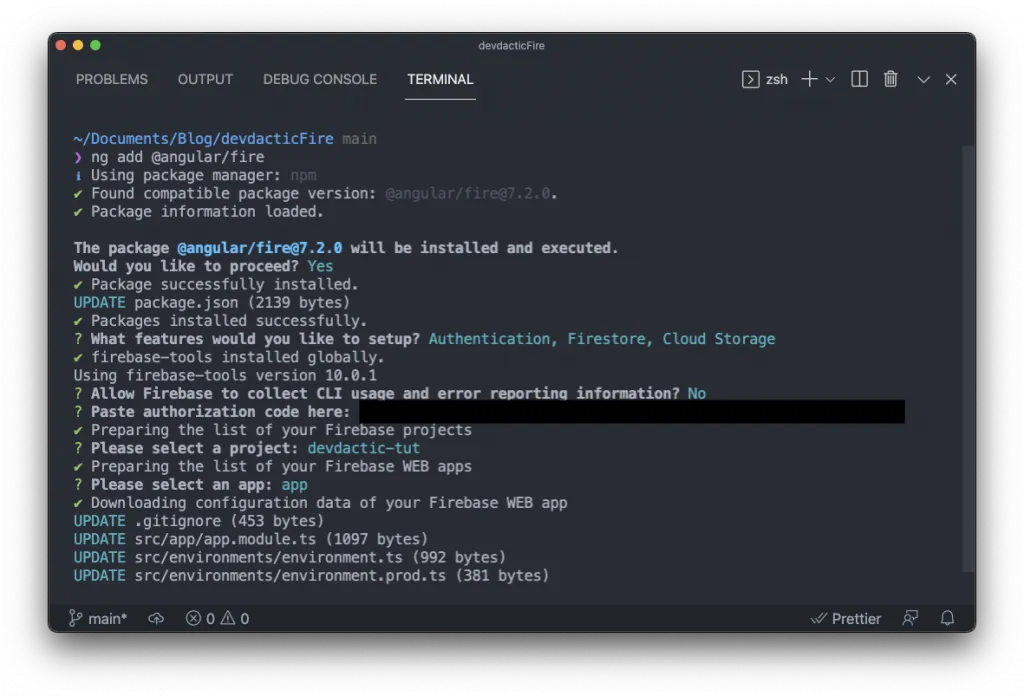
After that a browser will open to log in with Google, which hopefully reads your list of Firebase apps so you can select the Firebase project and app your created in the beginning!
As a result the schematic will automatically fill your environments/environment.ts file - if not make sure you manually add the Firebase configuration from the first step like this:
export const environment = {
	production: false,
	firebase: {
		apiKey: '',
		authDomain: '',
		projectId: '',
		storageBucket: '',
		messagingSenderId: '',
		appId: ''
	}
};
On top of that the schematic injected everything necessary into our src/app/app.module.ts using the new Firebase 9 modular approach:
import { NgModule } from '@angular/core';
import { BrowserModule } from '@angular/platform-browser';
import { RouteReuseStrategy } from '@angular/router';

import { IonicModule, IonicRouteStrategy } from '@ionic/angular';

import { AppComponent } from './app.component';
import { AppRoutingModule } from './app-routing.module';
import { initializeApp, provideFirebaseApp } from '@angular/fire/app';
import { environment } from '../environments/environment';
import { provideAuth, getAuth } from '@angular/fire/auth';
import { provideFirestore, getFirestore } from '@angular/fire/firestore';
import { provideStorage, getStorage } from '@angular/fire/storage';

@NgModule({
	declarations: [AppComponent],
	entryComponents: [],
	imports: [
		BrowserModule,
		IonicModule.forRoot(),
		AppRoutingModule,
		provideFirebaseApp(() => initializeApp(environment.firebase)),
		provideAuth(() => getAuth()),
		provideFirestore(() => getFirestore()),
		provideStorage(() => getStorage())
	],
	providers: [{ provide: RouteReuseStrategy, useClass: IonicRouteStrategy }],
	bootstrap: [AppComponent]
})
export class AppModule {}
Again, if the schematic failed for some reason that’s how your module should look like before you continue!
Now we can also quickly touch the routing of our app to display the login page as the first page, and use the default home page for the inside area.
We don’t have authentication implemented yet, but we can already use the AngularFire auth guards in two cool ways:
- Protect access to “inside” pages by redirecting unauthorized users to the login
- Preventing access to the login page for previously authenticated users, so they are automatically forwarded to the “inside” area of the app
This is done with the helping pipes and services of AngularFire that you can now add inside the src/app/app-routing.module.ts:
import { NgModule } from '@angular/core';
import { PreloadAllModules, RouterModule, Routes } from '@angular/router';
import { redirectUnauthorizedTo, redirectLoggedInTo, canActivate } from '@angular/fire/auth-guard';

const redirectUnauthorizedToLogin = () => redirectUnauthorizedTo(['']);
const redirectLoggedInToHome = () => redirectLoggedInTo(['home']);

const routes: Routes = [
	{
		path: '',
		loadChildren: () => import('./login/login.module').then((m) => m.LoginPageModule),
		...canActivate(redirectLoggedInToHome)
	},
	{
		path: 'home',
		loadChildren: () => import('./home/home.module').then((m) => m.HomePageModule),
		...canActivate(redirectUnauthorizedToLogin)
	},
	{
		path: '**',
		redirectTo: '',
		pathMatch: 'full'
	}
];

@NgModule({
	imports: [RouterModule.forRoot(routes, { preloadingStrategy: PreloadAllModules })],
	exports: [RouterModule]
})
export class AppRoutingModule {}
Now we can begin with the actual authentication of users!
Building the Authentication Logic
The whole logic will be in a separate service, and we need jsut three functions that simply call the according Firebase function to create a new user, sign in a user or end the current session.
For all these calls you need to add the Auth reference, which we injected inside the constructor.
Since these calls sometimes fail and I wasn’t very happy about the error handling, I wrapped them in try/catch blocks so we have an easier time when we get to our actual page.
Let’s begin with the src/app/services/auth.service.ts now and change it to:
import { Injectable } from '@angular/core';
import {
	Auth,
	signInWithEmailAndPassword,
	createUserWithEmailAndPassword,
	signOut
} from '@angular/fire/auth';

@Injectable({
	providedIn: 'root'
})
export class AuthService {
	constructor(private auth: Auth) {}

	async register({ email, password }) {
		try {
			const user = await createUserWithEmailAndPassword(this.auth, email, password);
			return user;
		} catch (e) {
			return null;
		}
	}

	async login({ email, password }) {
		try {
			const user = await signInWithEmailAndPassword(this.auth, email, password);
			return user;
		} catch (e) {
			return null;
		}
	}

	logout() {
		return signOut(this.auth);
	}
}
That’s already everything in terms of logic. Now we need to capture the user information for the registration, and therefore we import the ReactiveFormsModule in our src/app/login/login.module.ts now:
import { NgModule } from '@angular/core';
import { CommonModule } from '@angular/common';
import { FormsModule, ReactiveFormsModule } from '@angular/forms';

import { IonicModule } from '@ionic/angular';

import { LoginPageRoutingModule } from './login-routing.module';

import { LoginPage } from './login.page';

@NgModule({
	imports: [CommonModule, FormsModule, IonicModule, LoginPageRoutingModule, ReactiveFormsModule],
	declarations: [LoginPage]
})
export class LoginPageModule {}
Since we want to make it easy, we’ll handle both registration and signup with the same form on one page.
But since we added the whole logic already to a service, there’s not much left for us to do besides showing a casual loading indicator or presenting an alert if the action failed.
If the registration or login is successful and we get back an user object, we immediately route the user forward to our inside area.
Go ahead by changing the src/app/login/login.page.ts to:
import { Component, OnInit } from '@angular/core';
import { FormBuilder, FormGroup, Validators } from '@angular/forms';
import { Router } from '@angular/router';
import { AlertController, LoadingController } from '@ionic/angular';
import { AuthService } from '../services/auth.service';

@Component({
	selector: 'app-login',
	templateUrl: './login.page.html',
	styleUrls: ['./login.page.scss']
})
export class LoginPage implements OnInit {
	credentials: FormGroup;

	constructor(
		private fb: FormBuilder,
		private loadingController: LoadingController,
		private alertController: AlertController,
		private authService: AuthService,
		private router: Router
	) {}

	// Easy access for form fields
	get email() {
		return this.credentials.get('email');
	}

	get password() {
		return this.credentials.get('password');
	}

	ngOnInit() {
		this.credentials = this.fb.group({
			email: ['', [Validators.required, Validators.email]],
			password: ['', [Validators.required, Validators.minLength(6)]]
		});
	}

	async register() {
		const loading = await this.loadingController.create();
		await loading.present();

		const user = await this.authService.register(this.credentials.value);
		await loading.dismiss();

		if (user) {
			this.router.navigateByUrl('/home', { replaceUrl: true });
		} else {
			this.showAlert('Registration failed', 'Please try again!');
		}
	}

	async login() {
		const loading = await this.loadingController.create();
		await loading.present();

		const user = await this.authService.login(this.credentials.value);
		await loading.dismiss();

		if (user) {
			this.router.navigateByUrl('/home', { replaceUrl: true });
		} else {
			this.showAlert('Login failed', 'Please try again!');
		}
	}

	async showAlert(header, message) {
		const alert = await this.alertController.create({
			header,
			message,
			buttons: ['OK']
		});
		await alert.present();
	}
}
The last missing piece is now our view, which we connect with the formGroup we defined in our page. On top of that we can show some small error messages using the new Ionic 6 error slot.
Just make sure that one button inside the form has the submit type and therefore triggers the ngSubmit action, while the other has the type button if it should just trigger it’s connected click event!
Bring up the src/app/login/login.page.html now and change it to:
<ion-header>
<ion-toolbar color="primary">
<ion-title>My App</ion-title>
</ion-toolbar>
</ion-header>
<ion-content class="ion-padding">
<form (ngSubmit)="login()" [formGroup]="credentials">
<ion-item fill="solid" class="ion-margin-bottom">
<ion-input type="email" placeholder="Email" formControlName="email"></ion-input>
<ion-note slot="error" *ngIf="(email.dirty || email.touched) && email.errors"
>Email is invalid</ion-note
>
</ion-item>
<ion-item fill="solid" class="ion-margin-bottom">
<ion-input type="password" placeholder="Password" formControlName="password"></ion-input>
<ion-note slot="error" *ngIf="(password.dirty || password.touched) && password.errors"
>Password needs to be 6 characters</ion-note
>
</ion-item>
<ion-button type="submit" expand="block" [disabled]="!credentials.valid">Log in</ion-button>
<ion-button type="button" expand="block" color="secondary" (click)="register()"
>Create account</ion-button
>
</form>
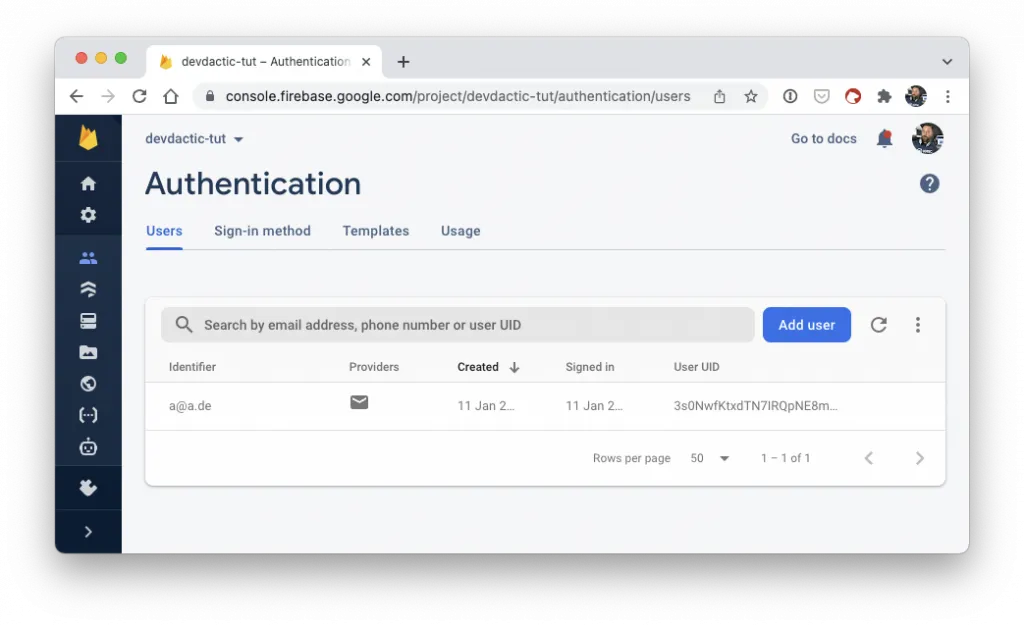
</ion-content>And at this point we are already done with the first half of our tutorial, since you can now really register users and also log them in.
You can confirm this by checking the Authentication area of your Firebase console and hopefully a new user was created in there!
For a more extensive login and registration UI tutorial you can also check out the Ionic App Navigation with Login, Guards & Tabs Area tutorial!
Uploading image files to Firebase with Capacitor
Just like before we will now begin with the service implementation, which makes life really easy for our page later down the road.
The service should first of all return the document of a user in which we plan to store the file reference/link to the user avatar.
In many tutorials you directly create a document inside your Firestore database for a user right after the sign up, but it’s also no problem that we haven’t done by now.
The data can be retrieved using the according docData() function - you can learn more about the way of accessing collections and documents with Firebase 9 here.
Besides that we can craft our uploadImage() function and expect a Photo object since this is what we get back from the Capacitor camera plugin.
Now we just need to create a path to where we want to upload our file and a reference to that path within Firebase storage.
With that information we can trigger the uploadString() function since we simply upload a base64 string this time. But there’s also a function to upload a Blob in case you have some raw data.
When the function is finished, we need to call another getDownloadURL() function to get the actual path of the image that we just uploaded.
This information is now written to the user document so we can later easily retrieve it.
All of that sounds challenging, but it’s actually just a few lines of code inside our src/app/services/avatar.service.ts:
import { Injectable } from '@angular/core';
import { Auth } from '@angular/fire/auth';
import { doc, docData, Firestore, setDoc } from '@angular/fire/firestore';
import { getDownloadURL, ref, Storage, uploadString } from '@angular/fire/storage';
import { Photo } from '@capacitor/camera';
@Injectable({
providedIn: 'root'
})
export class AvatarService {
constructor(private auth: Auth, private firestore: Firestore, private storage: Storage) {}
getUserProfile() {
const user = this.auth.currentUser;
const userDocRef = doc(this.firestore, `users/${user.uid}`);
return docData(userDocRef, { idField: 'id' });
}
async uploadImage(cameraFile: Photo) {
const user = this.auth.currentUser;
const path = `uploads/${user.uid}/profile.webp`;
const storageRef = ref(this.storage, path);
try {
await uploadString(storageRef, cameraFile.base64String, 'base64');
const imageUrl = await getDownloadURL(storageRef);
const userDocRef = doc(this.firestore, `users/${user.uid}`);
await setDoc(userDocRef, {
imageUrl
});
return true;
} catch (e) {
return null;
}
}
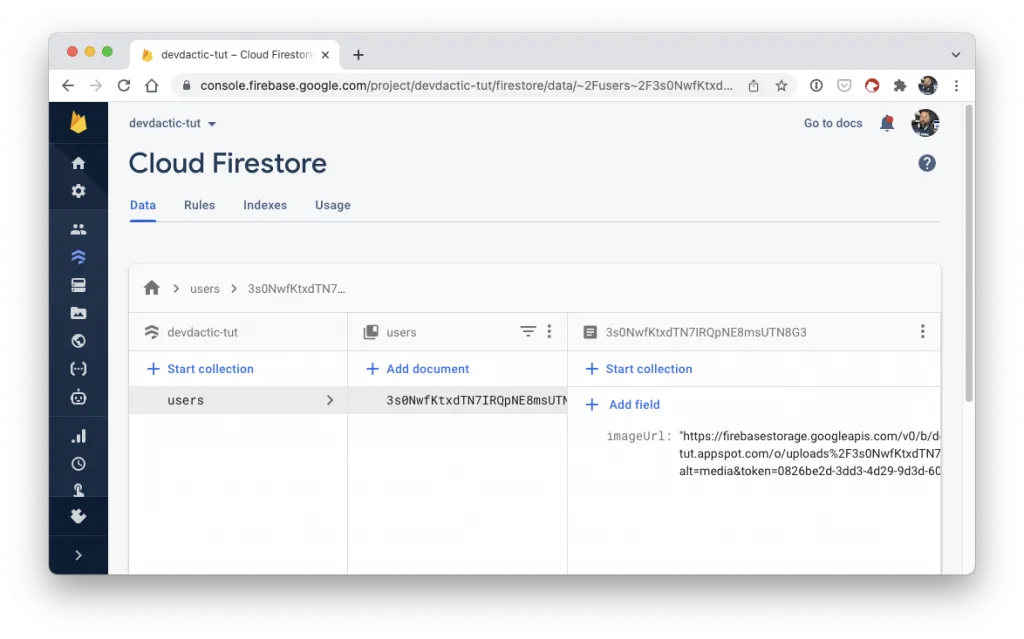
}In the end, we should therefore see an entry inside Firestore with the unique user ID inside the path and the image stored for that user like in the image below.
Now let’s put that service to use in our page!
First, we subscribe to the getUserProfile() function as we will then get the new value whenever we change that image.
Besides that we add a logout function, and finally a function that calls the Capacitor camera plugin. The image result will be passed to our service which handles all the rest - we just need some loading and error handling in here again!
Therefore go ahead now and change the src/app/home/home.page.ts to:
import { Component } from '@angular/core';
import { Router } from '@angular/router';
import { Camera, CameraResultType, CameraSource } from '@capacitor/camera';
import { AlertController, LoadingController } from '@ionic/angular';
import { AuthService } from '../services/auth.service';
import { AvatarService } from '../services/avatar.service';

@Component({
	selector: 'app-home',
	templateUrl: 'home.page.html',
	styleUrls: ['home.page.scss']
})
export class HomePage {
	profile = null;

	constructor(
		private avatarService: AvatarService,
		private authService: AuthService,
		private router: Router,
		private loadingController: LoadingController,
		private alertController: AlertController
	) {
		this.avatarService.getUserProfile().subscribe((data) => {
			this.profile = data;
		});
	}

	async logout() {
		await this.authService.logout();
		this.router.navigateByUrl('/', { replaceUrl: true });
	}

	async changeImage() {
		const image = await Camera.getPhoto({
			quality: 90,
			allowEditing: false,
			resultType: CameraResultType.Base64,
			source: CameraSource.Photos // Camera, Photos or Prompt!
		});

		if (image) {
			const loading = await this.loadingController.create();
			await loading.present();

			const result = await this.avatarService.uploadImage(image);
			loading.dismiss();

			if (!result) {
				const alert = await this.alertController.create({
					header: 'Upload failed',
					message: 'There was a problem uploading your avatar.',
					buttons: ['OK']
				});
				await alert.present();
			}
		}
	}
}
We’re almost there!
Now we need a simple view to display either the user avatar image if it exists, or just a placeholder if we don’t have a user document (or avatar image) yet.
That’s done pretty easily by changing our src/app/home/home.page.html to:
<ion-header>
	<ion-toolbar color="primary">
		<ion-buttons slot="start">
			<ion-button (click)="logout()">
				<ion-icon slot="icon-only" name="log-out"></ion-icon>
			</ion-button>
		</ion-buttons>
		<ion-title> My Profile </ion-title>
	</ion-toolbar>
</ion-header>

<ion-content class="ion-padding">
	<div class="preview">
		<ion-avatar (click)="changeImage()">
			<img *ngIf="profile?.imageUrl; else placheolder_avatar;" [src]="profile.imageUrl" />
			<ng-template #placheolder_avatar>
				<div class="fallback">
					<p>Select avatar</p>
				</div>
			</ng-template>
		</ion-avatar>
	</div>
</ion-content>
To make everything centered and look a bit nicer, just put the following quickly into your src/app/home/home.page.scss:
ion-avatar {
  width: 128px;
  height: 128px;
}

.preview {
  margin-top: 50px;
  display: flex;
  justify-content: center;
}

.fallback {
  width: 128px;
  height: 128px;
  border-radius: 50%;
  background: #bfbfbf;

  display: flex;
  justify-content: center;
  align-items: center;
  font-weight: 500;
}
And BOOM - you are done and have the whole flow from user registration, login to uploading files as a user implemented with Ionic and Capacitor!
You can check if the image was really uploaded by also taking a look at the Storage tab of your Firebase project.
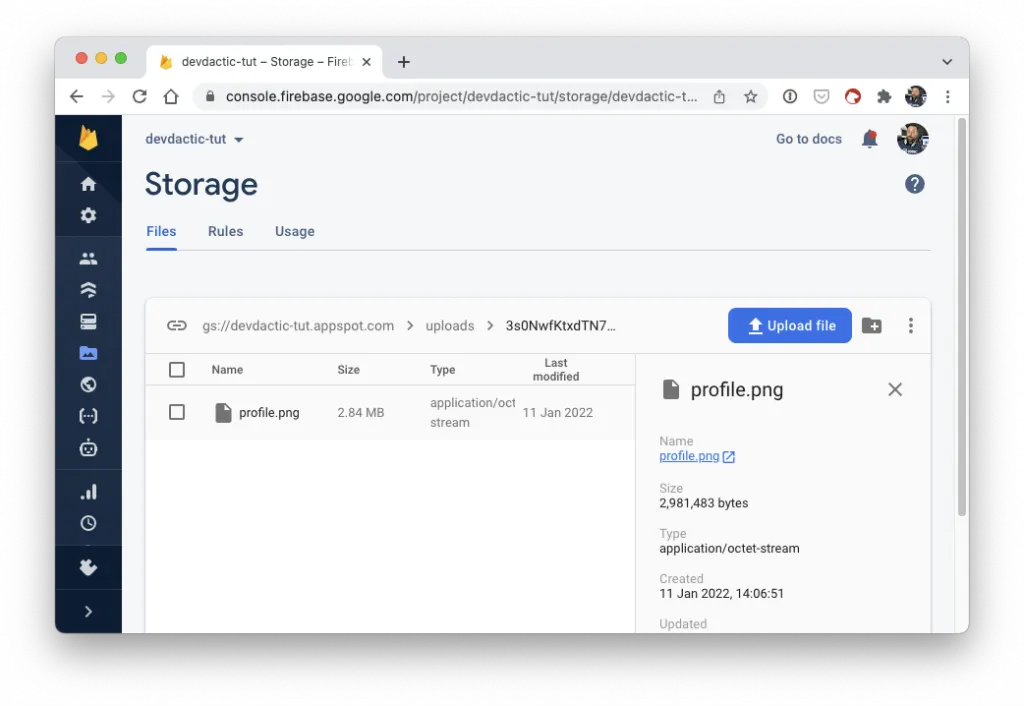
If you want the preview to show up correctly in there, just supply the right metadata during the upload task, but the image will be displayed inside your app no matter what.
Native iOS and Android Changes
To make all of this also work nicely on your actual native apps, we need a few changes.
First, go ahead and add those platforms:
ionic build

ionic cap add ios
ionic cap add android
Because we are accessing the camera we also need to define the permissions for the native platforms, so let’s start with iOS and add the following permissions (with a good reason in a real app!) to your ios/App/App/Info.plist:
	<key>NSCameraUsageDescription</key>
	<string>To capture images</string>
	<key>NSPhotoLibraryAddUsageDescription</key>
	<string>To add images</string>
	<key>NSPhotoLibraryUsageDescription</key>
	<string>To store images</string>
For Android we need to do the same. Therefore, bring up the android/app/src/main/AndroidManifest.xml and after the line that already sets the internet permission add two more lines:
    <uses-permission android:name="android.permission.INTERNET" />
    <uses-permission android:name="android.permission.READ_EXTERNAL_STORAGE" />
    <uses-permission android:name="android.permission.WRITE_EXTERNAL_STORAGE" />
Finally when I ran the app on my device, I just got a white screen of death.
There was a problem with the Firebase SDK and Capacitor, but there’s actually an easy fix.
We only need to change our src/app/app.module.ts and use the native authentication directly from the Firebase SDK when our app runs as a native app:
import { NgModule } from '@angular/core';
import { BrowserModule } from '@angular/platform-browser';
import { RouteReuseStrategy } from '@angular/router';

import { IonicModule, IonicRouteStrategy } from '@ionic/angular';

import { AppComponent } from './app.component';
import { AppRoutingModule } from './app-routing.module';
import { initializeApp, provideFirebaseApp } from '@angular/fire/app';
import { environment } from '../environments/environment';
import { provideAuth, getAuth } from '@angular/fire/auth';
import { provideFirestore, getFirestore } from '@angular/fire/firestore';
import { provideStorage, getStorage } from '@angular/fire/storage';
import { Capacitor } from '@capacitor/core';
import { indexedDBLocalPersistence, initializeAuth } from 'firebase/auth';
import { getApp } from 'firebase/app';

@NgModule({
	declarations: [AppComponent],
	entryComponents: [],
	imports: [
		BrowserModule,
		IonicModule.forRoot(),
		AppRoutingModule,
		provideFirebaseApp(() => initializeApp(environment.firebase)),
		provideAuth(() => {
			if (Capacitor.isNativePlatform()) {
				return initializeAuth(getApp(), {
					persistence: indexedDBLocalPersistence
				});
			} else {
				return getAuth();
			}
		}),
		provideFirestore(() => getFirestore()),
		provideStorage(() => getStorage())
	],
	providers: [{ provide: RouteReuseStrategy, useClass: IonicRouteStrategy }],
	bootstrap: [AppComponent]
})
export class AppModule {}
Because of the modular approach this change is super easy to add, and now you can also enjoy the Firebase app with upload on your iOS device!
Conclusion
Firebase remains one of the best choices as a cloud backend for your Ionic application if you want to quickly add features like user authentication, database or file upload.
For everyone more into SQL, you should also check out the rising star Supabase which offers already all essential functionality that Firebase has in an open source way.
You can also find a video version of this tutorial below.