Real iOS Push Notifications with Ionic Push Last update: 2015-07-28
I got a lot of requests on a tutorial showing how to use the Ionic.io Push notification service in a real example. Today I will finally show you how fast it can be to integrate iOS push notifications inside your Ionic Framework app!
The starting point of this tutorial will be my last tutorial about development push notifications with Ionic Push.
Make sure you can definitely send out development push notifications to your app. Only in that case we can be sure everything is set up correct so far!
Check out the new and updated way of Ionic Push Notifications
Setup the template and keys
If you are using the code from the last tutorial, make sure you have connected your app to the Ionic.io service by uploading it and replacing the keys inside your configure block. If you start with my provided template here (which is basically the clean code from the last tutorial), unzip the content and run
./init.shwhich will install all the dependencies you need. Now go ahead and upload your app by calling
ionic uploadOnce this is done, go to your Ionic.io Dashboard and copy your App ID to your app.js to the configure section and replace the dummy YOUR_APP_ID.
Also in the dashboard, select your app and go to settings -> keys and copy your Public API key, and paste that one to the app.js where it says YOUR_API_KEY.
At this point your app should be ready for testing the development push, so go ahead and run your app, click the two buttons and copy the key and paste it somewhere (you need it soon) which will come in an alert view or grab it from the console log.
If you now head to your command line and run
ionic push -syou will get asked for your private API key which you can also grab from the Ionic.io settings section, and also the device token which you copied in the step before. Answer the other questions with whatever you like, and you should see an alert in your running app!
It’s important that everything works so far. If you already have another app ready where development pushes work, that’s also fine and you can head on!
Setting up your iOS Certificates and all the fun
Dealing with iOS certificates is no fun, but it’s also more easy than some years ago. I will show the complete process in the video below this article, however, it’s best described on the Ionic iOS Push documentation. Please follow along the steps 1+2, which basically do these things:
- 1. Create a certificate request
- 2. Create a App ID with Push Notifications enabled
- 3. Create a development SSL Push Notification certificate with the file from step 1
- 4. Download that bundle identifier and export a .p12 file from it
- 5. Create a provisioning profile with your App ID
Once those things are ready, there are only some steps left. If you encounter any problems on those steps, just let me know in the comments. Also these things are only available if you are enrolled in the iOS developer program.
Finishing our app settings for iOS Push Notifications
By now you should have an App ID, which we need now. Open your config.xml and paste the App ID where you currently have some sort of dummy id right at the second line, starting with widget id=".."
The last thing you need now is to disable the development, so open the app.js and remove dev_push: true in the config section.
To rebuild your app now with the new settings, first add the iOS platform and then build it with:
ionic platform ios
ionic build ios
Now we also need to inform the Ionic Push service about our certificate, so run
ionic push --ios-dev-certThis will ask for your certificate, so paste in the one you exported from your Apple certificate (step 4 above!). Finally set the push modus to development pushes, which uses the Apple Push Notification Sandbox Service:
ionic push --production-mode=nSending a push
You app is ready and you need to deploy it to a device to test the iOS push notifications. Once it’s deployed, you can again use the 2 buttons to identify and register. Now the native pop up should ask for permission to send you notifications, so allow that. 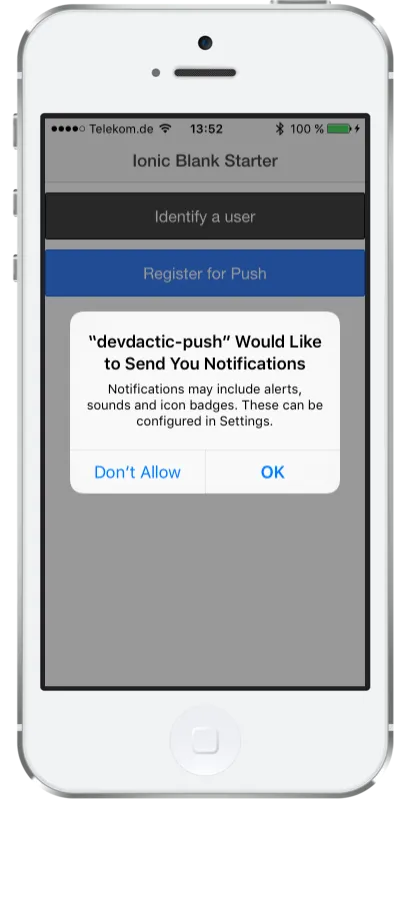
Now you can go to your Ionic.io dashboard again and select your App. In the section Push there should be a box which allows to create a new push.
I got this point wrong in the beginning, you can also see it in the video. I guess you have to specify some filter to get your push send out!
Anyway, if you click-through the steps, you can first configure a name and message text and then select which devices receive that push. Here you can specify some filters, or like in the image below, remove all of them to see your registered device: 
This device will only be available once you started the app and registered it! So if you see your device here, you have worked through all of the steps before successful!
If you finish the push wizard, the notification should be sent but for me this was not happening because I did not specify a filter. If you set the filter to match your one device, your push should be come to your device!
There’s also another trick to test your notifications. Back in the push dashboard, you should have an option to send a One-Time Push Notification. Select that one.
Now enter the id which your device also logged to the console and enter this one. Add a text and send out that push. And finally, there it is: An Ionic iOS Push Notification! 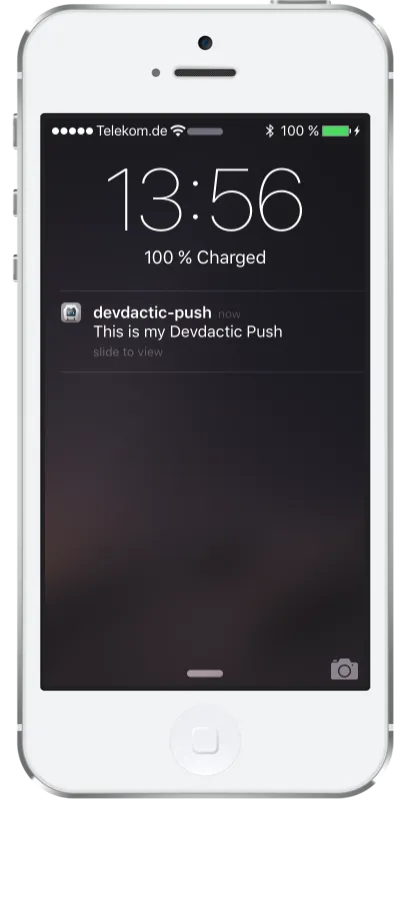
Final words
It’s not that easy to set up iOS push notifications with Ionic, but nor is it with native Apple code. If you plan to use push notifications in a real app, you also need to create a production SSL certificate and change the mode, but this is also described in the official Ionic documentation. You can also use your own server as some middlemen storing all the device token and then making REST calls to the Ionic service, but this is left to you and your dreams!
If you encounter any problems along the process or need further information, just ask below. Also if you like this share it with your friends :)
Again if you need want to start with the code from the development push tutorial, download below.
See a video with me setting up everything live below.
So long, Simon