How to Write Unit Tests for your Ionic Angular App Last update: 2022-05-17

Did you ever wonder what the *.spec file that is automatically generated for your pages and services is useful for? Then this tutorial is exactly for you!
The spec file inside your Angular project describes test cases, more specific unit tests for specific functionalities (“units”) of your code.
Running the tests is as easy as writing one command, but writing the tests looks a bit different and requires some general knowledge.
In our Ionic Angular app, everything is set up automatically to use Jasmine as a behaviour driven testing framework that gives us the tool to write easy test cases.
On top of that our tests are executed with the help of Karma, a test runner that runs our defined cases inside a browser window.
Why Unit Tests?
We have one spec file next to every page, component, service or whatever you generate with the Ionic CLI.
The reason is simple: We want to test a specific piece of code within a unit test, and not how our whole system operates!
That means, we should test the smallest possible unit (usually a function) within unit tests, which in the end results in a code coverage percentage that describes how much of our code is covered in unit tests.
In the end, this also means you can rely on those functions to be correct - or if you want to use Test Driven Development (TDD) you could come up with the tests first to describe the behaviour of your app, and then implement the actual code.
However you approach it, writing unit tests in your Ionic Angular application makes your code less prone to errors in the future when you change it, and removes any guessing about whether it works or not.
Enough of the theory, let’s dive into some code!
Creating an Ionic App for testing
We start with a blank new Ionic app and add a few services and a page so we can take a look at different test cases:
ionic start devdacticTests blank --type=angular
cd ./devdacticTests

ionic g page list
ionic g service services/api
ionic g service services/data
ionic g service services/products

npm install @capacitor/storage
I’ve also installed the Capacitor storage plugin so we can test a real world scenario with dependencies to another package.
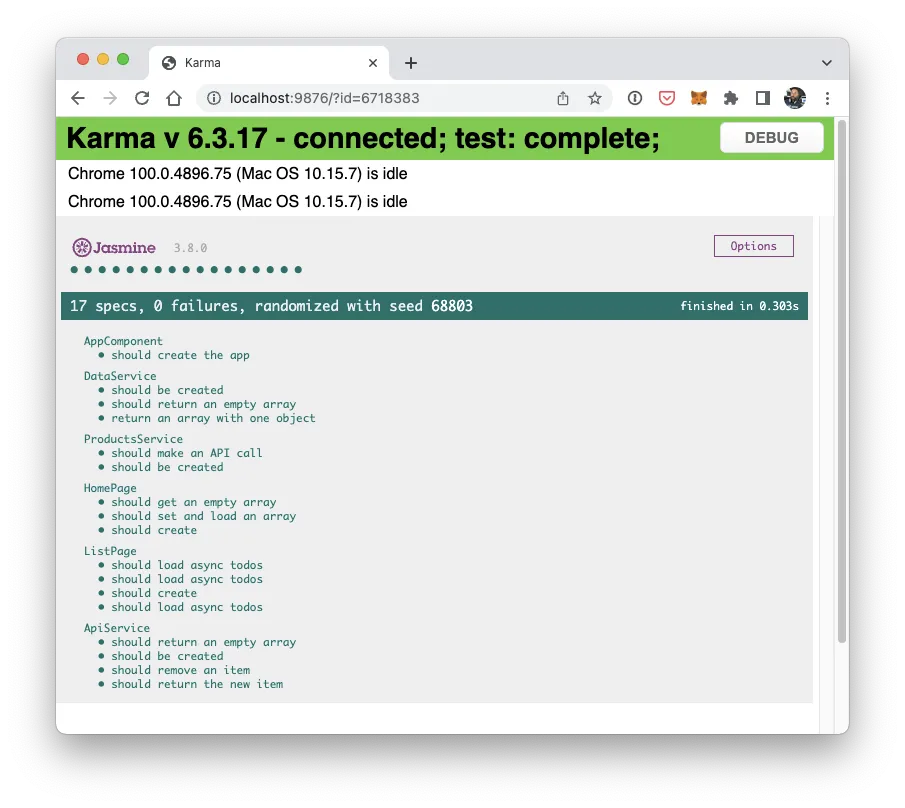
Now you can already run the tests, which will automatically update when you change your code:
npm testThis will run the test script of your package.json and open a browser when ready!
We will go through different cases and increase the difficulty along the way while adding the necessary code that we can test.
Testing a Simple Service
The easiest unit test is definitely for a service, as by default the service functionalities usually have a defined scope.
Begin by creating a simple dummy service like this inside the src/app/services/data.service.ts:
import { Injectable } from '@angular/core';

@Injectable({
  providedIn: 'root',
})
export class DataService {
  constructor() {}

  // Basic Testing
  getTodos(): any[] {
    const result = JSON.parse(localStorage.getItem('todos'));
    return result || [];
  }
}
We can now test whether the function returns the right elements by changing local storage from our test cases.
Before we get into the actual cases, we need to understand the Angular TestBed: This is almost like a ngModule, but this one is only for testing like a fake module.
We create this module beforeEach so before every test case runs, and we call the inject function to add the service or class we want to test. Later inside pages this will come with some more settings, but for a single service that’s all we need at this point.
Test cases are written almost as you would speak: it should do something and we expect a certain result.
Let’s go ahead and change the src/app/services/data.service.spec.ts to this now:
import { TestBed } from '@angular/core/testing';
import { DataService } from './data.service';

describe('DataService', () => {
  let service: DataService;

  beforeEach(() => {
    TestBed.configureTestingModule({});
    service = TestBed.inject(DataService);
  });

  afterEach(() => {
    service = null;
    localStorage.removeItem('todos');
  });

  it('should be created', () => {
    expect(service).toBeTruthy();
  });

  it('return an empty array', () => {
    expect(service.getTodos()).toEqual([]);
  });

  it('return an array with one object', () => {
    const arr = ['First Todo'];
    localStorage.setItem('todos', JSON.stringify(arr));

    expect(service.getTodos()).toEqual(arr);
    expect(service.getTodos()).toHaveSize(1);
  });

  it('return the correct array size', () => {
    const arr = [1, 2, 3, 4, 5];
    localStorage.setItem('todos', JSON.stringify(arr));

    expect(service.getTodos()).toHaveSize(arr.length);
  });
});
We added three cases, in which we test the getTodos() of our service.
There are several Jasmine matchers and we have only used a few of them to compare the result that we get from the service to a value we expect.
At this point you should see the new cases inside your browser window (if you haven’t started the test command, go back to the beginning), and all of them should be green and just fine.
This is not what I recommend!
If your tests don’t fail in the first place, you can never be sure that you wrote them correctly. They could be green because you made a mistake and they don’t really work like they should. Therefore:
Always make your tests fail first, then add the expected value!
Testing a Service with Promises
The previous case was pretty easy with synchronous functions, but that’s very rarely the reality unless you develop a simple calculator for your CV.
Now we add some more dummy code to the src/app/services/api.service.ts so we can also test asynchronous operations:
import { Injectable } from '@angular/core';
import { Storage } from '@capacitor/storage';

@Injectable({
  providedIn: 'root',
})
export class ApiService {
  constructor() {}

  async getStoredTodos(): Promise<any[]> {
    const data = await Storage.get({ key: 'mytodos' });

    if (data.value && data.value !== '') {
      return JSON.parse(data.value);
    } else {
      return [];
    }
  }

  async addTodo(todo) {
    const todos = await this.getStoredTodos();
    todos.push(todo);
    return await Storage.set({ key: 'mytodos', value: JSON.stringify(todos) });
  }

  async removeTodo(index) {
    const todos = await this.getStoredTodos();
    todos.splice(index, 1);
    return await Storage.set({ key: 'mytodos', value: JSON.stringify(todos) });
  }
}
Again, just testing this service in isolation is quite easy as we can simply await the results of those calls just like we would do when we call them inside a page.
Go ahead and change the src/app/services/api.service.spec.ts to include some new test cases that handle a Promise:
import { TestBed } from '@angular/core/testing';

import { ApiService } from './api.service';
import { Storage } from '@capacitor/storage';

describe('ApiService', () => {
  let service: ApiService;

  beforeEach(async () => {
    TestBed.configureTestingModule({});
    service = TestBed.inject(ApiService);
  });

  it('should be created', () => {
    expect(service).toBeTruthy();
  });

  afterEach(async () => {
    await Storage.clear();
    service = null;
  });

  it('should return an empty array', async () => {
    const value = await service.getStoredTodos();
    expect(value).toEqual([]);
  });

  it('should return the new item', async () => {
    await service.addTodo('buy milk');
    const updated = await service.getStoredTodos();
    expect(updated).toEqual(['buy milk']);
  });

  it('should remove an item', async () => {
    await service.addTodo('buy milk');
    await service.addTodo('buy coffee');
    await service.addTodo('buy ionic');

    const updated = await service.getStoredTodos();
    expect(updated).toEqual(['buy milk', 'buy coffee', 'buy ionic']);

    await service.removeTodo(1);

    const newValue = await service.getStoredTodos();
    expect(newValue).toEqual(['buy milk', 'buy ionic']);
  });
});
Again, it’s easy in this case without any dependencies or long running operations, but we already have a dependency to Capacitor Storage which does work fine, but imagine a usage of the camera - there is no camera when you test!
In those cases you could inject plugin mocks for different services to encapsulate the behaviour and make sure you are testing this specific function without outside dependencies!
Testing a Basic Ionic Page
Now we move on to testing an actual page, so let’s change our src/app/home/home.page.ts in order for it to have at least one function to test:
import { Component } from '@angular/core';
import { DataService } from '../services/data.service';

@Component({
  selector: 'app-home',
  templateUrl: 'home.page.html',
  styleUrls: ['home.page.scss'],
})
export class HomePage {
  todos = [];

  constructor(private dataService: DataService) {}

  loadTodos() {
    this.todos = this.dataService.getTodos();
  }
}
The setup for the test is now a bit longer, but the default code already handles the injection into the TestBed for us.
We now also create a fixture element, which has a reference to both the class and the template!
Therefore we are able to extract the component from this fixture after injecting it with createComponent().
Our test cases itself are pretty much the same, as we simply call the function of the page and fake some values for storage.
Go ahead with the src/app/home/home.page.spec.ts and add this now:
import { ComponentFixture, TestBed, waitForAsync } from '@angular/core/testing';
import { IonicModule } from '@ionic/angular';

import { HomePage } from './home.page';

describe('HomePage', () => {
  let component: HomePage;
  let fixture: ComponentFixture<homepage>;

  beforeEach(waitForAsync(() => {
    TestBed.configureTestingModule({
      declarations: [HomePage],
      imports: [IonicModule.forRoot()],
    }).compileComponents();

    fixture = TestBed.createComponent(HomePage);
    component = fixture.componentInstance;
    fixture.detectChanges();
  }));

  afterEach(() => {
    localStorage.removeItem('todos');
    component = null;
  });

  it('should create', () => {
    expect(component).toBeTruthy();
  });

  it('get an empty array', () => {
    component.loadTodos();
    expect(component.todos).toEqual([]);
  });

  it('set an array with objects', () => {
    const arr = [1, 2, 3, 4, 5];
    localStorage.setItem('todos', JSON.stringify(arr));
    component.loadTodos();
    expect(component.todos).toEqual(arr);
    expect(component.todos).toHaveSize(arr.length);
  });
});
</homepage>
This is once again a very simplified test, and there’s something we need to be careful about:
We want to test the page, not the service - therefore we should in reality fake the behaviour of the service and the value that is returned.
And we can do this using a spy, but before we get into that let’s quickly venture almost into end to end testing…
Testing Pages with Ionic UI elements
As said before, we can access both the class and the template from our fixture element - that means we can also query view elements from our unit test!
To try this, let’s work on our second page and change the src/app/list/list.page.ts to this:
import { Component, OnInit } from '@angular/core';
import { ApiService } from '../services/api.service';

@Component({
  selector: 'app-list',
  templateUrl: './list.page.html',
  styleUrls: ['./list.page.scss'],
})
export class ListPage implements OnInit {
  todos = [];

  constructor(private apiService: ApiService) {}

  ngOnInit() {
    this.loadStorageTodos();
  }

  async loadStorageTodos() {
    this.todos = await this.apiService.getStoredTodos();
  }
}
Additionally we create a very simple UI with a card for an empty list or an iteration of all the items like this inside the src/app/list/list.page.html:
<ion-header>
  <ion-toolbar>
    <ion-title>My List</ion-title>
  </ion-toolbar>
</ion-header>

<ion-content>
  <ion-card *ngIf="!todos.length">
    <ion-card-content> No todos found </ion-card-content>
  </ion-card>

  <ion-list *ngIf="todos.length > 0">
    <ion-item *ngFor="let t of todos">
      <ion-label>{{ t }}</ion-label>
    </ion-item>
  </ion-list>
</ion-content>
In our tests we can now access the debugElement of the fixture and run different queries against it to see if certain UI elements are present, or even which text exists inside them!
Let’s do this by changing our src/app/list/list.page.spec.ts to this:
import { ComponentFixture, TestBed, waitForAsync } from '@angular/core/testing';
import { By } from '@angular/platform-browser';
import { IonCard, IonicModule, IonItem } from '@ionic/angular';

import { ListPage } from './list.page';

describe('ListPage', () => {
  let component: ListPage;
  let fixture: ComponentFixture<ListPage>;

  beforeEach(waitForAsync(() => {
    TestBed.configureTestingModule({
      declarations: [ListPage],
      imports: [IonicModule.forRoot()],
    }).compileComponents();

    fixture = TestBed.createComponent(ListPage);
    component = fixture.componentInstance;
    fixture.detectChanges();
  }));

  it('should create', () => {
    expect(component).toBeTruthy();
  });

  it('should show a card if we have no todos', () => {
    const el = fixture.debugElement.query(By.directive(IonCard));
    expect(el).toBeDefined();
    expect(el.nativeNode.textContent.trim()).toBe('No todos found');
  });

  it('should show todos after setting them', () => {
    const arr = [1, 2, 3, 4, 5];

    let el = fixture.debugElement.query(By.directive(IonCard));
    expect(el).toBeDefined();
    expect(el.nativeNode.textContent.trim()).toBe('No todos found');

    component.todos = arr;

    // Important!
    fixture.detectChanges();

    el = fixture.debugElement.query(By.directive(IonCard));
    expect(el).toBeNull();

    const items = fixture.debugElement.queryAll(By.directive(IonItem));
    expect(items.length).toBe(arr.length);
  });
});
And there’s again something to watch out for in our second test case: We need to trigger the change detection manually!
Normally the view of your app updates when the data changes, but that’s not the case inside a unit test.
In our case, we set the array of todos inside the page, and therefore expect that the view now shows a list of IonItem nodes.
However, this only happens after we call detectChanges() on the fixture, so be careful when you access any DOM elements like this.
Overall I don’t think you should have massive UI tests in your unit tests. You can test your Ionic app more easily using Cypress end to end tests!
Testing Pages with Spy
Now we are coming back to the idea from before that we should actually fake the return values of our service to minimize any external dependencies.
The idea is to create a spy for a specific function of our service, and define which result will be returned. When we now call the function of our page that uses the getStoredTodos() from a service, the test will actually use the spy instead of the real service!
That means, we don’t need to worry about the service dependency anymore at this point!
We continue with the testing file for our list from before and now take a look at three different ways to handle asynchronous code using a spy:
- Use the Jasmine
done()callback to end a Promise - Run our code inside the
waitForAsync()zone and usewhenStable() - Run our code inside the
fakeAsync()zone and manually trigger atick()
Let’s see the code for this first of all by changing the src/app/list/list.page.spec.ts to this (I simply removed the UI tests):
import {
  ComponentFixture,
  fakeAsync,
  TestBed,
  tick,
  waitForAsync,
} from '@angular/core/testing';
import { By } from '@angular/platform-browser';
import { IonCard, IonicModule, IonItem } from '@ionic/angular';
import { ApiService } from '../services/api.service';
import { ListPage } from './list.page';

describe('ListPage', () => {
  let component: ListPage;
  let fixture: ComponentFixture<ListPage>;
  let service: ApiService;

  beforeEach(waitForAsync(() => {
    TestBed.configureTestingModule({
      declarations: [ListPage],
      imports: [IonicModule.forRoot()],
    }).compileComponents();

    fixture = TestBed.createComponent(ListPage);
    component = fixture.componentInstance;
    fixture.detectChanges();

    service = TestBed.inject(ApiService);
  }));

  it('should load async todos', (done) => {
    const arr = [1, 2, 3, 4, 5];
    const spy = spyOn(service, 'getStoredTodos').and.returnValue(
      Promise.resolve(arr)
    );
    component.loadStorageTodos();

    spy.calls.mostRecent().returnValue.then(() => {
      expect(component.todos).toBe(arr);
      done();
    });
  });

  it('waitForAsync should load async todos', waitForAsync(() => {
    const arr = [1, 2, 3];
    const spy = spyOn(service, 'getStoredTodos').and.returnValue(
      Promise.resolve(arr)
    );
    component.loadStorageTodos();

    fixture.whenStable().then(() => {
      expect(component.todos).toBe(arr);
    });
  }));

  it('fakeAsync should load async todos', fakeAsync(() => {
    const arr = [1, 2];
    const spy = spyOn(service, 'getStoredTodos').and.returnValue(
      Promise.resolve(arr)
    );
    component.loadStorageTodos();
    tick();
    expect(component.todos).toBe(arr);
  }));
});
The first way is basically the default Jasmine way, and the other two are more Angular like.
Both of them are just fine, the waitForAsync simply waits until all Promises are finished and then we can run our matcher.
In the fakeAsync we manually trigger the passage of time, and the code flow now looks more like when you are using async/await.
Feel free to try both and use the one you feel more comfortable with!
PS: You could already inject the spy directly into the TestBed to define functions that the spy will mock!
Testing Services with Http Calls
Alright we increased the complexity and difficulty along this tutorial and now reach the end, which I’m pretty sure you were waiting for!
To test HTTP calls we first of all need to write some code that actually performs a call, so begin by updating the src/app/app.module.ts to inject the HttpClientModule as always (this is not related to the actual test case!):
import { NgModule } from '@angular/core';
import { BrowserModule } from '@angular/platform-browser';
import { RouteReuseStrategy } from '@angular/router';

import { IonicModule, IonicRouteStrategy } from '@ionic/angular';

import { AppComponent } from './app.component';
import { AppRoutingModule } from './app-routing.module';
import { HttpClientModule } from '@angular/common/http';

@NgModule({
  declarations: [AppComponent],
  entryComponents: [],
  imports: [
    BrowserModule,
    IonicModule.forRoot(),
    AppRoutingModule,
    HttpClientModule,
  ],
  providers: [{ provide: RouteReuseStrategy, useClass: IonicRouteStrategy }],
  bootstrap: [AppComponent],
})
export class AppModule {}
Now bring up the src/app/services/products.service.ts and add this simple HTTP call:
import { HttpClient } from '@angular/common/http';
import { Injectable } from '@angular/core';

@Injectable({
  providedIn: 'root',
})
export class ProductsService {
  constructor(private http: HttpClient) {}

  getProducts() {
    return this.http.get('https://fakestoreapi.com/products');
  }
}
To test this function, we ned to create a whole HTTP testing environment because we don’t want to perform an actual HTTP call inside our test! This would take time and change your backend, and we just want to make sure the function sends out the call and returns some kind of data that we expect from the API.
To get started we now need to import the HttpClientTestingModule in our TestBed, and also inject the HttpTestingController to which we keep a reference.
Now we can define a mockResponse that will be sent back from our fake HTTp client, and then simply call the according getProducts() like we would normally and handle the Observable.
Inside the subscribe block we can compare the result we get to our mock response, because that’s what we will actually receive in this test case!
How?
The magic is in the lines below it, but let’s add the code to our src/app/services/products.service.spec.ts first of all:
import { TestBed } from '@angular/core/testing';

import { ProductsService } from './products.service';
import {
  HttpClientTestingModule,
  HttpTestingController,
} from '@angular/common/http/testing';
import { HttpClient } from '@angular/common/http';

describe('ProductsService', () => {
  let service: ProductsService;
  let httpClient: HttpClient;
  let httpTestingController: HttpTestingController;

  beforeEach(() => {
    TestBed.configureTestingModule({
      imports: [HttpClientTestingModule],
    });
    service = TestBed.inject(ProductsService);
    httpClient = TestBed.inject(HttpClient);
    httpTestingController = TestBed.inject(HttpTestingController);
  });

  afterEach(() => {
    httpTestingController.verify();
  });

  it('should be created', () => {
    expect(service).toBeTruthy();
  });

  it('should make an API call', () => {
    const mockResponse = [
      {
        id: 1,
        title: 'Simons Product',
        price: 42.99,
        description: 'Epic product test',
      },
    ];

    service.getProducts().subscribe((res) => {
      expect(res).toBeTruthy();
      expect(res).toHaveSize(1);
      const product = res[0];
      expect(product).toBe(mockResponse[0]);
    });

    const mockRequest = httpTestingController.expectOne(
      'https://fakestoreapi.com/products'
    );

    expect(mockRequest.request.method).toEqual('GET');

    // Resolve with our mock data
    mockRequest.flush(mockResponse);
  });
});
We can create a fake request using the httpTestingController and already add one expectation about the URL that should be called and the request method.
Finally we can let the client return our mockResponse by calling the flush() function.
So what’s happening under the hood?
- The
getProducts()from our service is called - The function wants to make an HTTP call to the defined URL
- The HTTP testing module intercepts this call
- The HTTP testing controller returns some fake data
- The
getProducts()returns this data thinking it made a real API call - We can compare the mock response to the result of the service function!
It’s all a bit tricky, but a great way to even test the API call functions of your app.
Get you Ionic Test Code Coverage
Finally if you’re interested in metrics or want to present them for your team, you should run the following command:
ng test --no-watch --code-coverageThis will generate a nice code coverage report in which you can see how much of your code is covered by tests. 
In our simple example we managed to get 100% coverage - how much will your company get?
You can also find a video version of this tutorial below.