Create Shared Element Transition in Ionic React App using Framer Motion Last update: 2022-11-29
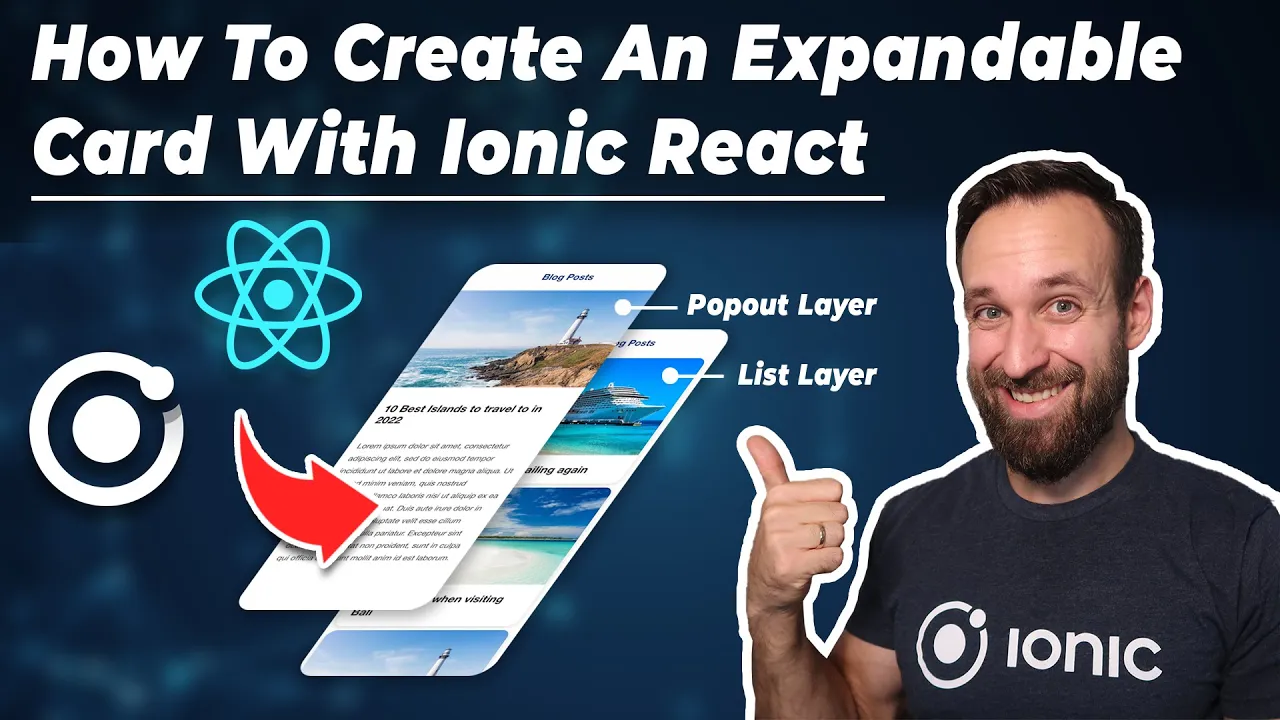
Shared element transitions is a common pattern in both web and mobile application. Youtube and Instagram use them heavily throughout their mobile application:
- Youtube uses this pattern in their mobile application when you minimize a playing video.
- Instagram uses it when you tap a photo on the profile or discover page - animating the photo from the grid to its enlarged full-screen version.
Shared element transition improves the user experience (UX) of your application by creating an association between the two views you are transitioning between. Take Instagram’s interaction for example. By enlarging and snapping the tapped photo into position as it transitions from a grid view to a single photo view, it creates a stronger connection between the tapped photo and the new page. It tells the user that they are looking at a larger version of the image they tapped.
Get the Code 🔐
Receive all the files of the tutorial right to your inbox and subscribe to my weekly no BS newsletter!
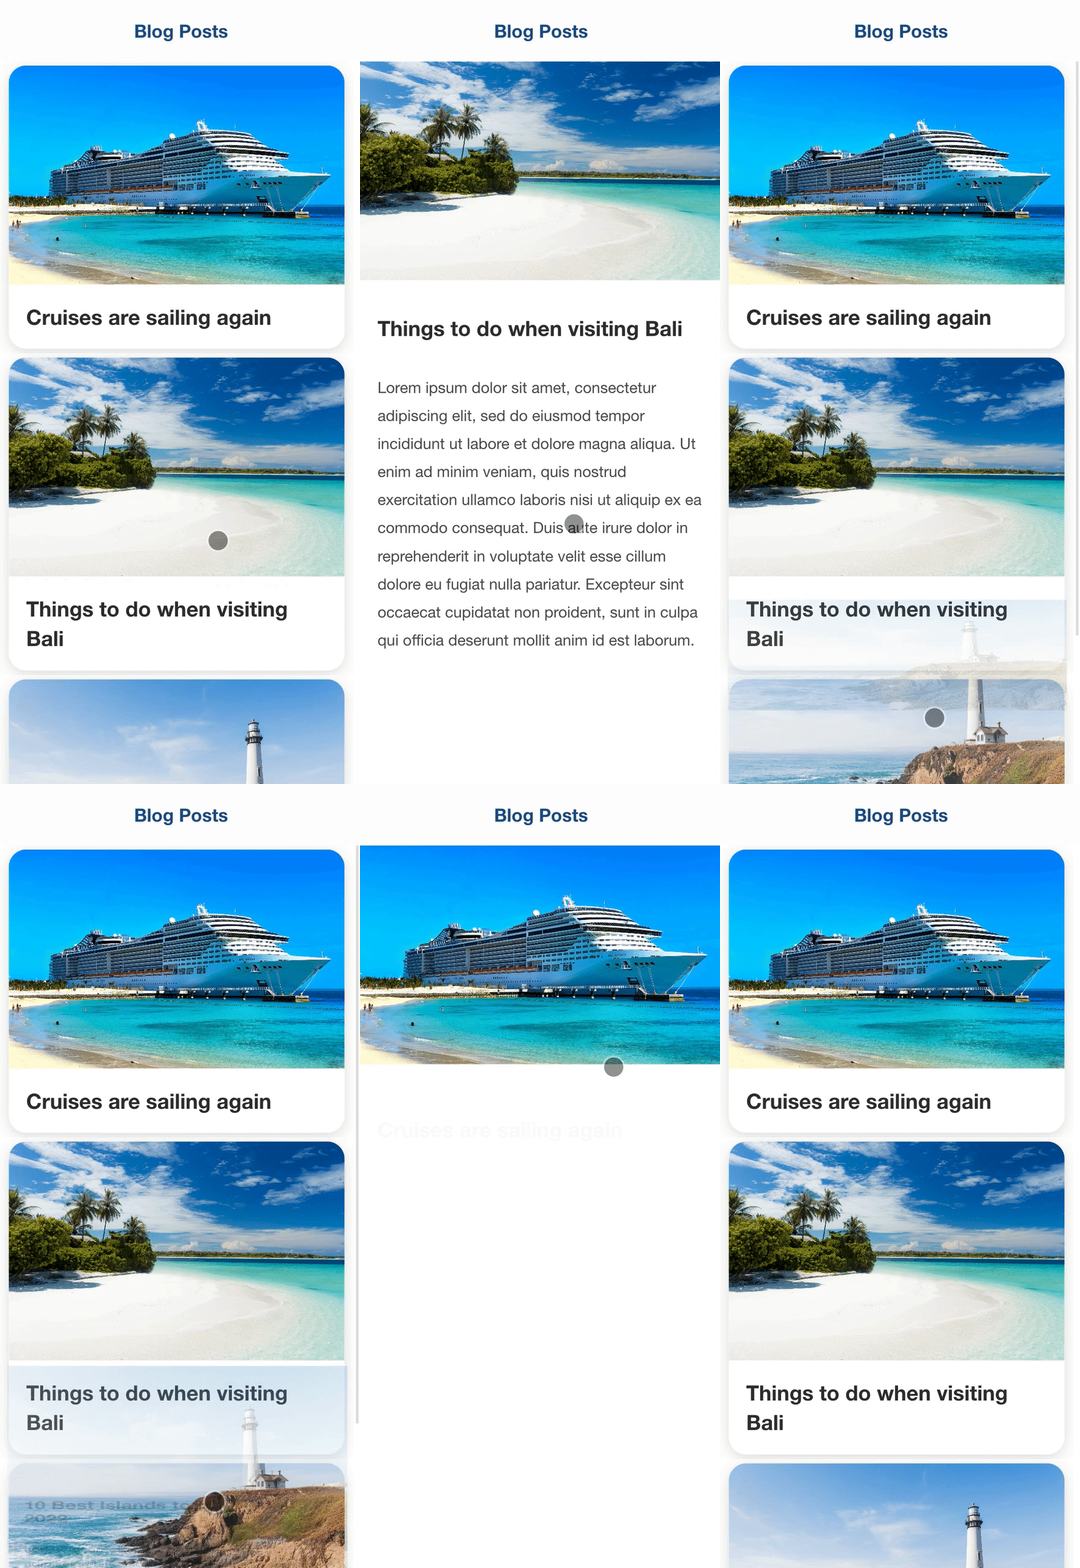
In this tutorial, we’ll learn how to create a simplified shared element transition. We’ll create a list with cards that will expand into a full page modal when clicked. There are a few different approaches to creating this interaction, but this tutorial will focus on using Framer Motion to create the animations.
Prerequisite
To follow along, create a new Ionic React application by running the following command:
ionic start ionicInteractive blank --type=reactIf you are new to Ionic, follow the Getting Started guide to set up your local dev environment.
Framer Motion
Framer Motion is a motion library for React that enables you to create complex user interactions using a declarative syntax. Framer Motion includes a robust set of animation utilities ranging from simple transitions to complex gesture handling. We’ll be using Framer Motion’s layout animation to create the shared element transition for this tutorial.
Install Framer Motion dependencies by running the following command:
npm i framer-motionSetup
We’ll use the default Home page component for our tutorial. Open Home.tsx in the pages directory and add the following code:
import { IonHeader, IonItem, IonPage, IonTitle, IonToolbar } from '@ionic/react';
import './Home.css';

const Home: React.FC = () => {
	return (
		<IonPage>
			<IonHeader mode="ios">
				<IonToolbar mode="ios">
					<IonTitle>Blog Posts</IonTitle>
				</IonToolbar>
			</IonHeader>
			<IonContent fullscreen></IonContent>
		</IonPage>
	);
};

export default Home;
Next, let’s add some base styling to our page. Open Home.css in the pages directory and add the following code:
ion-title {
	color: #1e5093;
}
ion-content {
	--background: #fff;
}
Create Layers
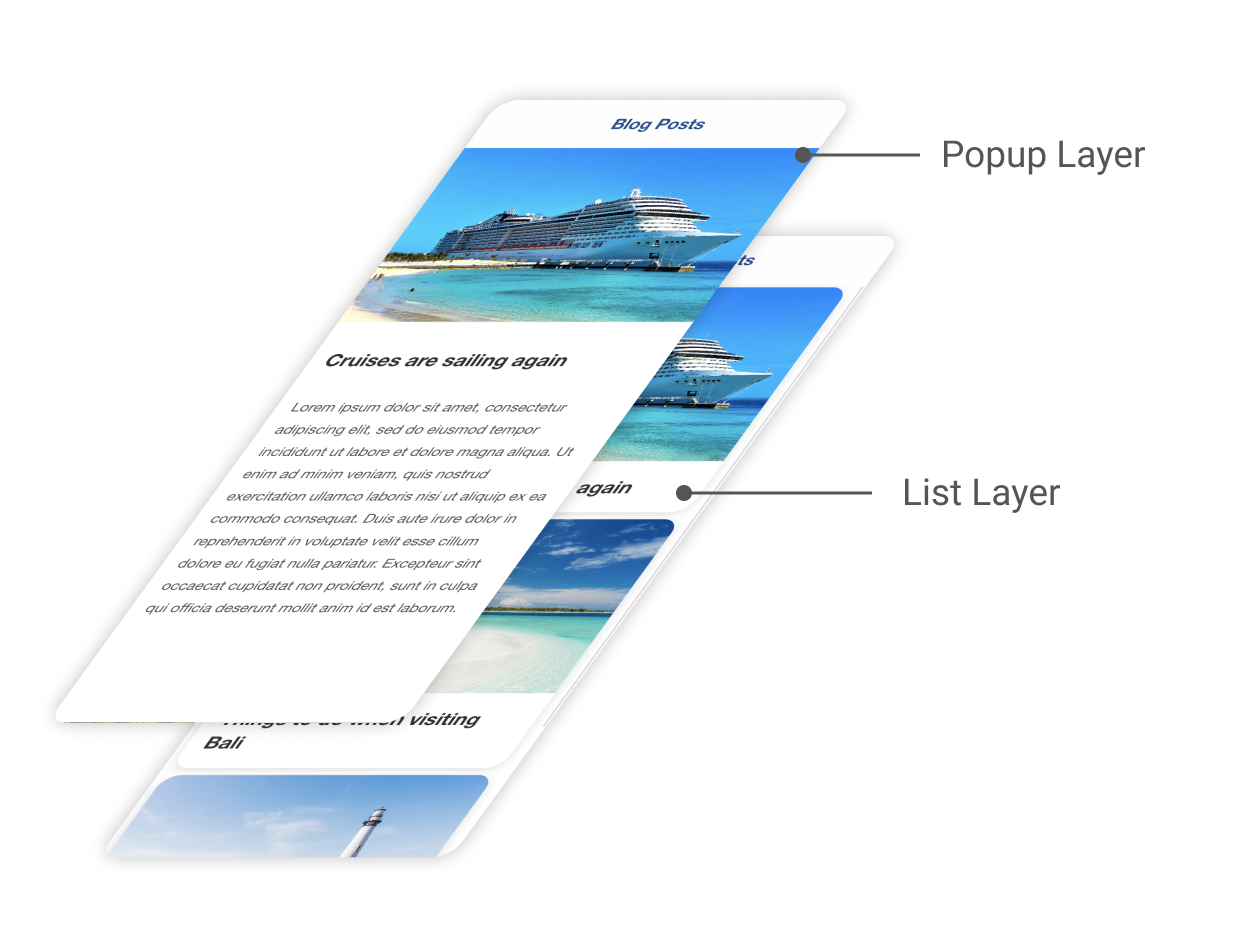
We’ll be manually layering out the page using CSS grids instead of navigating to a new page or opening a modal. We’ll cover how you can create shared element transition for those scenarios in separate blog posts.
The image below is a 3D representation of how the two layers are stacked on top of each other.
Let’s start with creating the container for our list and the popup layer. We’ll use a regular div element inside the IonContent component and give it a class content-container to add the necessary stylings. Open pages/Home.tsx:
import { IonHeader, IonItem, IonPage, IonTitle, IonToolbar } from '@ionic/react';
import './Home.css';

const Home: React.FC = () => {
	return (
		<IonPage>
			<IonHeader mode="ios">
				<IonToolbar mode="ios">
					<IonTitle>Blog Posts</IonTitle>
				</IonToolbar>
			</IonHeader>
			<IonContent fullscreen>
				{/* Add this 👇 */}
				<div className="content-container"></div>
			</IonContent>
		</IonPage>
	);
};

export default Home;
Set the display: grid to content-container and set it to have a single full height row and a single full-width column. Open pages/Home.css
ion-title {
	color: #1e5093;
}
ion-content {
	--background: #fff;
}

/* Add styling for the wrapper container 👇 */
.content-container {
	display: grid;
	grid-template-rows: 1fr;
	grid-template-columns: 1fr;
	width: 100%;
	height: 100%;
}
Next, create the container elements for our list and popup. We’ll use Ionic’s IonList component for our list and a regular div element for the popup. Open pages/Home.tsx and add the following:
// Add IonList to the list of imports 👇
import { IonHeader, IonItem, IonPage, IonTitle, IonToolbar, IonList } from '@ionic/react';
import './Home.css';

const Home: React.FC = () => {
	return (
		<IonPage>
			<IonHeader mode="ios">
				<IonToolbar mode="ios">
					<IonTitle>Blog Posts</IonTitle>
				</IonToolbar>
			</IonHeader>
			<IonContent fullscreen>
				<div className="content-container">
					{/* Add IonList 👇 */}
					<IonList></IonList>

					{/* Add Popup container 👇 */}
					<div className="popup-container"></div>
				</div>
			</IonContent>
		</IonPage>
	);
};

export default Home;
To stack the popup-container on top of the IonList, we’ll need to set both elements to the same row and column of the parent’s grid. We’ll also need to set a higher z-index for the popup-container element to guarantee that it will always be above the IonList layer. Open pages/Home.css and add the following
ion-title {
	color: #1e5093;
}
ion-content {
	--background: #fff;
}

.content-container {
	display: grid;
	grid-template-rows: 1fr;
	grid-template-columns: 1fr;
	width: 100%;
	height: 100%;
}

/* Add styling for the ion list component 👇 */
ion-list {
	--ion-item-background: #fff;
	grid-row: 1 / 2;
	grid-column: 1 /2;
	overflow-y: auto;
}

/* Add styling for the popup container 👇 */
.popup-container {
	grid-row: 1 / 2;
	grid-column: 1 /2;
	overflow-y: auto;
	height: 100%;
	width: 100%;
	background-color: #fff;
	z-index: 20;
}
Create List of Cards
Before we continue with building our animations, let’s first fill our list with dummy data so we have something to click on. Let’s also comment out the popup-container element for now to avoid blocking the list underneath. Open pages/Home.tsx and add the following:
// Update the list of imports 👇
import {
	IonHeader,
	IonItem,
	IonPage,
	IonTitle,
	IonToolbar,
	IonList,
	IonItem,
	IonCard,
	IonCardContent,
	IonImg,
	IonText
} from '@ionic/react';
import './Home.css';

// Add this 👇
interface Post {
	id: string;
	image: string;
	name: string;
	description: string;
}

const Home: React.FC = () => {
	// Add data to be rendered in the list 👇
	const posts: Post[] = [
		{
			id: '1',
			image:
				'https://images.unsplash.com/photo-1599640842225-85d111c60e6b?ixlib=rb-1.2.1&ixid=MnwxMjA3fDB8MHxwaG90by1wYWdlfHx8fGVufDB8fHx8&auto=format&fit=crop&w=1974&q=80',
			name: 'Cruises are sailing again'
		},
		{
			id: '2',
			image:
				'https://images.unsplash.com/photo-1512649408904-c0a00fb810da?ixlib=rb-1.2.1&ixid=MnwxMjA3fDB8MHxwaG90by1wYWdlfHx8fGVufDB8fHx8&auto=format&fit=crop&w=2531&q=80',
			name: 'Things to do when visiting Bali'
		},
		{
			id: '3',
			image:
				'https://images.unsplash.com/photo-1545579133-99bb5ab189bd?ixlib=rb-1.2.1&ixid=MnwxMjA3fDB8MHxwaG90by1wYWdlfHx8fGVufDB8fHx8&auto=format&fit=crop&w=3570&q=80',
			name: '10 Best Islands to travel to in 2022'
		}
	];

	return (
		<IonPage>
			<IonHeader mode="ios">
				<IonToolbar mode="ios">
					<IonTitle>Blog Posts</IonTitle>
				</IonToolbar>
			</IonHeader>
			<IonContent fullscreen>
				<div className="content-container">
					{/* Update IonList 👇 */}
					<IonList mode="ios" className="ion-no-padding">
						{posts.map((post) => (
							<IonItem
								key={'card-' + post.id}
								mode="ios"
								lines="none"
								className="ion-no-padding ion-no-inner-padding"
							>
								<IonCard className="ion-no-padding">
									<div className="card-content">
										<IonImg className="card-image" src={post.image} />
										<IonCardContent>
											<div className="title-container">
												<IonText>{post.name}</IonText>
											</div>
										</IonCardContent>
									</div>
								</IonCard>
							</IonItem>
						))}
					</IonList>

					{/* Comment out the following for now, so we can focus on building out the list layer first 👇 */}
					{/*
        <div className="popup-container">
        </div>
        */}
				</div>
			</IonContent>
		</IonPage>
	);
};

export default Home;
Now, let’s add some styling to our cards to make them look like the example you saw at the beginning of the tutorial. Open pages/Home.css and add the following:
ion-title {
	color: #1e5093;
}
ion-content {
	--background: #fff;
}

.content-container {
	display: grid;
	grid-template-rows: 1fr;
	grid-template-columns: 1fr;
	width: 100%;
	height: 100%;
}

ion-list {
	--ion-item-background: #fff;
	grid-row: 1 / 2;
	grid-column: 1 /2;
	overflow-y: auto;
}

/* Add styling for the contents of the list 👇 */
ion-item {
	--background: #fff;
	width: 100%;
}
ion-card {
	margin: 5px 10px;
	width: 100%;
	background-color: #fff;
}
ion-card .card-content ion-text {
	font-size: 1.5rem;
	font-weight: 600;
	color: #333;
}
ion-card ion-img {
	height: 250px;
	width: 100%;
	object-fit: cover;
}

.popup-container {
	grid-row: 1 / 2;
	grid-column: 1 /2;
	overflow-y: auto;
	height: 100%;
	width: 100%;
	background-color: #fff;
	z-index: 20;
}
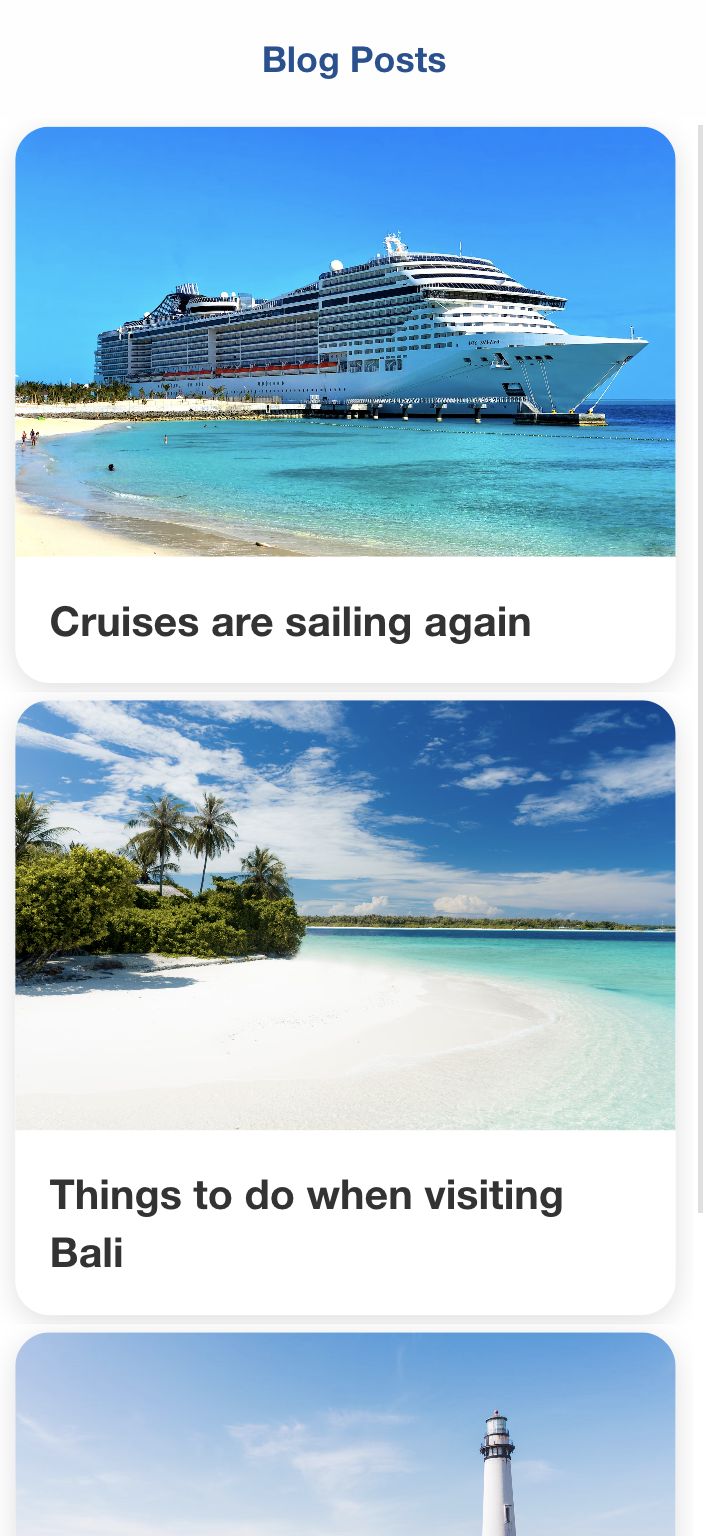
Checkpoint: Run ionic serve and open localhost:8100 on your browser. If you’ve followed along, you should see the following:
Add Click Events to Open and Close Popup
We’ll use React’s useState to keep track of the selectedPost state in our component. When a user clicks on the card, it will set the selectedPost variable to the data of the selected card. This will then display the popup element. Setting the selectedPost variable to undefined will then dismiss the popup element. Open pages/Home.tsx and add the following:
import {
	IonHeader,
	IonItem,
	IonPage,
	IonTitle,
	IonToolbar,
	IonList,
	IonItem,
	IonCard,
	IonCardContent,
	IonImg,
	IonText
} from '@ionic/react';
// Import useState 👇
import { useState } from 'react';
import './Home.css';

interface Post {
	id: string;
	image: string;
	name: string;
	description: string;
}

const Home: React.FC = () => {
	// Add this 👇
	const [selectedPost, setSelectedPost] = useState<Post | undefined>(undefined);

	const posts: Post[] = [
		{
			id: '1',
			image:
				'https://images.unsplash.com/photo-1599640842225-85d111c60e6b?ixlib=rb-1.2.1&ixid=MnwxMjA3fDB8MHxwaG90by1wYWdlfHx8fGVufDB8fHx8&auto=format&fit=crop&w=1974&q=80',
			name: 'Cruises are sailing again'
		},
		{
			id: '2',
			image:
				'https://images.unsplash.com/photo-1512649408904-c0a00fb810da?ixlib=rb-1.2.1&ixid=MnwxMjA3fDB8MHxwaG90by1wYWdlfHx8fGVufDB8fHx8&auto=format&fit=crop&w=2531&q=80',
			name: 'Things to do when visiting Bali'
		},
		{
			id: '3',
			image:
				'https://images.unsplash.com/photo-1545579133-99bb5ab189bd?ixlib=rb-1.2.1&ixid=MnwxMjA3fDB8MHxwaG90by1wYWdlfHx8fGVufDB8fHx8&auto=format&fit=crop&w=3570&q=80',
			name: '10 Best Islands to travel to in 2022'
		}
	];

	return (
		<IonPage>
			<IonHeader mode="ios">
				<IonToolbar mode="ios">
					<IonTitle>Blog Posts</IonTitle>
				</IonToolbar>
			</IonHeader>
			<IonContent fullscreen>
				<div className="content-container">
					<IonList mode="ios" className="ion-no-padding">
						{posts.map((post) => (
							<IonItem
								key={'card-' + post.id}
								mode="ios"
								lines="none"
								className="ion-no-padding ion-no-inner-padding"
							>
								{/* Add a click event to set the selectedPost variable 👇 */}
								<IonCard className="ion-no-padding" onClick={() => setSelectedPost(post)}>
									<div className="card-content">
										<IonImg className="card-image" src={post.image} />
										<IonCardContent>
											<div className="title-container">
												<IonText>{post.name}</IonText>
											</div>
										</IonCardContent>
									</div>
								</IonCard>
							</IonItem>
						))}
					</IonList>

					{/*
        <div className="popup-container">
        </div>
        */}
				</div>
			</IonContent>
		</IonPage>
	);
};

export default Home;
Uncomment the popup-container and wrap it in a conditional. This will display the popup when selectedPost is truthy and remove it when it’s falsy. We’ll also add a click listener to the popup-container so we can close the popup when we click on it. Open pages/Home.tsx and add the following:
import { IonHeader, IonItem, IonPage, IonTitle, IonToolbar, IonList, IonItem, IonCard, IonCardContent, IonImg, IonText } from '@ionic/react';
// Import useState 👇
import { useState } from 'react';
import './Home.css';

interface Post {
  id: string,
  image: string,
  name: string,
  description: string
}

const Home: React.FC = () => {

    // Add this 👇
    const [selectedPost, setSelectedPost] = useState<Post | undefined>(undefined);

    const posts: Post[] = [
        {
            id: '1',
            image: "https://images.unsplash.com/photo-1599640842225-85d111c60e6b?ixlib=rb-1.2.1&ixid=MnwxMjA3fDB8MHxwaG90by1wYWdlfHx8fGVufDB8fHx8&auto=format&fit=crop&w=1974&q=80",
            name: "Cruises are sailing again",
        },
        {
            id: '2',
            image: "https://images.unsplash.com/photo-1512649408904-c0a00fb810da?ixlib=rb-1.2.1&ixid=MnwxMjA3fDB8MHxwaG90by1wYWdlfHx8fGVufDB8fHx8&auto=format&fit=crop&w=2531&q=80",
            name: "Things to do when visiting Bali",
        },
        {
            id: '3',
            image: "https://images.unsplash.com/photo-1545579133-99bb5ab189bd?ixlib=rb-1.2.1&ixid=MnwxMjA3fDB8MHxwaG90by1wYWdlfHx8fGVufDB8fHx8&auto=format&fit=crop&w=3570&q=80",
            name: "10 Best Islands to travel to in 2022",
        },
    ]

  return (
    <IonPage>
      <IonHeader mode="ios">
        <IonToolbar mode="ios">
          <IonTitle>Blog Posts</IonTitle>
        </IonToolbar>
      </IonHeader>
      <IonContent fullscreen>
      <div className="content-container">
        <IonList mode="ios" className="ion-no-padding">
            {
                posts.map((post) =>
                 <IonItem key={'card-'+post.id} mode="ios" lines="none" className="ion-no-padding ion-no-inner-padding">
                 <IonCard className="ion-no-padding" onClick={() => setSelectedPost(post)}>
                     <div className="card-content">
                        <IonImg className="card-image" src={post.image} />
                        <IonCardContent>
                            <div className="title-container">
                                <IonText>{post.name}</IonText>
                            </div>
                        </IonCardContent>
                     </div>
                 </IonCard>
                </IonItem>
            )}
            </IonList>

        {
            {/* Conditionally display the popup container 👇 */}
            selectedPost &&
            {/* Add a click listener to close the popup */}
            <div
                className="popup-container"
                onClick={() => setSelectedPost(undefined)}>
            </div>
        }
      </div>
      </IonContent>
    </IonPage>
  );
};

export default Home;
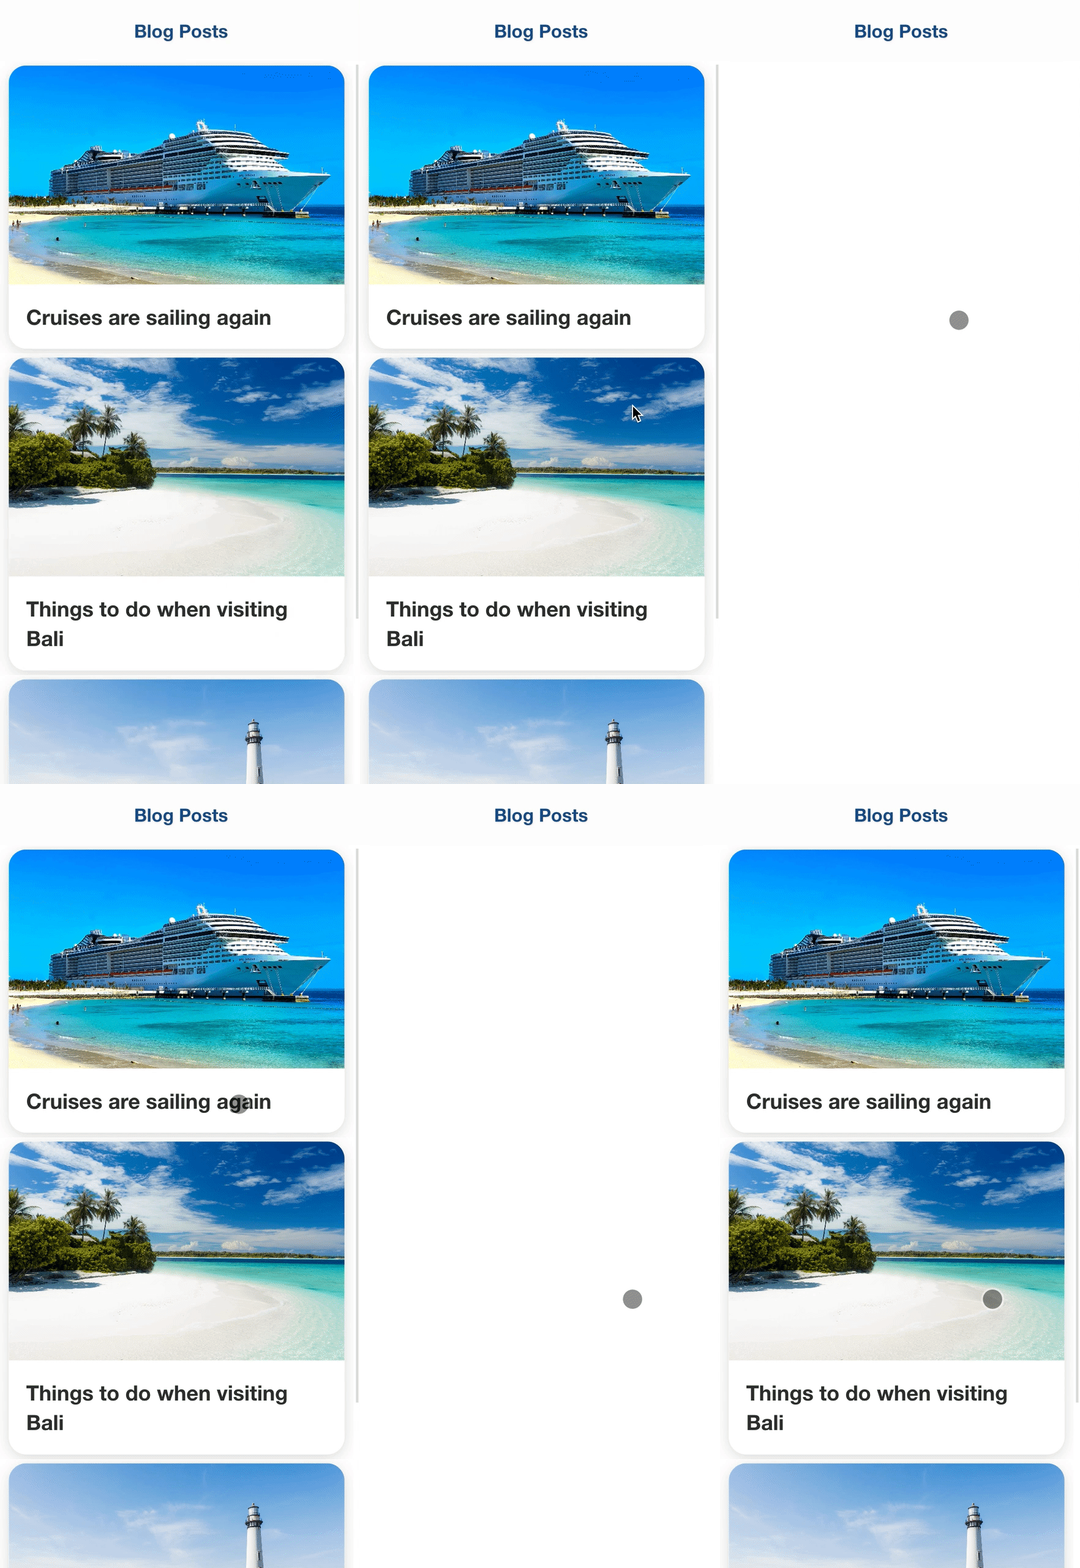
Checkpoint: Run ionic serve and open localhost:8100 on your browser. Click on one of the cards in the list and you should see a white element covering the entire view. This is the empty popup element. Click on the white element, and you should see the list of cards again.
Create Popup Element
The popup layer contains an image at the top, the title, and some text contents. We’ll use a static string for the main text of the popup component for simplicity. Open pages/Home.tsx and add the following:
import {
	IonHeader,
	IonItem,
	IonPage,
	IonTitle,
	IonToolbar,
	IonList,
	IonItem,
	IonCard,
	IonCardContent,
	IonImg,
	IonText
} from '@ionic/react';
import { useState } from 'react';
import './Home.css';

interface Post {
	id: string;
	image: string;
	name: string;
	description: string;
}

const Home: React.FC = () => {
	const [selectedPost, setSelectedPost] = useState<Post | undefined>(undefined);

	const posts: Post[] = [
		{
			id: '1',
			image:
				'https://images.unsplash.com/photo-1599640842225-85d111c60e6b?ixlib=rb-1.2.1&ixid=MnwxMjA3fDB8MHxwaG90by1wYWdlfHx8fGVufDB8fHx8&auto=format&fit=crop&w=1974&q=80',
			name: 'Cruises are sailing again'
		},
		{
			id: '2',
			image:
				'https://images.unsplash.com/photo-1512649408904-c0a00fb810da?ixlib=rb-1.2.1&ixid=MnwxMjA3fDB8MHxwaG90by1wYWdlfHx8fGVufDB8fHx8&auto=format&fit=crop&w=2531&q=80',
			name: 'Things to do when visiting Bali'
		},
		{
			id: '3',
			image:
				'https://images.unsplash.com/photo-1545579133-99bb5ab189bd?ixlib=rb-1.2.1&ixid=MnwxMjA3fDB8MHxwaG90by1wYWdlfHx8fGVufDB8fHx8&auto=format&fit=crop&w=3570&q=80',
			name: '10 Best Islands to travel to in 2022'
		}
	];

	return (
		<IonPage>
			<IonHeader mode="ios">
				<IonToolbar mode="ios">
					<IonTitle>Blog Posts</IonTitle>
				</IonToolbar>
			</IonHeader>
			<IonContent fullscreen>
				<div className="content-container">
					<IonList mode="ios" className="ion-no-padding">
						{posts.map((post) => (
							<IonItem
								key={'card-' + post.id}
								mode="ios"
								lines="none"
								className="ion-no-padding ion-no-inner-padding"
							>
								<IonCard className="ion-no-padding" onClick={() => setSelectedPost(post)}>
									<div className="card-content">
										<IonImg className="card-image" src={post.image} />
										<IonCardContent>
											<div className="title-container">
												<IonText>{post.name}</IonText>
											</div>
										</IonCardContent>
									</div>
								</IonCard>
							</IonItem>
						))}
					</IonList>

					{selectedPost && (
						<div className="popup-container" onClick={() => setSelectedPost(undefined)}>
							{/* Add contents of the popup container 👇 */}
							<IonImg src={selectedPost.image} />
							<h1>{selectedPost.name}</h1>
							<IonText>
								<p>
									Lorem ipsum dolor sit amet, consectetur adipiscing elit, sed do eiusmod tempor
									incididunt ut labore et dolore magna aliqua. Ut enim ad minim veniam, quis nostrud
									exercitation ullamco laboris nisi ut aliquip ex ea commodo consequat. Duis aute
									irure dolor in reprehenderit in voluptate velit esse cillum dolore eu fugiat nulla
									pariatur. Excepteur sint occaecat cupidatat non proident, sunt in culpa qui
									officia deserunt mollit anim id est laborum.
								</p>
							</IonText>
						</div>
					)}
				</div>
			</IonContent>
		</IonPage>
	);
};

export default Home;
Next, let’s add some styles to our popup content. Open pages/Home.css and add the following:
ion-title {
	color: #1e5093;
}
ion-content {
	--background: #fff;
}

.content-container {
	display: grid;
	grid-template-rows: 1fr;
	grid-template-columns: 1fr;
	width: 100%;
	height: 100%;
}

ion-list {
	--ion-item-background: #fff;
	grid-row: 1 / 2;
	grid-column: 1 /2;
	overflow-y: auto;
}

ion-item {
	--background: #fff;
	width: 100%;
}
ion-card {
	margin: 5px 10px;
	width: 100%;
	background-color: #fff;
}
ion-card .card-content ion-text {
	font-size: 1.5rem;
	font-weight: 600;
	color: #333;
}
ion-card ion-img {
	height: 250px;
	width: 100%;
	object-fit: cover;
}

.popup-container {
	grid-row: 1 / 2;
	grid-column: 1 /2;
	overflow-y: auto;
	height: 100%;
	width: 100%;
	background-color: #fff;
	z-index: 20;
}

/* Add styling for the contents of the popup container 👇 */
.popup-container ion-img {
	height: 250px;
	width: 100%;
	object-fit: cover;
}

.popup-container h1 {
	color: #333;
	font-size: 1.5rem;
	font-weight: 600;
	padding: 20px;
}

.popup-container p {
	color: #555;
	font-size: 1.1rem;
	padding: 0 20px;
	line-height: 2rem;
}
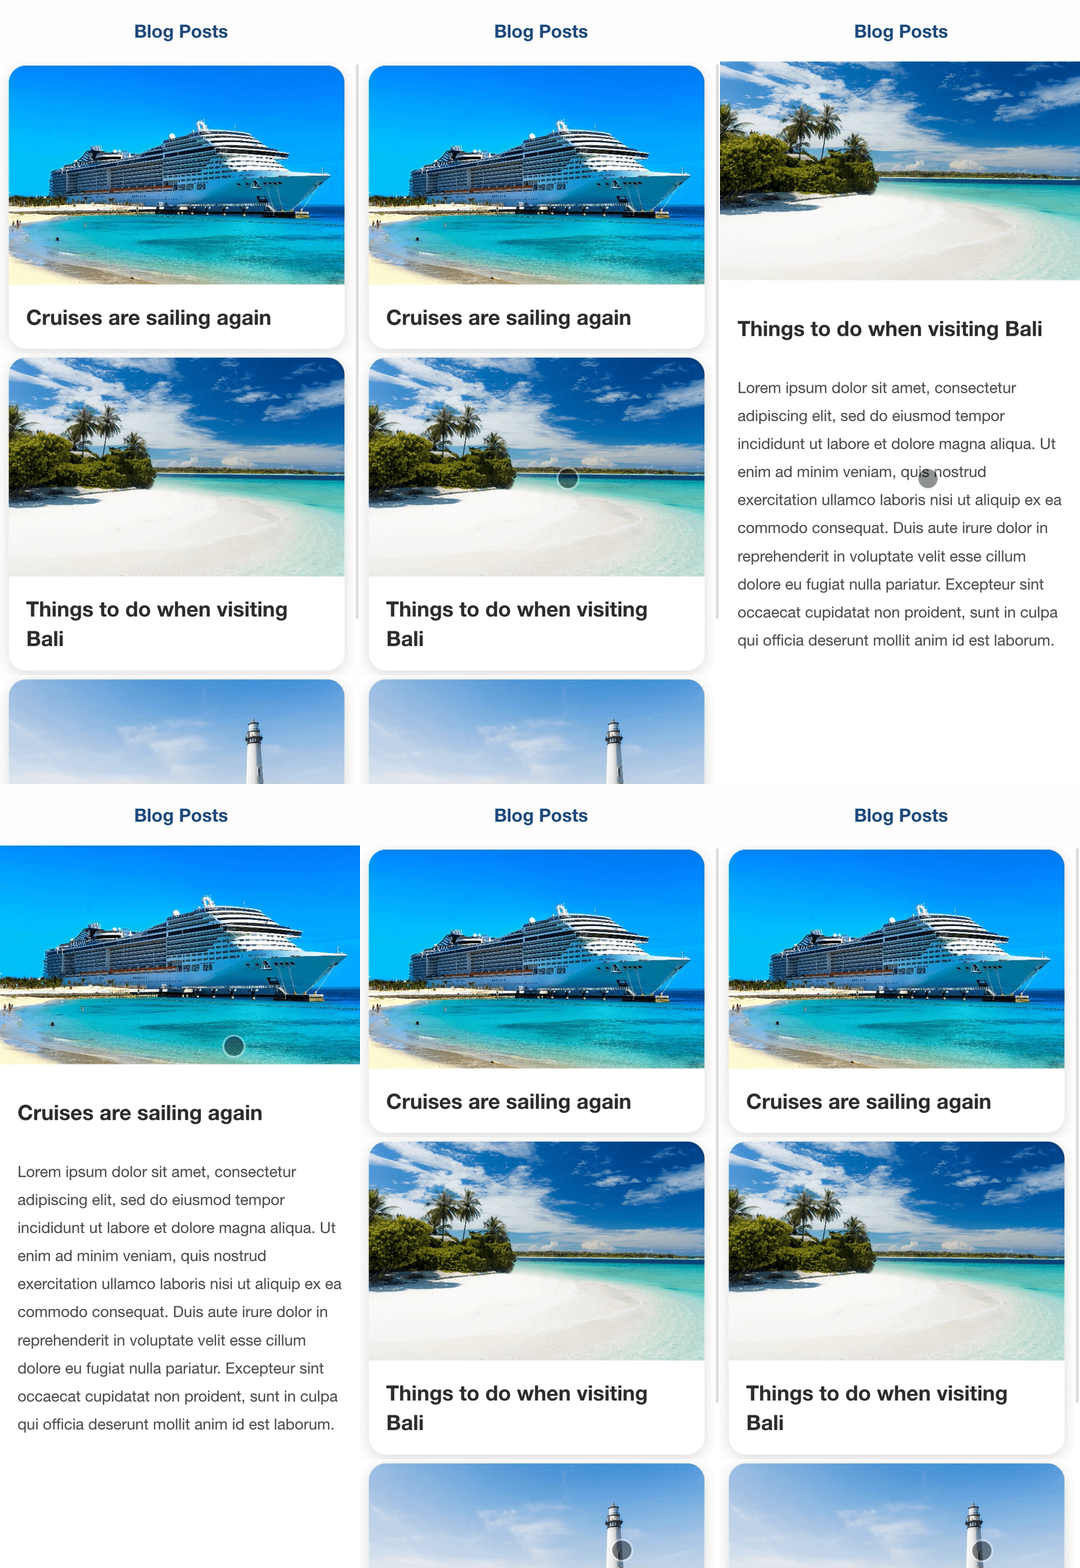
Checkpoint: Run ionic serve and open localhost:8100 on your browser. Click on a card and you should see the popup opening on top of the list, displaying information from the clicked card.
Add Shared Element Transition
Framer Motion contains a special set of components prefixed with motion that is designed to simplify creating animations. These components accept animation-related configuration as properties, allowing us to orchestrate our animations directly in the template.
To create a shared element transition, we’ll need to animate an element from its original position to its final position and vice versa. In our case, the card and image should expand and reposition themselves as the popup is rendered. Framer Motion lets us create this type of animation by attaching a layoutId to the target element. Framer Motion looks for the same layoutId in your template and animates the elements as each one is being added and removed from the DOM - creating the shared element transition effect.
Layout animations is Framer Motion’s optimized animation to animate between CSS layouts by using transforms instead of the layout system.
Open pages/Home.tsx and replace the card-content and popup-container elements with motion.div elements with the same layoutId:
import { IonHeader, IonItem, IonPage, IonTitle, IonToolbar, IonList, IonItem, IonCard, IonCardContent, IonImg, IonText } from '@ionic/react';
import { useState } from 'react'

// Import motion 👇
import { motion } from 'framer-motion';;
import './Home.css';

interface Post {
  id: string,
  image: string,
  name: string,
  description: string
}

const Home: React.FC = () => {
    const [selectedPost, setSelectedPost] = useState<Post | undefined>(undefined);

    const posts: Post[] = [
        {
            id: '1',
            image: "https://images.unsplash.com/photo-1599640842225-85d111c60e6b?ixlib=rb-1.2.1&ixid=MnwxMjA3fDB8MHxwaG90by1wYWdlfHx8fGVufDB8fHx8&auto=format&fit=crop&w=1974&q=80",
            name: "Cruises are sailing again",
        },
        {
            id: '2',
            image: "https://images.unsplash.com/photo-1512649408904-c0a00fb810da?ixlib=rb-1.2.1&ixid=MnwxMjA3fDB8MHxwaG90by1wYWdlfHx8fGVufDB8fHx8&auto=format&fit=crop&w=2531&q=80",
            name: "Things to do when visiting Bali",
        },
        {
            id: '3',
            image: "https://images.unsplash.com/photo-1545579133-99bb5ab189bd?ixlib=rb-1.2.1&ixid=MnwxMjA3fDB8MHxwaG90by1wYWdlfHx8fGVufDB8fHx8&auto=format&fit=crop&w=3570&q=80",
            name: "10 Best Islands to travel to in 2022",
        },
    ]

  return (
    <IonPage>
      <IonHeader mode="ios">
        <IonToolbar mode="ios">
          <IonTitle>Blog Posts</IonTitle>
        </IonToolbar>
      </IonHeader>
      <IonContent fullscreen>
      <div className="content-container">
        <IonList mode="ios" className="ion-no-padding">
            {
                posts.map((post) =>
                 <IonItem key={'card-'+post.id} mode="ios" lines="none" className="ion-no-padding ion-no-inner-padding">
                 <IonCard className="ion-no-padding" onClick={() => setSelectedPost(post)}>
                    {/* Replace div with motion.div and add a layoutId 👇 */}
                     <motion.div
                        className="card-content"
                        layoutId={'card-'+post.id}
                        >
                        <IonImg className="card-image" src={post.image} />
                        <IonCardContent>
                            <div className="title-container">
                                <IonText>{post.name}</IonText>
                            </div>
                        </IonCardContent>
                     </motion.div>
                 </IonCard>
                </IonItem>
            )}
            </IonList>

        {
            selectedPost &&
            {/* Replace div with motion.div and add a layoutId,
                also add an initial, and animate property to make the
                popup fade in as it enters 👇 */}
            <motion.div
                className="popup-container"
                onClick={() => setSelectedPost(undefined)}
                layoutId={'card-'+selectedPost.id}
                initial={{ opacity: 0 }}
                animate={{ opacity: 1 }}>
                <IonImg  src={selectedPost.image} />
                <h1>{selectedPost.name}</h1>
                <IonText>
                    <p>
                        Lorem ipsum dolor sit amet, consectetur adipiscing elit, sed do eiusmod tempor incididunt ut labore et dolore magna aliqua. Ut enim ad minim veniam, quis nostrud exercitation ullamco laboris nisi ut aliquip ex ea commodo consequat. Duis aute irure dolor in reprehenderit in voluptate velit esse cillum dolore eu fugiat nulla pariatur. Excepteur sint occaecat cupidatat non proident, sunt in culpa qui officia deserunt mollit anim id est laborum.
                    </p>
                </IonText>
            </motion.div>
        }
        </div>
      </IonContent>
    </IonPage>
  );
};

export default Home;
The changes above should expand the card when you click on it. However, no animation will be applied as the popup is dismissed. This is because the element is immediately removed from the React tree. To play the reverse animation as the element is removed, wrap the target element in Framer Motion’s AnimatePresence component. Open pages/Home.tsx and add the following:
import {
	IonHeader,
	IonItem,
	IonPage,
	IonTitle,
	IonToolbar,
	IonList,
	IonItem,
	IonCard,
	IonCardContent,
	IonImg,
	IonText
} from '@ionic/react';
import { useState } from 'react';

// Import AnimatePresence 👇
import { AnimatePresence, motion } from 'framer-motion';
import './Home.css';

interface Post {
	id: string;
	image: string;
	name: string;
	description: string;
}

const Home: React.FC = () => {
	const [selectedPost, setSelectedPost] = useState<Post | undefined>(undefined);

	const posts: Post[] = [
		{
			id: '1',
			image:
				'https://images.unsplash.com/photo-1599640842225-85d111c60e6b?ixlib=rb-1.2.1&ixid=MnwxMjA3fDB8MHxwaG90by1wYWdlfHx8fGVufDB8fHx8&auto=format&fit=crop&w=1974&q=80',
			name: 'Cruises are sailing again'
		},
		{
			id: '2',
			image:
				'https://images.unsplash.com/photo-1512649408904-c0a00fb810da?ixlib=rb-1.2.1&ixid=MnwxMjA3fDB8MHxwaG90by1wYWdlfHx8fGVufDB8fHx8&auto=format&fit=crop&w=2531&q=80',
			name: 'Things to do when visiting Bali'
		},
		{
			id: '3',
			image:
				'https://images.unsplash.com/photo-1545579133-99bb5ab189bd?ixlib=rb-1.2.1&ixid=MnwxMjA3fDB8MHxwaG90by1wYWdlfHx8fGVufDB8fHx8&auto=format&fit=crop&w=3570&q=80',
			name: '10 Best Islands to travel to in 2022'
		}
	];

	return (
		<IonPage>
			<IonHeader mode="ios">
				<IonToolbar mode="ios">
					<IonTitle>Blog Posts</IonTitle>
				</IonToolbar>
			</IonHeader>
			<IonContent fullscreen>
				<div className="content-container">
					<IonList mode="ios" className="ion-no-padding">
						{posts.map((post) => (
							<IonItem
								key={'card-' + post.id}
								mode="ios"
								lines="none"
								className="ion-no-padding ion-no-inner-padding"
							>
								<IonCard className="ion-no-padding" onClick={() => setSelectedPost(post)}>
									<motion.div className="card-content" layoutId={'card-' + post.id}>
										<IonImg className="card-image" src={post.image} />
										<IonCardContent>
											<div className="title-container">
												<IonText>{post.name}</IonText>
											</div>
										</IonCardContent>
									</motion.div>
								</IonCard>
							</IonItem>
						))}
					</IonList>

					{/* Wrap the target element in the Animate component 👇 */}
					<AnimatePresence>
						{selectedPost && (
							<motion.div
								className="popup-container"
								onClick={() => setSelectedPost(undefined)}
								layoutId={'card-' + selectedPost.id}
								initial={{ opacity: 0 }}
								animate={{ opacity: 1 }}
							>
								<IonImg src={selectedPost.image} />
								<h1>{selectedPost.name}</h1>
								<IonText>
									<p>
										Lorem ipsum dolor sit amet, consectetur adipiscing elit, sed do eiusmod tempor
										incididunt ut labore et dolore magna aliqua. Ut enim ad minim veniam, quis
										nostrud exercitation ullamco laboris nisi ut aliquip ex ea commodo consequat.
										Duis aute irure dolor in reprehenderit in voluptate velit esse cillum dolore eu
										fugiat nulla pariatur. Excepteur sint occaecat cupidatat non proident, sunt in
										culpa qui officia deserunt mollit anim id est laborum.
									</p>
								</IonText>
							</motion.div>
						)}
					</AnimatePresence>
				</div>
			</IonContent>
		</IonPage>
	);
};

export default Home;
Next, we’ll do a similar animation for the images. The image should slide to the top of the popup layer from its current location in the card as we open the popup and vice versa as we close the popup. Wrap the images in a motion.div component and assign a unique layoutId:
import {
	IonHeader,
	IonItem,
	IonPage,
	IonTitle,
	IonToolbar,
	IonList,
	IonItem,
	IonCard,
	IonCardContent,
	IonImg,
	IonText
} from '@ionic/react';
import { useState } from 'react';

// Import AnimatePresence 👇
import { AnimatePresence, motion } from 'framer-motion';
import './Home.css';

interface Post {
	id: string;
	image: string;
	name: string;
	description: string;
}

const Home: React.FC = () => {
	const [selectedPost, setSelectedPost] = useState<Post | undefined>(undefined);

	const posts: Post[] = [
		{
			id: '1',
			image:
				'https://images.unsplash.com/photo-1599640842225-85d111c60e6b?ixlib=rb-1.2.1&ixid=MnwxMjA3fDB8MHxwaG90by1wYWdlfHx8fGVufDB8fHx8&auto=format&fit=crop&w=1974&q=80',
			name: 'Cruises are sailing again'
		},
		{
			id: '2',
			image:
				'https://images.unsplash.com/photo-1512649408904-c0a00fb810da?ixlib=rb-1.2.1&ixid=MnwxMjA3fDB8MHxwaG90by1wYWdlfHx8fGVufDB8fHx8&auto=format&fit=crop&w=2531&q=80',
			name: 'Things to do when visiting Bali'
		},
		{
			id: '3',
			image:
				'https://images.unsplash.com/photo-1545579133-99bb5ab189bd?ixlib=rb-1.2.1&ixid=MnwxMjA3fDB8MHxwaG90by1wYWdlfHx8fGVufDB8fHx8&auto=format&fit=crop&w=3570&q=80',
			name: '10 Best Islands to travel to in 2022'
		}
	];

	return (
		<IonPage>
			<IonHeader mode="ios">
				<IonToolbar mode="ios">
					<IonTitle>Blog Posts</IonTitle>
				</IonToolbar>
			</IonHeader>
			<IonContent fullscreen>
				<div className="content-container">
					<IonList mode="ios" className="ion-no-padding">
						{posts.map((post) => (
							<IonItem
								key={'card-' + post.id}
								mode="ios"
								lines="none"
								className="ion-no-padding ion-no-inner-padding"
							>
								<IonCard className="ion-no-padding" onClick={() => setSelectedPost(post)}>
									<motion.div className="card-content" layoutId={'card-' + post.id}>
										{/* Wrap the target element in the motion.div component 👇 */}
										<motion.div layoutId={'image-container' + post.id}>
											<IonImg className="card-image" src={post.image} />
										</motion.div>
										<IonCardContent>
											<div className="title-container">
												<IonText>{post.name}</IonText>
											</div>
										</IonCardContent>
									</motion.div>
								</IonCard>
							</IonItem>
						))}
					</IonList>

					<AnimatePresence>
						{selectedPost && (
							<motion.div
								className="popup-container"
								onClick={() => setSelectedPost(undefined)}
								layoutId={'card-' + selectedPost.id}
								initial={{ opacity: 0 }}
								animate={{ opacity: 1 }}
							>
								{/* Wrap the target element in the motion.div component 👇 */}
								<motion.div layoutId={'image-container' + post.id}>
									<IonImg src={selectedPost.image} />
								</motion.div>
								<h1>{selectedPost.name}</h1>
								<IonText>
									<p>
										Lorem ipsum dolor sit amet, consectetur adipiscing elit, sed do eiusmod tempor
										incididunt ut labore et dolore magna aliqua. Ut enim ad minim veniam, quis
										nostrud exercitation ullamco laboris nisi ut aliquip ex ea commodo consequat.
										Duis aute irure dolor in reprehenderit in voluptate velit esse cillum dolore eu
										fugiat nulla pariatur. Excepteur sint occaecat cupidatat non proident, sunt in
										culpa qui officia deserunt mollit anim id est laborum.
									</p>
								</IonText>
							</motion.div>
						)}
					</AnimatePresence>
				</div>
			</IonContent>
		</IonPage>
	);
};

export default Home;
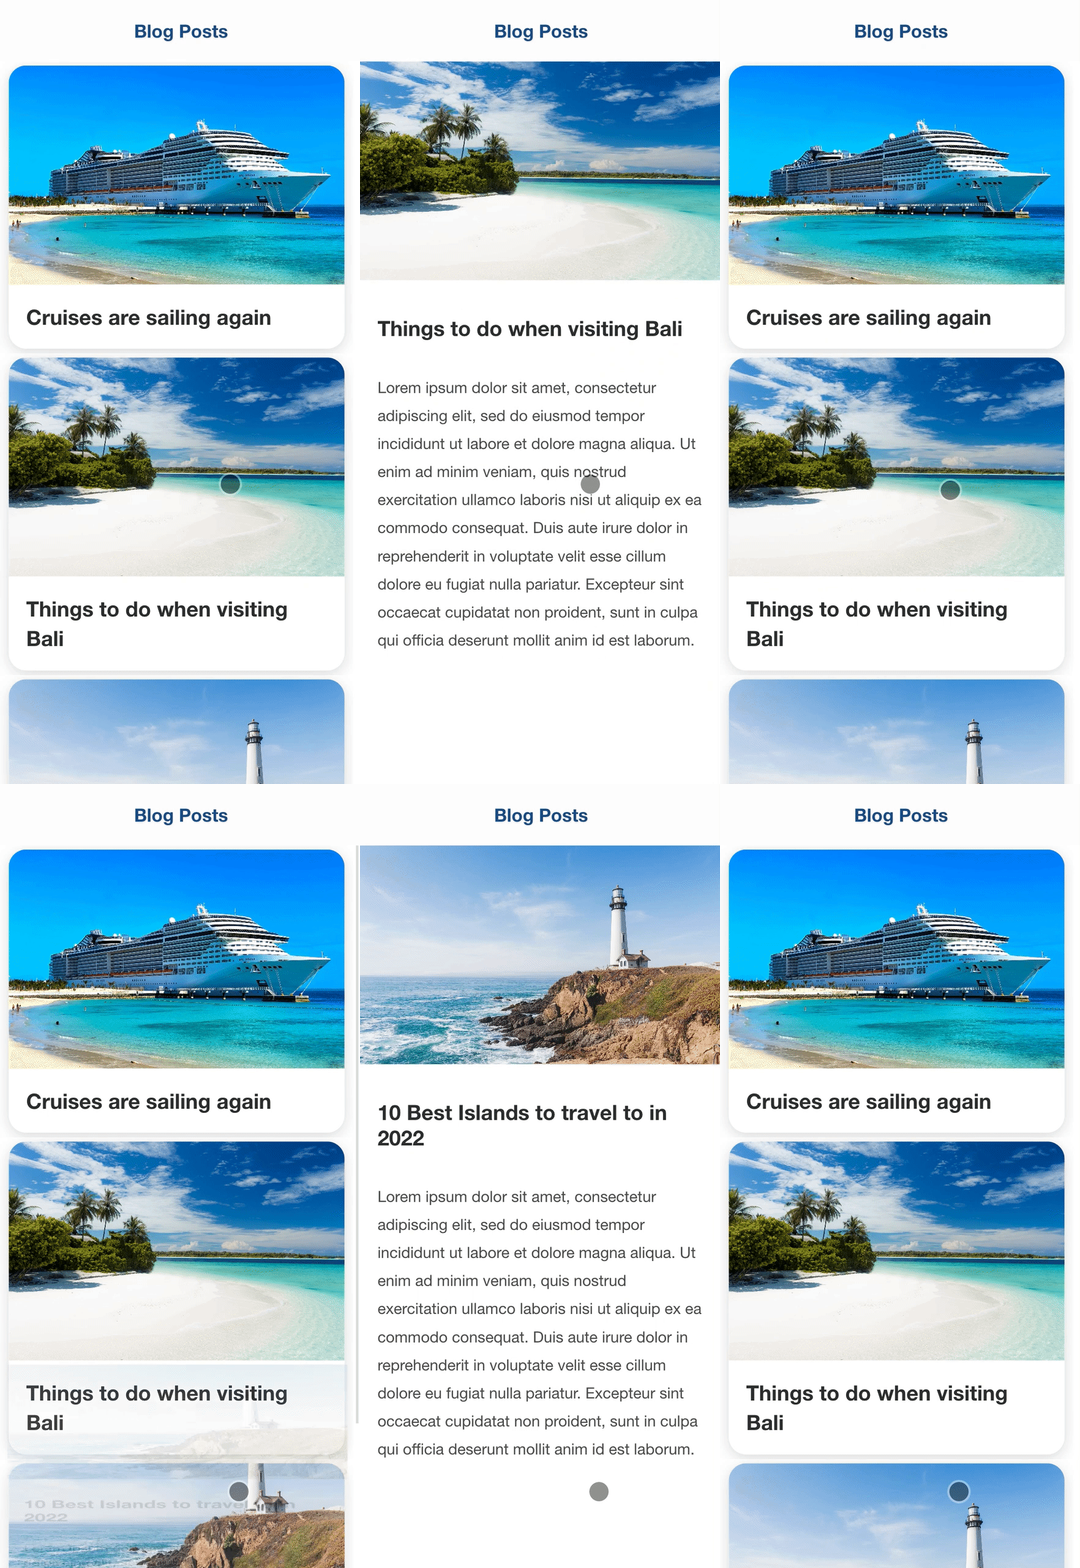
Checkpoint: Run ionic serve and open localhost:8100 on your browser. Click on a card and you should see the card expand into a full-screen popup. Clicking on the popup should dismiss the popup, animating it back to the original card.
Polishing up the Animations
We’ll add some more subtle animations to create a more polished experience. Let’s start with animating the text in the card as the popup is being opened. We’ll give it a fade-in and fade-out animation. Open pages/Home.tsx and add the following:
import {
	IonHeader,
	IonItem,
	IonPage,
	IonTitle,
	IonToolbar,
	IonList,
	IonItem,
	IonCard,
	IonCardContent,
	IonImg,
	IonText
} from '@ionic/react';
import { useState } from 'react';
import { AnimatePresence, motion } from 'framer-motion';
import './Home.css';

interface Post {
	id: string;
	image: string;
	name: string;
	description: string;
}

const Home: React.FC = () => {
	const [selectedPost, setSelectedPost] = useState<Post | undefined>(undefined);

	const posts: Post[] = [
		{
			id: '1',
			image:
				'https://images.unsplash.com/photo-1599640842225-85d111c60e6b?ixlib=rb-1.2.1&ixid=MnwxMjA3fDB8MHxwaG90by1wYWdlfHx8fGVufDB8fHx8&auto=format&fit=crop&w=1974&q=80',
			name: 'Cruises are sailing again'
		},
		{
			id: '2',
			image:
				'https://images.unsplash.com/photo-1512649408904-c0a00fb810da?ixlib=rb-1.2.1&ixid=MnwxMjA3fDB8MHxwaG90by1wYWdlfHx8fGVufDB8fHx8&auto=format&fit=crop&w=2531&q=80',
			name: 'Things to do when visiting Bali'
		},
		{
			id: '3',
			image:
				'https://images.unsplash.com/photo-1545579133-99bb5ab189bd?ixlib=rb-1.2.1&ixid=MnwxMjA3fDB8MHxwaG90by1wYWdlfHx8fGVufDB8fHx8&auto=format&fit=crop&w=3570&q=80',
			name: '10 Best Islands to travel to in 2022'
		}
	];

	return (
		<IonPage>
			<IonHeader mode="ios">
				<IonToolbar mode="ios">
					<IonTitle>Blog Posts</IonTitle>
				</IonToolbar>
			</IonHeader>
			<IonContent fullscreen>
				<div className="content-container">
					<IonList mode="ios" className="ion-no-padding">
						{posts.map((post) => (
							<IonItem
								key={'card-' + post.id}
								mode="ios"
								lines="none"
								className="ion-no-padding ion-no-inner-padding"
							>
								<IonCard className="ion-no-padding" onClick={() => setSelectedPost(post)}>
									<motion.div className="card-content" layoutId={'card-' + post.id}>
										<motion.div layoutId={'image-container' + post.id}>
											<IonImg className="card-image" src={post.image} />
										</motion.div>
										<IonCardContent>
											{/* Add fade in and fade out animation 👇 */}
											<motion.div
												className="title-container"
												variants={{
													show: {
														opacity: 1,
														transition: {
															duration: 0.5,
															delay: 0.3
														}
													},
													hidden: {
														opacity: 0,
														transition: {
															duration: 0.1
														}
													}
												}}
												initial="show"
												animate={selectedPost?.id === post.id ? 'hidden' : 'show'}
											>
												<IonText>{post.name}</IonText>
											</motion.div>
										</IonCardContent>
									</motion.div>
								</IonCard>
							</IonItem>
						))}
					</IonList>

					<AnimatePresence>
						{selectedPost && (
							<motion.div
								className="popup-container"
								onClick={() => setSelectedPost(undefined)}
								layoutId={'card-' + selectedPost.id}
								initial={{ opacity: 0 }}
								animate={{ opacity: 1 }}
							>
								<motion.div layoutId={'image-container' + post.id}>
									<IonImg src={selectedPost.image} />
								</motion.div>
								<h1>{selectedPost.name}</h1>
								<IonText>
									<p>
										Lorem ipsum dolor sit amet, consectetur adipiscing elit, sed do eiusmod tempor
										incididunt ut labore et dolore magna aliqua. Ut enim ad minim veniam, quis
										nostrud exercitation ullamco laboris nisi ut aliquip ex ea commodo consequat.
										Duis aute irure dolor in reprehenderit in voluptate velit esse cillum dolore eu
										fugiat nulla pariatur. Excepteur sint occaecat cupidatat non proident, sunt in
										culpa qui officia deserunt mollit anim id est laborum.
									</p>
								</IonText>
							</motion.div>
						)}
					</AnimatePresence>
				</div>
			</IonContent>
		</IonPage>
	);
};

export default Home;
Next, we’ll add a fade-in and slide-up animation to our text contents in the popup container. We’ll also add a delay to the main text of the popup to give it a staggering effect. Open pages/Home.tsx and add the following:
import {
	IonHeader,
	IonItem,
	IonPage,
	IonTitle,
	IonToolbar,
	IonList,
	IonItem,
	IonCard,
	IonCardContent,
	IonImg,
	IonText
} from '@ionic/react';
import { useState } from 'react';

// Import AnimatePresence 👇
import { AnimatePresence, motion } from 'framer-motion';
import './Home.css';

interface Post {
	id: string;
	image: string;
	name: string;
	description: string;
}

const Home: React.FC = () => {
	const [selectedPost, setSelectedPost] = useState<Post | undefined>(undefined);

	const posts: Post[] = [
		{
			id: '1',
			image:
				'https://images.unsplash.com/photo-1599640842225-85d111c60e6b?ixlib=rb-1.2.1&ixid=MnwxMjA3fDB8MHxwaG90by1wYWdlfHx8fGVufDB8fHx8&auto=format&fit=crop&w=1974&q=80',
			name: 'Cruises are sailing again'
		},
		{
			id: '2',
			image:
				'https://images.unsplash.com/photo-1512649408904-c0a00fb810da?ixlib=rb-1.2.1&ixid=MnwxMjA3fDB8MHxwaG90by1wYWdlfHx8fGVufDB8fHx8&auto=format&fit=crop&w=2531&q=80',
			name: 'Things to do when visiting Bali'
		},
		{
			id: '3',
			image:
				'https://images.unsplash.com/photo-1545579133-99bb5ab189bd?ixlib=rb-1.2.1&ixid=MnwxMjA3fDB8MHxwaG90by1wYWdlfHx8fGVufDB8fHx8&auto=format&fit=crop&w=3570&q=80',
			name: '10 Best Islands to travel to in 2022'
		}
	];

	return (
		<IonPage>
			<IonHeader mode="ios">
				<IonToolbar mode="ios">
					<IonTitle>Blog Posts</IonTitle>
				</IonToolbar>
			</IonHeader>
			<IonContent fullscreen>
				<div className="content-container">
					<IonList mode="ios" className="ion-no-padding">
						{posts.map((post) => (
							<IonItem
								key={'card-' + post.id}
								mode="ios"
								lines="none"
								className="ion-no-padding ion-no-inner-padding"
							>
								<IonCard className="ion-no-padding" onClick={() => setSelectedPost(post)}>
									<motion.div className="card-content" layoutId={'card-' + post.id}>
										<motion.div layoutId={'image-container' + post.id}>
											<IonImg className="card-image" src={post.image} />
										</motion.div>
										<IonCardContent>
											<motion.div
												className="title-container"
												variants={{
													show: {
														opacity: 1,
														transition: {
															duration: 0.5,
															delay: 0.3
														}
													},
													hidden: {
														opacity: 0,
														transition: {
															duration: 0.1
														}
													}
												}}
												initial="show"
												animate={selectedPost?.id === post.id ? 'hidden' : 'show'}
											>
												<IonText>{post.name}</IonText>
											</motion.div>
										</IonCardContent>
									</motion.div>
								</IonCard>
							</IonItem>
						))}
					</IonList>

					<AnimatePresence>
						{selectedPost && (
							<motion.div
								className="popup-container"
								onClick={() => setSelectedPost(undefined)}
								layoutId={'card-' + selectedPost.id}
								initial={{ opacity: 0 }}
								animate={{ opacity: 1 }}
							>
								<motion.div layoutId={'image-container' + post.id}>
									<IonImg src={selectedPost.image} />
								</motion.div>
								{/* Add fade-in and slide-up animation 👇 */}
								<motion.div
									initial={{ opacity: 0, transform: 'translateY(20px)' }}
									animate={{
										opacity: 1,
										transform: 'translateY(0)',
										transitionDuration: '0.5s',
										transitionDelay: '0.15s'
									}}
								>
									<h1>{selectedPost.name}</h1>
								</motion.div>
								{/* Add fade in and fade out animation with some delay 👇 */}
								<motion.div
									initial={{ opacity: 0, transform: 'translateY(20px)' }}
									animate={{
										opacity: 1,
										transform: 'translateY(0)',
										transitionDuration: '0.5s',
										transitionDelay: '0.2s'
									}}
								>
									<IonText>
										<p>
											Lorem ipsum dolor sit amet, consectetur adipiscing elit, sed do eiusmod tempor
											incididunt ut labore et dolore magna aliqua. Ut enim ad minim veniam, quis
											nostrud exercitation ullamco laboris nisi ut aliquip ex ea commodo consequat.
											Duis aute irure dolor in reprehenderit in voluptate velit esse cillum dolore
											eu fugiat nulla pariatur. Excepteur sint occaecat cupidatat non proident, sunt
											in culpa qui officia deserunt mollit anim id est laborum.
										</p>
									</IonText>
								</motion.div>
							</motion.div>
						)}
					</AnimatePresence>
				</div>
			</IonContent>
		</IonPage>
	);
};

export default Home;
Checkpoint: Run ionic serve and open localhost:8100 on your browser. Click on a card and you should see the card expand into a full-screen popup, followed by the text animating to its final position.

Conclusion
Adding shared element transition strategically in your application can improve the overall UX of your application. It maintains the context better, clearly indicating that the new view contains information related to the item that was clicked.
If you are interested in more content like this or have any questions, let me know in the comments or tweet me at @williamjuan27.
If you want to learn even more about Ionic with a library of 60+ video courses, templates, and a supportive community, you can join the Ionic Academy and get access to a ton of learning material to boost your Ionic development skills.
Further Reading
- Learn a different approach to creating shared element transition in an Ionic Angular application in this blog post by Josh Morony
- Learn about the new shared element transition API coming soon to browsers in this blog
- Learn another approach to shared element transition using React navigation in this blog post.
