Building Your Own Simple RSS Reader with Ionic Last update: 2016-10-13
Parsing RSS data is not a simple task given that most feeds are based on XML. Within this post we will build a simple RSS reader with Ionic 2 using the Yahoo API to transform our feeds into more readable JSON.
This Tutorial was updated for Ionic 3.1!
I give credits to Raymond Camden where I first saw the Yahoo API in action, so follow him, he’s an awesome guy who likes Star Wars and cats.
Let’s dig into the fun and start a blank new app!
Prerequisite
Learning Ionic can become overwhelming, I know that feeling. Is learning from tutorials and videos sometimes not enough for you? Then I got something for you.
If you want to learn Ionic with step-by-step video courses, hands-on training projects and a helpful community who has your back, then take a look at the Ionic Academy.
Starting a new Ionic 2 App
As always, we use the Ionic CLI to start a blank new Ionic app. Additional we generate a page and a provider for our app which we can easily use later for our reader. We also install a Cordova plugin to open a browser inside the app and also the SQLite storage which will be used by Ionic Storage where we will store data. Now go ahead and run from your command line:
ionic start devdactic-rss blank
ionic g page feedList
ionic g provider feed
rm -rf src/pages/home
ionic g page home
ionic cordova plugin add cordova-plugin-inappbrowser
npm install --save @ionic-native/in-app-browser
ionic cordova plugin add cordova-sqlite-storage
Note: The default created HomePage is not ready for lazy loading so we delete it and create it again - then it will have a module file!
As we will also use Ionic Storage, we need to import it and our provider into our module as well as the HttpModule to make some requests, so replace everything inside src/app/app.module.ts with:
import { BrowserModule } from '@angular/platform-browser';
import { ErrorHandler, NgModule } from '@angular/core';
import { IonicApp, IonicErrorHandler, IonicModule } from 'ionic-angular';
import { SplashScreen } from '@ionic-native/splash-screen';
import { StatusBar } from '@ionic-native/status-bar';

import { MyApp } from './app.component';

import { IonicStorageModule } from '@ionic/storage';
import { FeedProvider } from './../providers/feed/feed';
import { HttpModule } from '@angular/http';
import { InAppBrowser } from '@ionic-native/in-app-browser';

@NgModule({
  declarations: [
    MyApp
  ],
  imports: [
    BrowserModule,
    HttpModule,
    IonicModule.forRoot(MyApp),
    IonicStorageModule.forRoot()
  ],
  bootstrap: [IonicApp],
  entryComponents: [
    MyApp
  ],
  providers: [
    StatusBar,
    SplashScreen,
    {provide: ErrorHandler, useClass: IonicErrorHandler},
    FeedProvider,
    InAppBrowser
  ]
})
export class AppModule {}
As we will now use lazy loading, we need to change the entry point to reflect this so go ahead and change the rootPage of our app to be just the name of the class inside the src/app/app.component.ts:
import { Component } from '@angular/core';
import { Platform } from 'ionic-angular';
import { StatusBar } from '@ionic-native/status-bar';
import { SplashScreen } from '@ionic-native/splash-screen';

@Component({
  templateUrl: 'app.html'
})
export class MyApp {
  rootPage:any = 'HomePage';

  constructor(platform: Platform, statusBar: StatusBar, splashScreen: SplashScreen) {
    platform.ready().then(() => {
      statusBar.styleDefault();
      splashScreen.hide();
    });
  }
}
These are all the resources we need for now, let’s start with the heart of our app first.
Crafting the RSS Service
The RSS service will take care of delivering all the information our app needs. All the logic for storing and loading feeds plus actually grabbing feed data takes place in this class.
We define 2 classes, FeedItem to hold one article of a feed and Feed to represent an RSS feed from a website. Using TypeScript it’s really a good approach to wrap your information in objects like these!
Open the previously generated provider at src/providers/feed/feed.ts and replace everything with:
import { Injectable } from '@angular/core';
import { Http } from '@angular/http';
import 'rxjs/add/operator/map';
import { Storage } from '@ionic/storage';
import { Observable } from 'rxjs/Observable';

export class FeedItem {
  description: string;
  link: string;
  title: string;

  constructor(description: string, link: string, title: string) {
    this.description = description;
    this.link = link;
    this.title = title;
  }
}

export class Feed {
  title: string;
  url: string;

  constructor(title: string, url: string) {
    this.title = title;
    this.url = url;
  }
}

@Injectable()
export class FeedProvider {

  constructor(private http: Http, public storage: Storage) {}

  public getSavedFeeds() {
    return this.storage.get('savedFeeds').then(data => {
      let objFromString = JSON.parse(data);
      if (data !== null && data !== undefined) {
        return JSON.parse(data);
      } else {
        return [];
      }
    });
  }

  public addFeed(newFeed: Feed) {
    return this.getSavedFeeds().then(arrayOfFeeds => {
      arrayOfFeeds.push(newFeed)
      let jsonString = JSON.stringify(arrayOfFeeds);
      return this.storage.set('savedFeeds', jsonString);
    });
  }

  public getArticlesForUrl(feedUrl: string) {
    var url = 'https://query.yahooapis.com/v1/public/yql?q=select%20title%2Clink%2Cdescription%20from%20rss%20where%20url%3D%22'+encodeURIComponent(feedUrl)+'%22&format=json';
    let articles = [];
    return this.http.get(url)
    .map(data => data.json()['query']['results'])
    .map((res) => {
      if (res == null) {
        return articles;
      }
      let objects = res['item'];
      var length = 20;

      for (let i = 0; i < objects.length; i++) {
        let item = objects[i];
        var trimmedDescription = item.description.length > length ?
        item.description.substring(0, 80) + "..." :
        item.description;
        let newFeedItem = new FeedItem(trimmedDescription, item.link, item.title);
        articles.push(newFeedItem);
      }
      return articles
    })
  }
}
The getSavedFeeds and addFeed work on our storage object and gather or save a new added Feed. By doing this we can keep the once added Feeds inside our list like in every good Feed reader app!
The getArticlesForUrl is the function doing the work of extracting all the Feed data from one feed using the Yahoo API. It looks a bit weird and I never thought this would work, but it actually fetches the data quite well. The only thing missing here is an image, apparently I found no solution to retrieve that information as well.
Let me know if you can find a solution for this, that would really add a few extra stars to that API.
Once we have the data we apply some transformation to convert the JSON response into FeedItems which we can then return to our view.
We got the heart of the app, the rest now will be easy simply using our service!
Showing and Adding new Feeds inside a Side Menu
As seen before we have the functions to store and retrieve stored Feeds from the storage. We want to have a simple side menu view where we have the different feeds inside the menu while displaying the actual articles from one feed inside the main view.
We start with the class for the side menu so go ahead and insert everything below into the src/pages/home/home.ts:
import { Component, ViewChild } from '@angular/core';
import { NavController, AlertController, Nav, IonicPage } from 'ionic-angular';
import { FeedProvider, Feed } from '../../providers/feed/feed';

@IonicPage()
@Component({
  selector: 'page-home',
  templateUrl: 'home.html'
})
export class HomePage {
  @ViewChild(Nav) nav: Nav;

  rootPage = 'FeedListPage';
  feeds: Feed[];

  constructor(private navController: NavController, private feedProvider: FeedProvider, public alertCtrl: AlertController) { }

  public addFeed() {
    let prompt = this.alertCtrl.create({
      title: 'Add Feed URL',
      inputs: [
        {
          name: 'name',
          placeholder: 'The best Feed ever'
        },
        {
          name: 'url',
          placeholder: 'http://www.myfeedurl.com/feed'
        },
      ],
      buttons: [
        {
          text: 'Cancel',
          role: 'cancel'
        },
        {
          text: 'Save',
          handler: data => {
            let newFeed = new Feed(data.name, data.url);
            this.feedProvider.addFeed(newFeed).then(
              res => {
                this.loadFeeds();
              }
            );
          }
        }
      ]
    });
    prompt.present();
  }

  private loadFeeds() {
    this.feedProvider.getSavedFeeds().then(
      allFeeds => {
        this.feeds = allFeeds;
      });
  }

  public openFeed(feed: Feed) {
    this.nav.setRoot('FeedListPage', { 'selectedFeed': feed });
  }

  public ionViewWillEnter() {
    this.loadFeeds();
  }
}
We use the ionViewWillEnter to load the feeds from our service, and if we have the data we simply assign it to the this.feeds variable which will be used in our view in the next step.
The actual longer part is to add a feed, which is simply displaying an Alert with 2 inout fields for the URL and a clear name for the Feed. Inside the handler for the result of this alert we can catch the user input and create (add) a new feed again just by using our service and calling a reload on the view to update the list.
If the user selects a feed we set the root of our navigation to the FeedListPage and pass the selected feed object as a parameter. We will see how to handle these params in the next section.
Before we come to that we need to show the list of feeds inside our side menu view, so go ahead and open the src/pages/home/home.html:
<ion-menu [content]="content">
  <ion-header>
    <ion-toolbar secondary>
      <ion-title>Recent articles</ion-title>
    </ion-toolbar>
  </ion-header>

  <ion-content>
    <ion-list>
      <button menuClose ion-item *ngFor="let feed of feeds" (click)="openFeed(feed)">
        {{feed.title}}
      </button>
    </ion-list>
    <button ion-button full (click)="addFeed()" action secondary>
      <ion-icon name="add"></ion-icon> Add Feed
    </button>
  </ion-content>

</ion-menu>

<ion-nav [root]="rootPage" #content swipeBackEnabled="false"></ion-nav>
At the bottom we define our navigation where the root is set to the variable rootPage. The rest of the view defines the actual content of the side menu, where we display a list of our feeds and assign click events to each of them. Below the list is a button to add new feeds, which will then bring up the alert view.
So far we are almost done, let’s finish it up with the view for our articles!
Loading Feed Data and Showing Articles
Once the user selects a feed from the side menu we need to update the main view. We already saw how to pass params using the setRoot function, now we need to extract these values inside the constructor of our FeedListPage.
We use again the ionViewWillEnter but add a check if we actually have a selected feed. We also add a little fallback to start loading the first Feed of our array if no feed is selected (at startup).
Our loadArticles is now taking care of loading all the articles for a specific feed, and once we got the value we can set our array of articles and also set a variable to indicate loading progress to false.
Now go ahead and insert in your src/pages/feed-list/feed-list.ts:
import { Component } from '@angular/core';
import { NavController, NavParams, IonicPage } from 'ionic-angular';
import { InAppBrowser } from '@ionic-native/in-app-browser';
import { FeedProvider, FeedItem, Feed } from '../../providers/feed/feed';

@IonicPage({
  name: 'FeedListPage'
})
@Component({
  selector: 'page-feed-list',
  templateUrl: 'feed-list.html'
})
export class FeedListPage {
  articles: FeedItem[];
  selectedFeed: Feed;
  loading: Boolean;

  constructor(private nav: NavController, private iab: InAppBrowser, private feedProvider: FeedProvider, private navParams: NavParams) {
    this.selectedFeed = navParams.get('selectedFeed');
  }

  public openArticle(url: string) {
    this.iab.create(url, '_blank');
    // window.open(url, '_blank');
  }

  loadArticles() {
    this.loading = true;
    this.feedProvider.getArticlesForUrl(this.selectedFeed.url).subscribe(res => {
      this.articles = res;
      this.loading = false;
    });
  }

  public ionViewWillEnter() {
    if (this.selectedFeed !== undefined && this.selectedFeed !== null ) {
      this.loadArticles()
    } else {
      this.feedProvider.getSavedFeeds().then(
        feeds => {
          if (feeds.length > 0) {
            let item = feeds[0];
            this.selectedFeed = new Feed(item.title, item.url);
            this.loadArticles();
          }
        }
      );
    }
  }
}
To finally open an article we can use the Cordova InAppBrowser and simply pass the URL of the feed and also say we want to open it in a blank view.
The view of the articles is again a simple list iterating over our array of articles. We also add the spinner which will depend on the loading variable. Open your src/pages/feed-list/feed-list.html and insert:
<ion-header>
  <ion-navbar secondary>
    <ion-buttons start>
      <button ion-button menuToggle>
      <ion-icon name="menu"></ion-icon>
    </button>
    </ion-buttons>
    <ion-title *ngIf="!selectedFeed">Newest Articles</ion-title>
    <ion-title>{{selectedFeed?.title}}</ion-title>
  </ion-navbar>
</ion-header>

<ion-content class="feed-list" padding>
  <ion-spinner *ngIf="loading" id="feed-spinner"></ion-spinner>
  <ion-list *ngIf="selectedFeed" class="spinner">
    <ion-item *ngFor="let item of articles" (click)="openArticle(item.link)" class="feed-article">
      <div class="article-title">{{item.title}}</div><br>
      <p [innerHtml]="item.description"></p>
    </ion-item>
  </ion-list>
  <ion-row *ngIf="!selectedFeed">
    <ion-col text-center>
      Please select a feed!
    </ion-col>
  </ion-row>
</ion-content>
The description is not simply printed but added as innerHtml as this seemed to work best for whatever comes from the service.
The view looks ok, but it’s never a bad idea to add some styling so we can tweak the appearance with some easy styles inside the src/pages/feed-list/feed-list.scss:
page-feed-list {
.feed-list {
background: #d1ffdc;
.feed-article {
height: 80px;
background: #ffffff;
border-radius: 10px;
margin-bottom: 10px;
border-top: 0px;
color: #000000;
}
ion-list > .item:first-child, ion-list > .item-wrapper:first-child .item {
border-top: 0px;
}
ion-list .item .item-inner {
border-bottom: 0px;
}
.article-title {
font-weight: bold;
}
}
#feed-spinner {
margin: auto;
position: absolute;
top: 0; left: 0; bottom: 0; right: 0;
height: 100px;
}
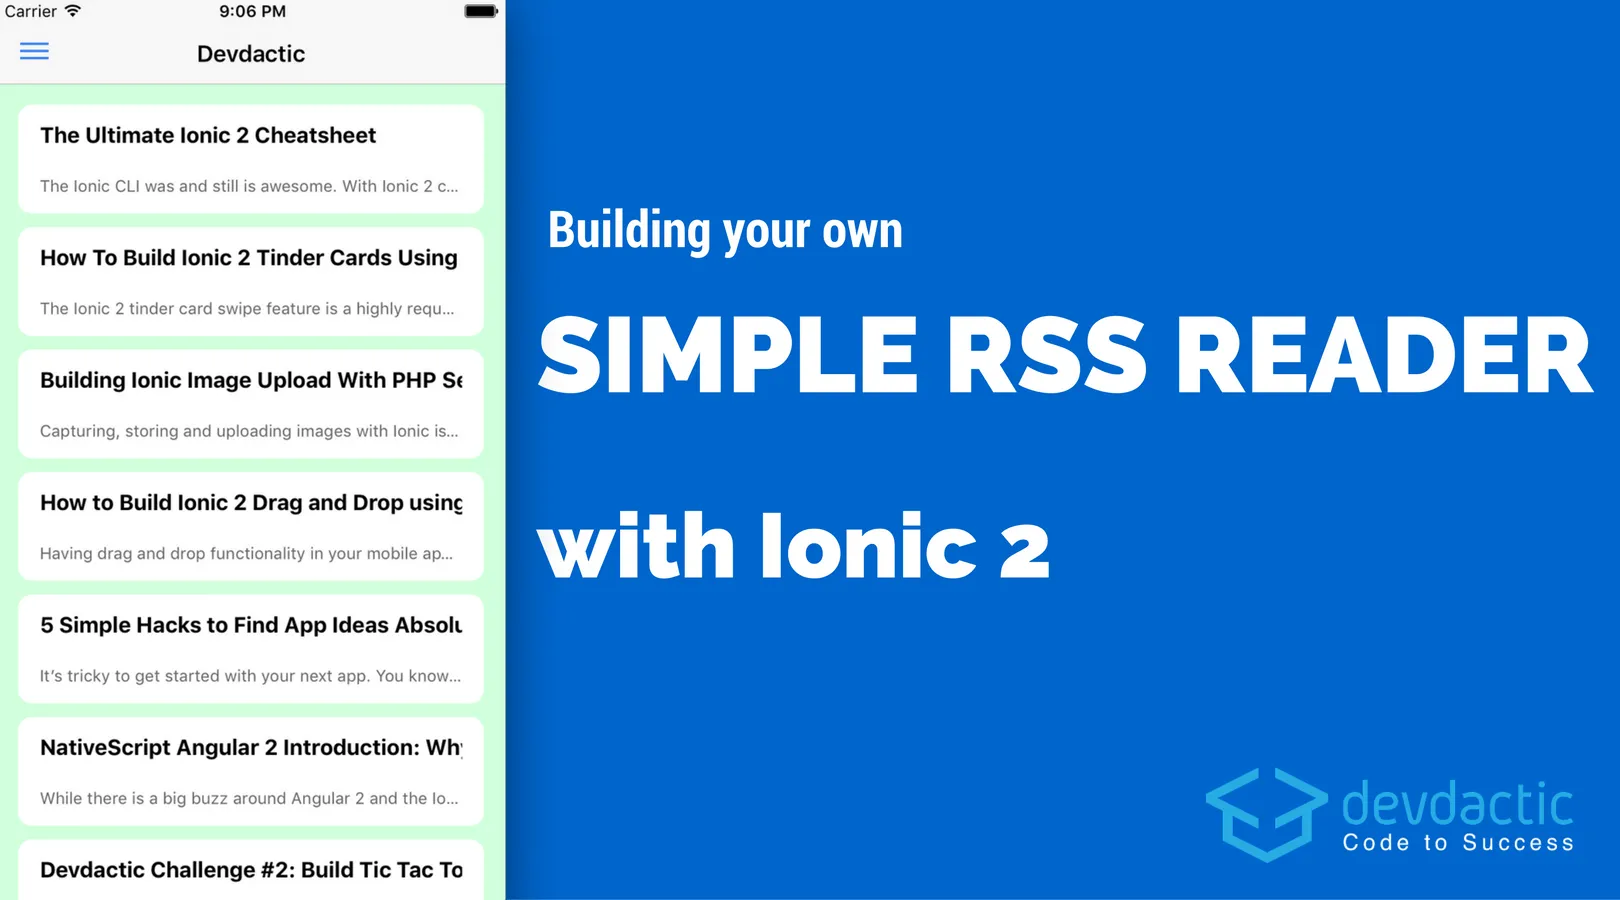
}Now our own little RSS Reader with Ionic 2 is ready to be used and should look somehow like this:
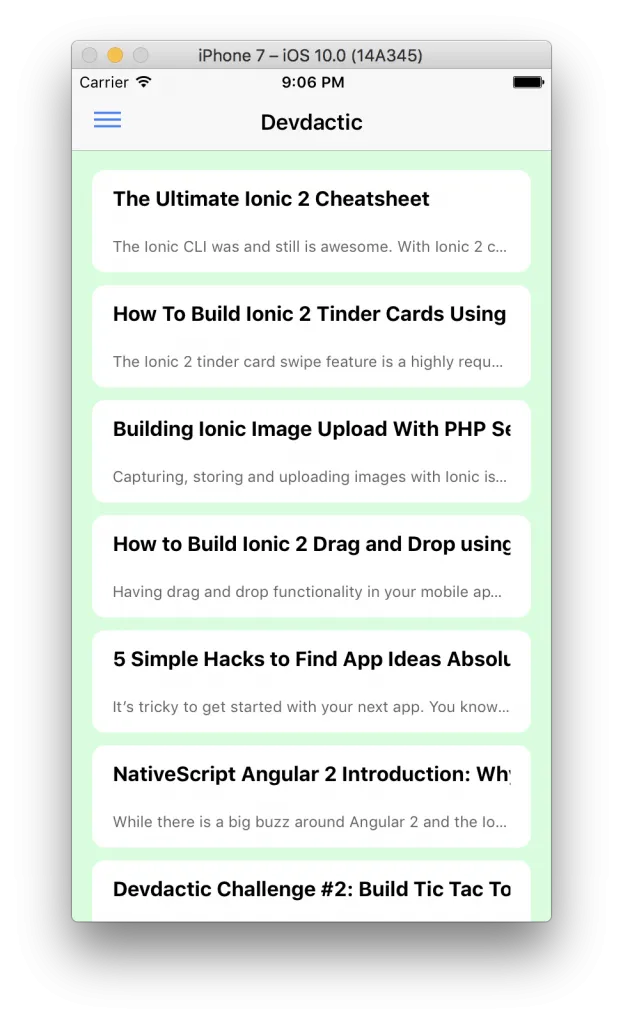
I added the Devdactic feed for testing, but you can obviously pick any Feed you like (and subscribe to mine in your favorite RSS reader!).
Conclusion
The simple RSS reader using Ionic 2 has it’s limitations as the Yahoo API is not the best API in the world to convert our data from XML to JSON. If you have a good approach please share your thoughts below, also I hope you subscribe to my blog to get future updates and more awesome tutorials!
You can find a video version of this article below!
Happy Coding, Simon