Rapid Prototyping with Ionic 2 and Node.js - Part 3 Last update: 2017-02-07
If you have developed an app with Rapid Prototyping you want to get it out into the hands of other people. But what’s the easiest way to do so without already submitting your unfinished app? And what about your backend?
In this last part of our 3 part series we will see how to easily use an Ionic service to show your app to other people in nearly no time. Also we will deploy our Node.js backend to a server we can reach from everywhere (not just localhost).
All of the 3 parts of the series can be found below:
Rapid Prototyping with Ionic 2 and Node.js - Part 1: The Node.js Backend Rapid Prototyping with Ionic 2 and Node.js - Part 2: The Ionic 2 Frontend Rapid Prototyping with Ionic 2 and Node.js - Part 3: Deployment of your Components
Prerequisite
Learning Ionic can become overwhelming, I know that feeling. Is learning from tutorials and videos sometimes not enough for you? Then I got something for you.
If you want to learn Ionic with step-by-step video courses, hands-on training projects and a helpful community who has your back, then take a look at the Ionic Academy.
How to get your MVP out?
There are different options to get our your app. The way described inside Ionic 2 From Zero to App Store is the standard iOS and Android procedure of alpha & beta staging. This official way involves having an iOS developer account as well as a Google Play Developer account.
If you have both of them, you can ”simply” submit your apps and start an alpha or beta test with selected people before the app officially hits the app store. Simply means, you still have to insert a lot of details for your apps as they will be shown like regular store entries to your testers so it takes some time to provide that.
But there’s another less stressful way which involves the Ionic View service which we will use to provide access to our MVP.
What about the backend side?
It’s quite easy to hit npm start and happily connect your app to localhost, but of course you can’t start that same server on your local machine for people out there that are going to test your app. If you have your own server you can get the code deployed there, install all the needed packages for Node.js and add a redirect to the port of the running backend.
You say, although you might even have a server it won’t be that easy, and for others it’s likely to see only question marks if they had to deploy the server. That’s why we use the simple and (in the beginning) free to use service Heroku to deploy and run our app in really no time.
If you have never done it before you might be surprised how easy it can be to get out your complete functional app into the hands of others, so follow along the next steps to finally deploy our frontend and backend!
Upload your Node.js Server to Heroku
For this part you need the code from the first part of the series, so make sure you have the backend code ready for the next steps or go back to get it now!
First of all we will make our backend available. If you haven’t done yet, make sure to create a new account on Heroku (it’s free) to get started.
Once you are ready, we need to install the Heroku CLI so download it and follow the installation steps.
After we have installed the toolbelt (I think that was the previous name) we need to login to our account from the command line, so run
heroku loginAlso, if your repository is not yet a Git repository we need to quickly init git and commit our current folder. In that case also run inside the folder of your backend app:
$ cd myapp
git init
# Initialized empty Git repository in .git/
git add .
git commit -m "my first commit"
If you already have a repository it’s quite easy to connect it to Heroku aswell, simply check out the Heroku Git setup guide.
We are now ready to create a new Heroku app. This will create a new instance inside your dashboard if you login to your account, and this is the place where we can now push our code to. Once we run the create command, Heroku actually set’s the remote URLs for our repository which you can directly display after running it.
To finally ”deploy” your application, you need to push your git changes to the Heroku remote. You will see some logs from your deployment and hopefully read something like “success” in the end which is a good sign that something has worked. Now run these commands inside your backend folder:
$ heroku create
git remote -v
# heroku	https://git.heroku.com/<your-repo>.git (fetch)
# heroku	https://git.heroku.com/<your-repo>.git (push)
git push heroku master</your-repo></your-repo>
We are almost finished, but remember that we used a local MongoDB We need a MongoDB!!
Don’t panic, Heroku for the win. Heroku allows to easily configure add ons for your instance, and one of those is the Cloud MongoDB service mLab.
If you have your own isntance of MongoDB running somewhere you can of course use that, but if not simply follow the steps below to integrate mLab into your Heroku instance.
Configure mLab for Heroku
Inside your Heroku dashboard select the app of your backend. If you have multiple, make sure to select the right one! 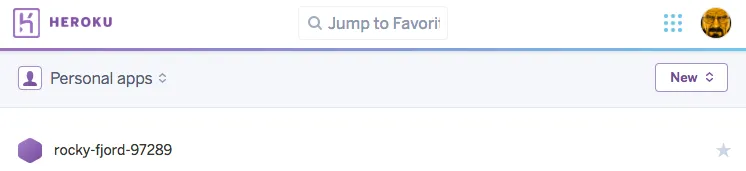 Inside the view of your app click on Configure Add-ons which will take you to a new screen.
 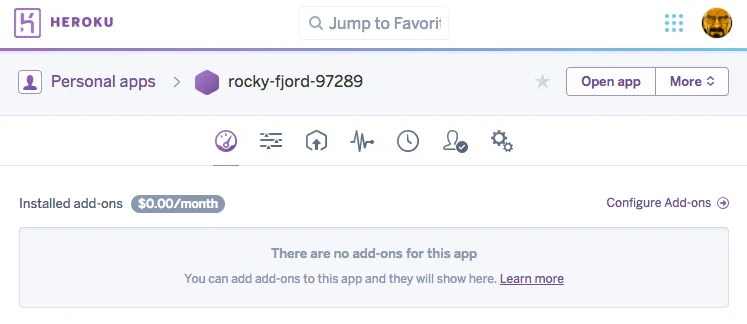 In the section Add ons simply start typing mongo or mlab until the entry shows up in the list below.
  Select the plan that fits you best. For this tutorial I simply picked Sandbox because we are only testing some stuff, so you can go with that option for now!
 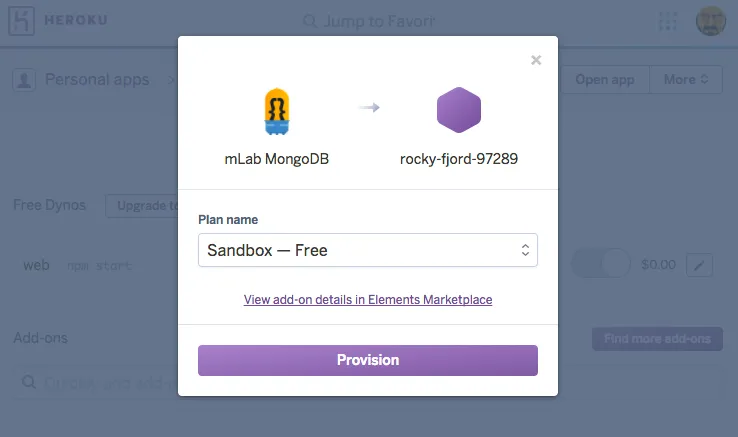 After you have selected mLab the service should show up inside your add ons area and Heroku will show you a success message.
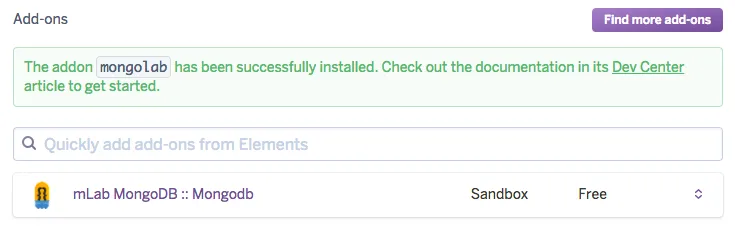
You have now successful configured a MongoDB inside Heroku! We can now (with a little trick) grep the URL for our database by running the following command inside our folder:
heroku config | grep MONGODB_URIRemember our config.json inside the backend project? Edit this file now and insert the URL you got from the previous command.
{
  "database": "mongodb://<dbuser>:<dbpassword>@12356.mlab.com:55718/heroku_a123456"
}
Now commit and push to Heroku again and your backend is completely living in the cloud!
You can try to connect with Postman now, you can find your URL to the app online or again by using a simple command:
heroku info -s | grep web_url | cut -d= -f2( thanks to Stackoverflow)
If you want to see how to see Postman requests go back to the first part and watch the video at the bottom of the post, I’m showing how to use Postman against your local backend so simply replace localhost with the URL to your new app.
Our backend is now in the cloud and accessible from everywhere, so it’s time to make our frontend Ionic 2 app ready now!
Publish your Ionic 2 App through Ionic.io
The current app we have built in the second part of this series is a fine little app, but we have 2 problems:
- The app is using localhost as the backend
- The app can only be installed directly to a device from our computer
What we want is the app to live in the outside world, so we need to tackle those 2 points now. We start with the first one as it’s the more easy one.
All we have to do is to change the route to the backend in exactly one file. That is some good planning!
Make sure you have the code of the app ready and open the src/providers/app-settings.ts so we can change the URL to our Heroku URL:
import { Injectable } from '@angular/core';

const CONFIG = {
  apiUrl: '<your-heroku-url>',
};

@Injectable()
export class AppSettings {

  constructor() {
  }

  public getApiUrl() {
    return CONFIG.apiUrl;
  }
}
</your-heroku-url>
As all of our services simply use this route, we don’t have to change anything else here to switch from local backend to Heroku now!
This was the easy part, but in fact the next one is almost as easy as this with just a few steps more.
To get our MVP out in the hands of customers or testers we can use the Ionic Cloud and especially the Ionic View app.
If you haven’t used it make sure to get an account there, it’s free for the basic stuff we will use.
Through the Ionic.io platform we are now able to upload our app and share a link or email so other people can get the app through the Ionic View app (which they need to install).
To get your app connected to the cloud services, start in your apps directory and run:
ionic io initThis will create an app id and you can now find a new entry in the dashboard of your account.
Now go ahead an upload your app by running:
ionic uploadYou will now get a feedback on the command line with a question to share your app. You can send out emails to your clients or your own account and grab the link inside to download your app from the Ionic View app!
That’s already everything to get your MVP out in the hands of your customers. Of course this is not the real submission, if you want to follow the complete path to the app store make sure to checkout From Zero to App Store where we go through the complete submission for iOS and Android!
Conclusion
We have finally done it! Your app can now live outside your localhost and others can use it with a connection to a real running backend.
I hope this 3 parts gave you an idea how fast you can actually developed a frontend and backend, and why using these technologies is a good idea for rapid prototype and releasing an MVP of your project.
If you need any help developing an MVP for your project or startup, let me know and I’ll be happy to work with you.
Happy Coding, Simon