How I Built a MEAN Prototype in 24 Hours Last update: 2018-07-24
Normally we talk about specific Ionic or Angular code examples, but today I want to share some Experiences and steps you can take to build and deploy prototype versions of your ideas in less than 24 hours.
Do you know these times when you find a simply idea, you fall in love with it and just have to build something and show it to the world?
It doesn’t really matter if it’s going to be a huge project or just a helpful tool, you know you need to finish this as fast as possible before your head can work on anything else again.
That happened to me a few weeks ago and I was surprised how fast you can build and deploy a full app with API these days, even completely for free! As a spoiler, the result is the Ionic Snippet library (more on this at the end).
Because you might not yet be sure how everything works together or how you could develop your own real prototype as fast as possible I’ll share my experiences of those 24 hours with you and which stages I went through.
1. Idea
It started with a simple idea: What about a snippet library for Ionic?
Places like these already exists for other frameworks and languages. People around the world upload or submit their snippets and others can browse the archive to find helpful shortcuts. Upload, storing, presenting - basic CRUD operations that shouldn’t take too long!
The idea was small enough for a fast test but at the same time has the potential to become a bigger problem if it finds traction one day. I was fired up and knew that it was about time to get my hands dirty.
2. Framework Selection
Because I usually blog about Ionic I’m familiar with Angular. However, I’ve not used pure Angular and the CLI since many versions but I felt this was the right time to re-connect with the base of where I was coming from.
Also, this time there was not really the need for a mobile app, this project should simply be a website for now and therefore the decision for the frontend was Angular 6.
At the same time the idea needed a backend. A place to store the snippets and give the user results back for searches. Ever since the MEAN stack got more popularity I started my APIs with NodeJs and a MongoDB, and that was again my choice this time.
Although the project contains all elements of the MEAN stack, I always separate the Angular frontend from my Node server. I don’t like having everything inside one project, the server for me is 99% of the time a REST API so I got all the flexibility later to built whatever frontend I enjoy or works best.
3. Critical Function Test
The framework selection was done, not the actual coding started. Before I make huge plans for a project I think about the critical elements of the app.
What might be a pain in the *ss down the road?
For this project it was both the upload and presentation of snippets. Ionic snippets only work with a bunch of files, and although you could only show some HTML or JS I felt that this won’t do the trick for users. If you browse the library, you also want to see how this looks in action as fast as possible.
Because of that, I decided to integrate Stackblitz which actually happens to offer a great Javascript SDK! Stackblitz also offers the chance to directly start a new Ionic project with one click inside their editor which is perfect to showcase new ideas or, exactly, snippets.
Therefore my critical test was to load a Stackblitz project like this by it’s URL and present it in an appropriate way inside an Angular application. To show you some code, here’s how the integration looks like:
All you need is the ID of the project and optionally some options how you want to embed the Stackblitz editor within your page. For me, this combination worked out best and afterwards just call embedProjectId to load the editor into an element inside your view:
import sdk from '@stackblitz/sdk';

let options: any = {
  'height': 500,
  'hideDevTools': true,
  'hideNavigation': '1',
  'forceEmbedLayout': '1'
};

sdk.embedProjectId('vm', 'ionic-5d6z3e', options).then(vm => {
  // Hooray!
});
Yo just need a div with the same ID inside your view like this:
<div id="vm"></div>That was the critical function test. And although the result only contains a few lines, getting there took some more time.
But at that point I knew that showing a list, a form and all the other things wouldn’t cause too many problems, so I went ahead.
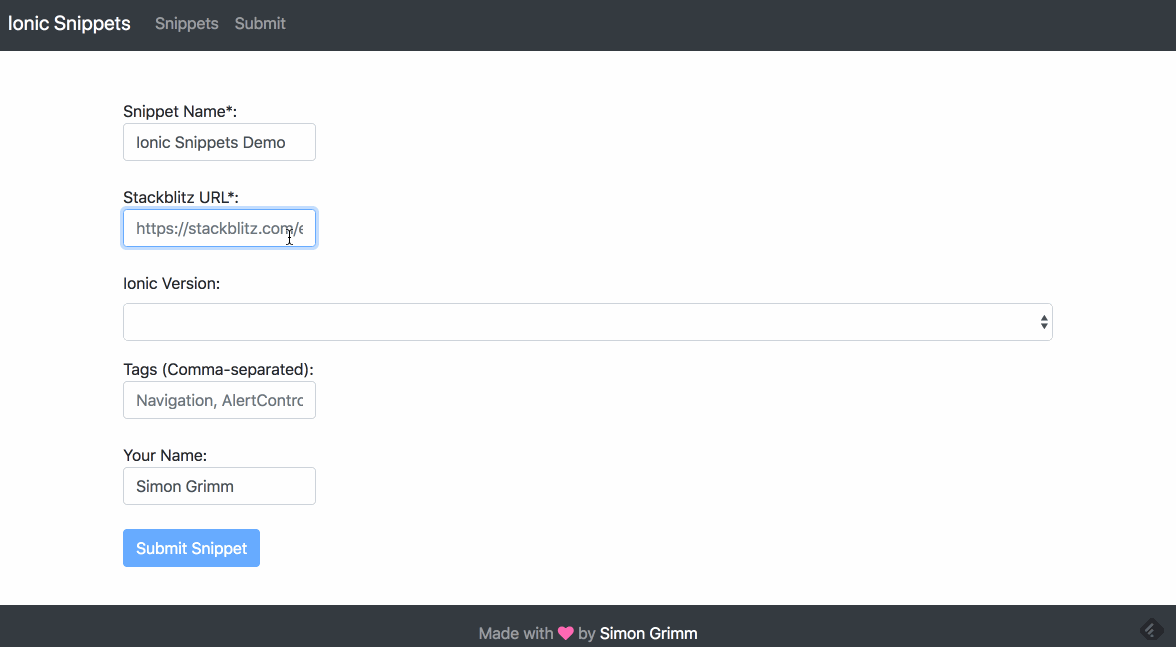
4. Most Basic Version Feedback
When you are building something new, early feedback is the best way to validate if you should continue with your endeavour. Although this was not a super ambitious project I wanted to know if Ionic developers would be actually interested in the idea.
Therefore, I created the most basic version possible that could work inside a GIF and asked the holy Twitter community.
The feedback was overwhelming and I thought this will be super helpful for many developers out there.
Not sure if I would have changed my course if nobody had reacted, because the idea still needed to get out of my brain.. Anyway, because I continued this article doesn’t end here but goes a bit more into details now.
5. Building the Angular 6 App
Angular comes with it’s awesome CLI that just like Ionic bootstraps your projects, creates components at the right places and even does a bit more. That might also be the reason why we’ll se a closer integration with this once Ionic v4 is out!
Stil, the project structure is a bit different, and especially the routing works completely different compared to Ionic 3.x which means: You start as a beginner again.
The project would have been fast if I took the time to properly understand the Angular routing concepts but of course I jumped right into it and expected everything to work my way. After failed attempts I finally found this awesome article on Angular + Bootstrap which is now the base for my navigation concept and general page structure.
As an alternative you could also use Angular Material instead of Bootstrap but that’s more or less a personal choice what you prefer. I just wanted basic styling and no additional components so I picked Bootstrap.
When a user submits a form he expects a response, and here I added the great nxg-toastr component which works right out of the box without much configuration and does the job perfectly.
The code itself is not really spectacular, the Stackblitz SDK usage might be the most interesting part actually. If you still have questions about the structure, navigation or any other page just ask inside the comments below!
Once all basic frontend features were ready for the MVP I even added Google Analytics with Angular to get and idea how many people visited my page.
All of this worked so flawless and was overall just fun to code!
6. Building the NodeJS API
The last step and this step were actually carried out simultaneously. I’m not really a backend developer so I just build what I need for the frontend side. This sometimes takes a few extra iterations that you could save if you had a strict plan in the first place but you know.. things change, you get new ideas, it just happens!
The code of the API is just as interesting as the frontend. It’s not even more than 100 lines combined in real files, but it’s still powerful to simply run your own server with database where you can potentially control everything that’s happening!
When working with Node and MongoDB I’d always recommend to use Mongoose to model your database objects and to easily access the collections later. Besides that there are a few other dependencies so if you want to create your own little API together, here are my packages:
  "dependencies": {
    "body-parser": "^1.6.5",
    "compression": "^1.0.11",
    "cors": "^2.8.4",
    "dotenv": "^0.4.0",
    "errorhandler": "^1.1.1",
    "express": "^4.16.3",
    "helmet": "^3.9.0",
    "mongoose": "^5.2.0",
    "mongoose-paginate": "^5.0.3",
    "mongoose-timestamp": "^0.6.0",
    "morgan": "^1.2.3"
  }
The only special thing I’ve used here is the Mongoose Pagination plugin which allows to easily paginate through your results. If you think you could have a lot of data one day, start now by adding pagination for both the API and the frontend.
If both your backend and frontend are ready for the world, it’s time to get out!
7. Domain, Hosting & Go Live
Maybe some of you fear this step or don’t know how to do it, how much it cost but here’s the truth: It is easy, super fast and in the beginning free!
There’s really no excuse to stop or not start a project because you fear this step. This is a bit different if you want to get into the iOS and Android Appstore, but for the web it’s true.
Let’s see how to deploy both of our parts.
API
Our backend is a NodeJS application that needs a MongoDB. There are some services out there that allow you to easily host your app, but the fastest I found (and used many times already) is Heroku.
With the Heroku CLI integration you can directly connect your App with Heroku and your GIT (which I highly recommend to use inside your project every time for versioning!). Once you’ve created an app insie your Heroku dashboard and added the remote to your project, you just need to add a Procfile to the root of your project like this:
web: node server.jsHeroku will read this file and start the server when you push your code to Heroku like this:
ngit push heroku masterThat’s all to deploy or redeploy your app - Heroku will handle the rest.
Now you still need that database - and there comes the Heroku Addons into play. With a few clicks you can directly add a free instance of mLab to your Heroku app!
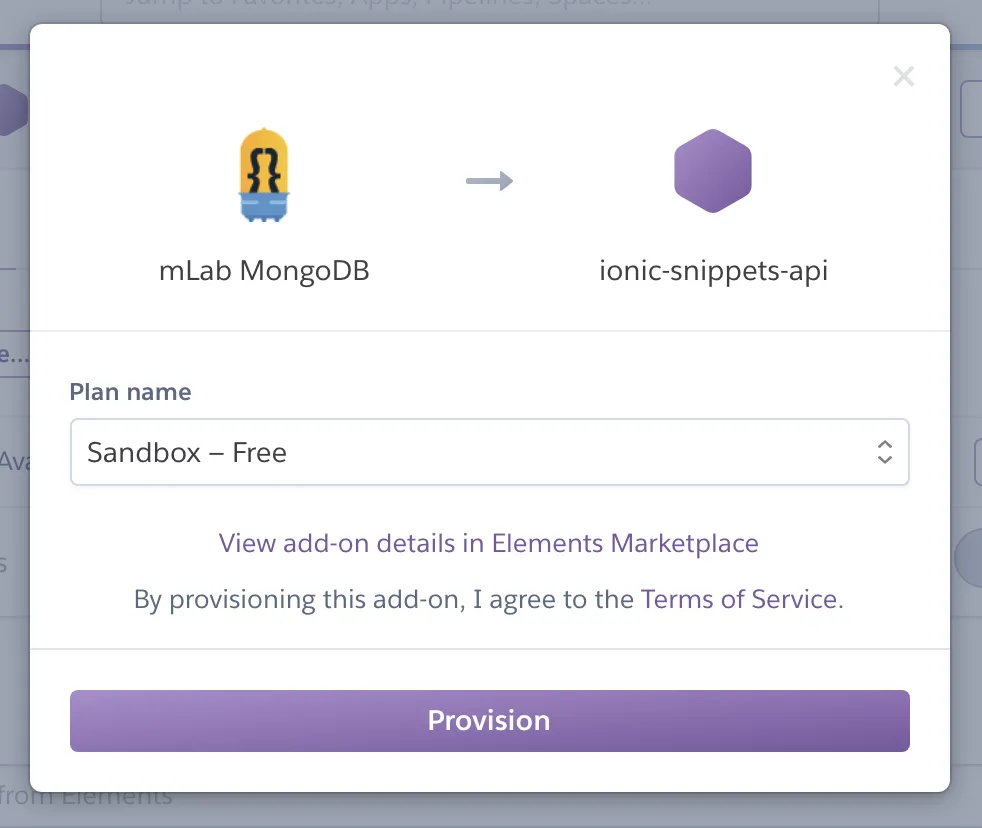
When you add these resources, the URI to your database is stored inside the Heroku environment variables when the app is started. Therefore, you need to prepare your app to always take the right URI to the database wherever you start/deploy the API, so in my case a config part could look like this:
module.exports = {
    db: process.env.MONGOLAB_URI || 'mongodb://localhost:27017/ionicsnippets'
};
In the beginning you can use free dynos which will automatically shut down after some time and restart once they are called, but you can also keep them up running for just a few bucks.
Website
This part of the deployment is actually even faster. If you don’t have any webspace or hosting available, Firebase Hosting will do the trick for you.
To start with this hosting, simply create a new Firebase project inside your account, install the Firebase CLI and login to your account from the CLI.
Once this is done, you can call firebase init inside your Angular project and run through the wizard. Select hosting and your project and Firebase will create a .firebaserc and firebase.json.
During that wizard make sure to select the right options like this:
$ What do you want to use as your public directory? www/yourprojectname
$ Configure as a single-page app (rewrite all urls to /index.html)? Yes
§ File www/index.html already exists. Overwrite? No
Finally, it’s time to build the Angular app for production and upload it to Firebase, therefore you can run:
ng build --prod
firebase deploy
Those two commands will do the magic and Firebase will give you the hosting URL as a result. This URL is not pretty so and therefore you might consider getting your own domain.
Domain
I bought the domain actually before the project started. I kinda like purchasing domains and thinking about the project I could use them for…
Anyway, this step is optional and there are infinite hosting or domain providers out there. You should be able to purchase them wherever you want, I used a German provider so that won’t be really helpful for you.
But what you definitely need to do is go to your Firebase -> Hosting dashboard and select ”Connect domain”. Inside this wizard enter your domain name and you will get a TXT record like this:
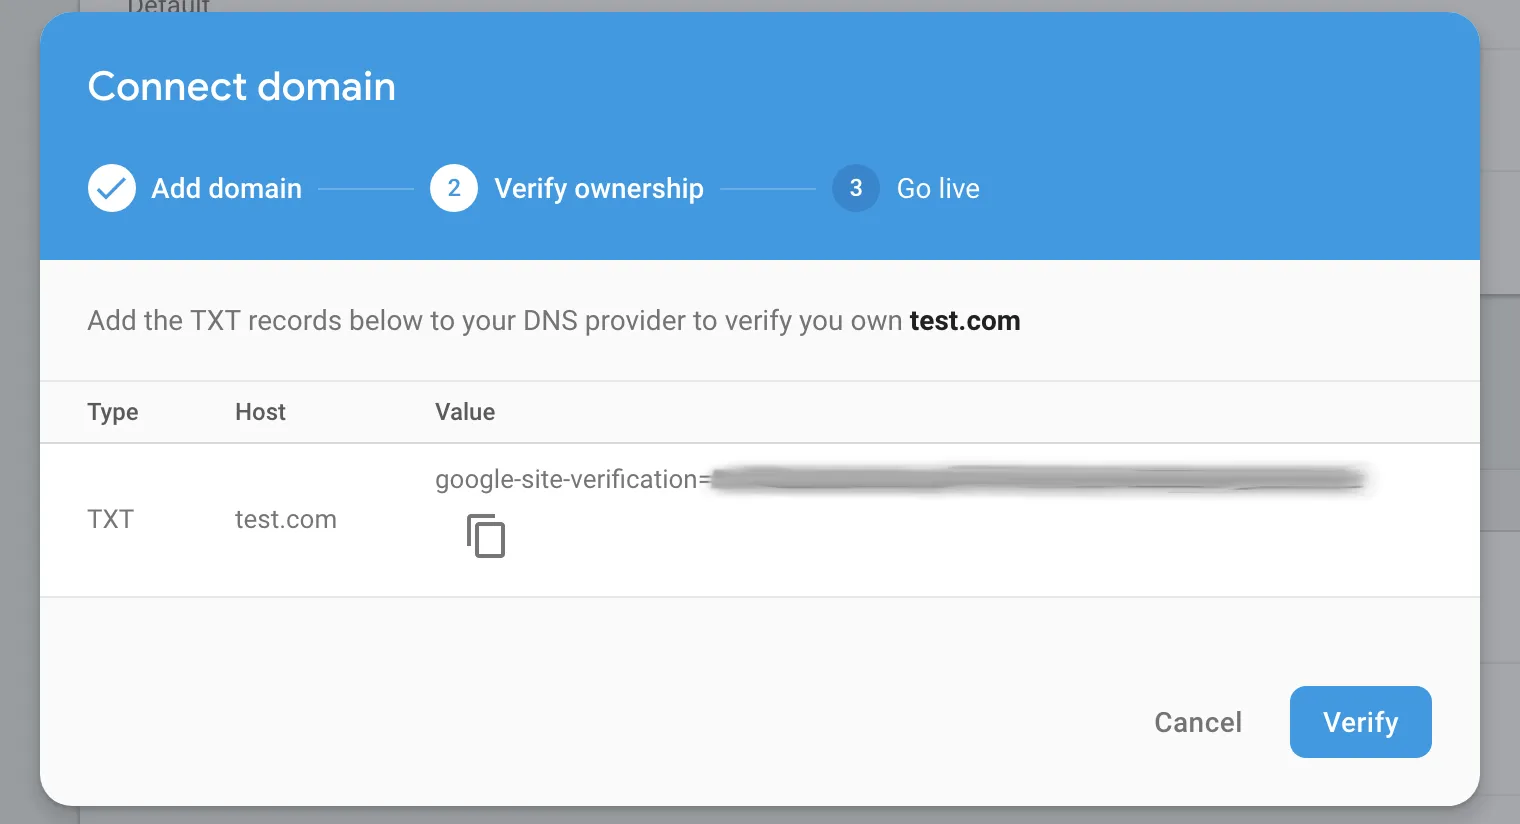
Now you need to open your DNS settings somewhere inside the account where you purchased the domain and insert a new TXT record with the value that Firebase gave you.
Once this step is finished and verified by Firebase you can finally add A records to your DNS settings that point directly to the IP of the Firebase hosting instance. Those settings should be on the same page as your TXT settings, it’s just some stuff you need to handle once but then you can access your project even under the good looking domain!
8. Build it and they will…
So what about ”build it and they will come” ? That quote is definitely outdated.
Although the response on my initial idea was amazing, until now I’m the only person adding snippets on Ionic Snippets.
Even if you think your project is helpful, people won’t use it from day one. It’s an early version, perhaps it lacks many features and besides you loving your little baby project it’s not yet ready for the big world.
At this point, don’t be sad.
Even if no-one will ever use your project, you have still learned a bunch along the way so let’s recap:
- Building a modern Angular webapp
- Creating your own API with Database
- Running a server on Heroku
- Uploading an Angular project to Firebase Hosting
- using a custom domain
All of this will be useful and your next MVP will likely just take half the time and have twice as many features. Don’t underestimate the learnings you get from going trough this process on your own. You need to separate the result from the process.
PS: All of this took me actually less then 24 hours, it was just the full time between idea and go live. The actual work on the project was less time because I had to sleep.
If you need any guidance along your way or have more questions about certain steps, feel free to ask below!