The Complete Ionic Push Notifications Guide Last update: 2016-04-26
Ionic Push Notifications, once again. My previous articles on this topic had the most comments and questions ever, so as the way of using this has changed again a bit to the current Beta status, we will put everything from starting with dummy push notifications to real iOS and Android push notifications inside this article.
This guide aims to help you set up push notifications for your Ionic app. Also I will append new questions to the final help section for something like the FAQ of Ionic push notifications. Without more words, let’s start the fun.
It’s going to be a wild ride!
Oh and if you want to grab a Postman collection with all the HTTP Requests you need for creating and observing Push notifications, just enter you email below!
Prerequisite
Learning Ionic can become overwhelming, I know that feeling. Is learning from tutorials and videos sometimes not enough for you? Then I got something for you.
If you want to learn Ionic with step-by-step video courses, hands-on training projects and a helpful community who has your back, then take a look at the Ionic Academy.
Start the smallest Push App ever
The funny thing here is that we actually need almost no code for push to work. Anyway, we start with a blank Ionic app and add 2 plugins, the ionic-platform-web-client which will handle the connection to Ionic.io and the phonegap-plugin-push which handles incoming pushes inside your app (and how you want to react upon receiving them). So go ahead and run:
ionic start devdactic-push blank
cd devdactic-push
ionic add ionic-platform-web-client
ionic plugin add phonegap-plugin-push --variable SENDER_ID="GCM_PROJECT_NUMBER"
We need a GCM project number for our Android app, but as we currently haven’t created something like this you can simply add it with the dummy string, or leave the part with —variable.. out for now.
When I installed the plugin I got this error: Plugin doesn’t support this project’s cordova-ios version. cordova-ios: 3.8.0, failed version requirement: >=4.0.0
If you encounter this as well, here is the fix to install the right iOS platform:
ionic platform rm ios
ionic platform add ios@4.1.0
Alright, the basic is done, let’s connect our app to the Ionic.io services!
If you have no account there, now is the time. It’s free and you need it in order to send Ionic push notifications to your app.
Your account is ready?
Then continue on your command line and run:
ionic io init
ionic config set dev_push true
First of all this will create an app id inside your Ioni.io dashboard, and we also enable Dev Pushes for our app to test if everything works until now. The name Dev Push is not really good and afaik they think about changing it to to Demo Push, hope we see that change soon!
The funny part is now the code we actually need. Open up your app.js and replace the current .run() block with this:
angular.module('starter', ['ionic'])

.run(function($ionicPlatform) {
  $ionicPlatform.ready(function() {
    var push = new Ionic.Push({
      "debug": true
    });

    push.register(function(token) {
      console.log("My Device token:",token.token);
      push.saveToken(token);  // persist the token in the Ionic Platform
    });
  });
})
We could actually leave out more lines, but I think this is fine for now. We create a new Push object and register ourself. On success, we will log our device token which we need to send push notifications to.
And that’s everything we need right now, so let’s see our app in action.
Creating Ionic Demo Push Notifications
To test our app we want to use the Dev Push, but before we need to add a security profile and create an API key inside Ionic.io so that we can contact the services from outside.
So go to your created App inside the Ionic.io dashboard, click on Settings and in the submenu Certificates. We need to create a profile now, otherwise for me the push was not recognized (although it should work without a profile in this step, and previously did).
Anyway, we need this profile later for our iOS and Android certificates so go ahead and add one right now. I named mine test and the result looks like this: 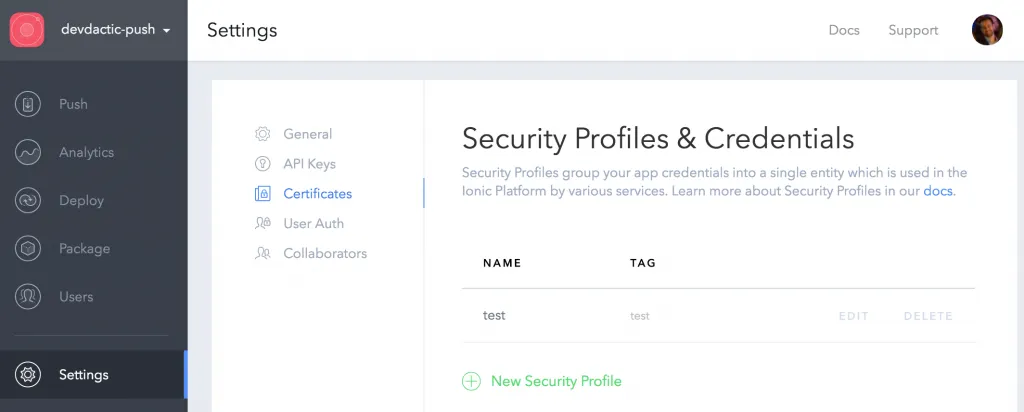
As said before we also need an API key to talk to the Ionic.io services from outside, so now go to API Keys and create a New API Token in the upper section of the page. 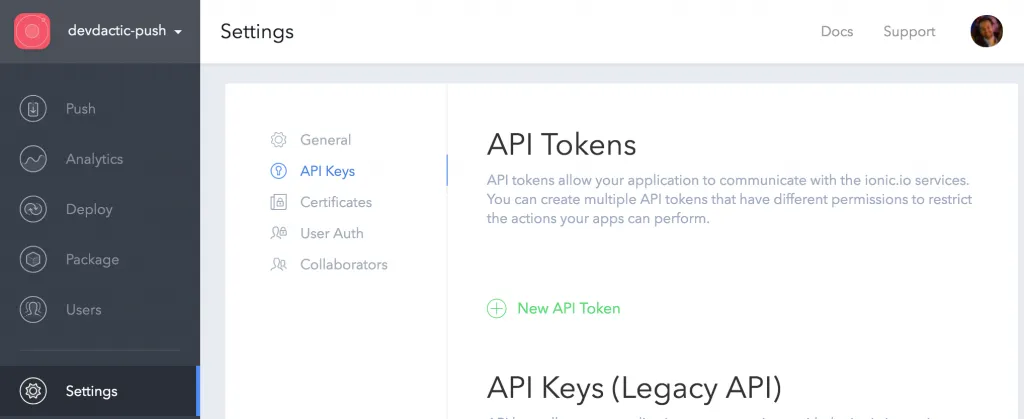
Now we are already able to send our Dev Push, so go ahead and run your app with ionic serve or on a device, and observe the log for our Dev Token!
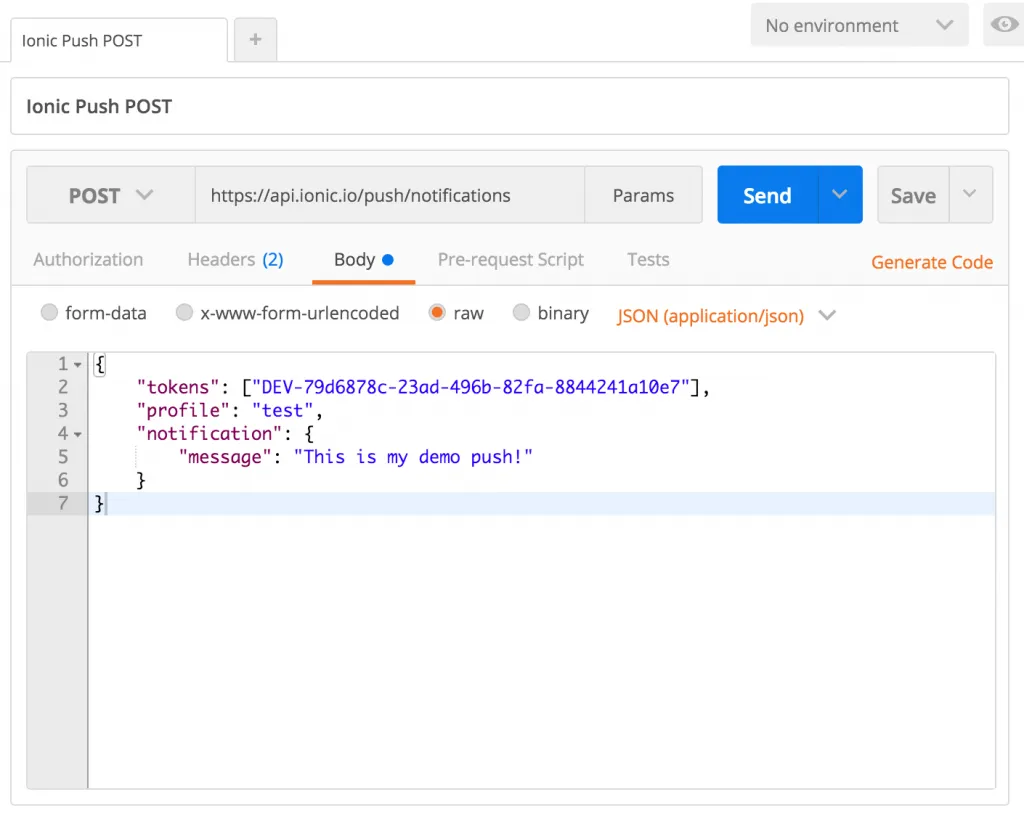
Now we can send a push using a CURL request, the 3 things you need to have are:
- DEV_DEVICE_TOKEN: The one you copied from your apps log
- PROFILE_NAME: The name of your security profile
- API_TOKEN: The API token you created
Insert those values into the command below, run it and you should see a message coming up in your browser!
curl -X POST -H "Authorization: Bearer API_TOKEN" -H "Content-Type: application/json" -d '{
    "tokens": ["DEV_DEVICE_TOKEN"],
    "profile": "PROFILE_NAME",
    "notification": {
        "message": "This is my demo push!"
    }
}' "https://api.ionic.io/push/notifications"
If you want it a bit more comfortable, I can recommend making those request with Postman, an awesome tool for testing APIs. The calls inside Postman for creating a dev push would look like the following.
The Headers for our notification: 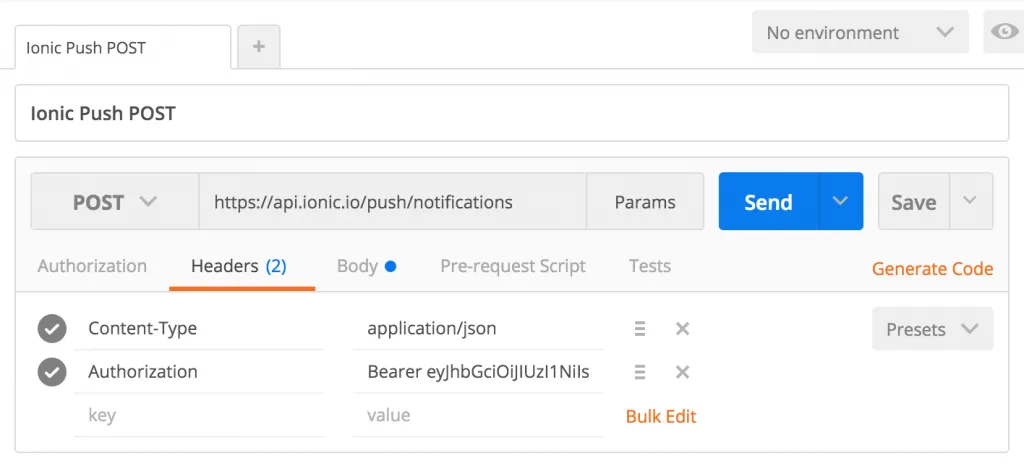
Setting up Ionic Push Notifications Profiles
To use the platform specific services of Apple and Google we need to configure some profiles and stuff, but the integration within Ionic.io has really become a lot easier by now. So let’s take a closer look at both platforms (or pick just he one you need!).
iOS
The Ionic team offers a very detailed guide on how to create the profiles you need, so I recommend you stick completely to this documentation on iOS Push Profiles.
Also, to generate these certificates you need a Mac and also need to be part of the Apple Developer Program. If you just joined now, you might also need to set up your general iOS Build Profiles, but you don’t need this step if you have already previously created iOS apps.
After going through the Push guide you need to have your App Id from the Identifier you created inside your Apple profile. Copy that ID and open your config.xml and add your ID:
<widget id="YOU_APP_ID" version="0.0.1" xmlns="http://www.w3.org/ns/widgets" xmlns:cdv="http://cordova.apache.org/ns/1.0">This is important because now your build iOS app will also have that bundle ID, which it needs to receive our pushes.
The last thing for iOS you need now is to upload the needed certificate into your Ionic.io security profile. You might have already done this as a final step of the Ionic guide, so just make sure that inside your security profile the Push Notification Service is set up correctly like this: 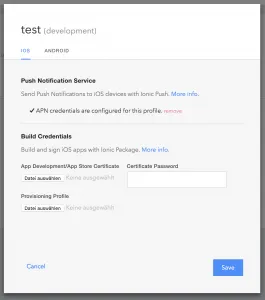
Android
The setup for Android is even a bit easier, because the certificate-signing-provisioning stuff get’s a lot easier. For Android you need to be inside the Google Developers program, and you also need to set up some basic keys (if you have never created Android apps before) using this documentation from Ionic.
If you have already worked with Android apps before you can skip that step.
The next step is to create a Google API project inside your dashboard and enabling Google Cloud Messaging. As I can’t describe it any better, please follow the advise on Android Push Profiles from Ionic.
After going through this steps you should have already added the API Key to your Ionic.io security profile (if not do now) and the result should look like this: 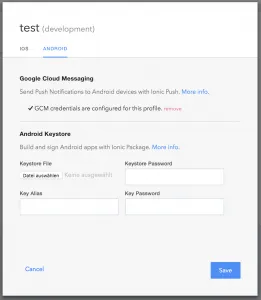
The last thing we need to change now is the GCM number for our - set GCM number for your project phonegap-plugin-push which we installed in the beginning with a dummy value. To make sure everything works correctly I recommend you remove the plugin and add it again but now with your GCM_PROJECT_NUMBER (which you can find inside your Google Dashboard). Also you n eed to add the android platform if you haven’t done already.
ionic platform add android
ionic plugin rm phonegap-plugin-push
ionic plugin add phonegap-plugin-push --variable SENDER_ID="GCM_PROJECT_NUMBER"
ionic config set gcm_key <your-gcm-project-number></your-gcm-project-number>
Send Real Ionic Push Notifications
Everything until here was smooth sailing and not the real world (ok maybe the Apple certificates very a bit hard). It’s time to get real, so start on your command line and set our Dev Push to false:
ionic config set dev_push falseFrom now on, we can only test our real Android and iOS Push Notifications on a real device!
Also, in order to see that we got the push you currently need to close the app to get a notification because the Push inside an open app will be handled directly. If you app is closed you can see the little banner at the top, so that’s what we want to see if everything ins working.
iOS
For iOS I recommend you simply build the app using ionic build ios and afterwards open the Xcode project. Why?
Because we need the log message of our token. And I often had a hard time getting to the log using a different method than this.
So if you run your app, you should find your device token inside the log. With that, and all the information you already had before, you can create a Push using the CURL or Postman commands we already had in the beginning. The result should look like this on an iPhone: 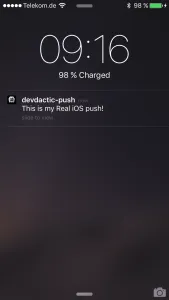
Android
Coming from a native iOS background, Android was a bit tricky for me, especially getting the device token.
So after running ionic build android you should find your APK inside platforms/android/build/outputs/apk/YOURAPP.apk. If you connect your Android device to your computer, you can now run adb install PATH_TO_YOUR_APP and have the app directly on your device.
Finally, we also need the device token, so I opened the Android Device Monitor running just monitor from the command line.
Inside the logs (have fun filtering for the right logs of your app!) you can find the token after the app starts somewhere in the onRegistration block just like in the image below.
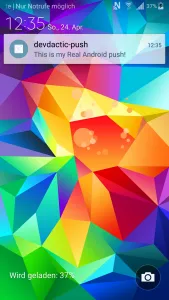
With that token, you can again perform the create push call using CURL or Postman and the result on Android looks like this (maybe cooler background on your device):
Ionic Push Notifications Help Section
Ok so there you have it, the complete setup guide for Ionic Push Notifcations. This last section is now meant to help with some general problems you might encounter along the way.
This section will be updated with new questions and problems you have!
Cordova Push Plugin Behaviour
If you want to change the behaviour of how a push is handled inside your app and what options you also have, check out the Github repo of the phonegap-plugin-push .
HTTP Error Codes
When you create your pushes and don’t receive anything on your device, you should always check the status of the created push using the UUID you get after making the POST. This helped me a lot to troubleshoot what was going on, and you can find a list for all the error codes inside the Ionic documentation.
Happy coding, Simon

