How to use Ionic In App Purchase with Capacitor Last update: 2020-06-16
If you want to use Ionic In App Purchase to earn additional income from your apps, you can use the Capacitor plugin for IAP but you also need some additional setup upfront.
In this post we will use the version two of the in app purchase plugin and make everything work with Capacitor! 
Before we get started with our App, there are actually a few things we need to configure for our native apps.
iOS App Setup
Let’s start with iOS since it’s this time actually easier and faster. First of all you need an app identifier - perhaps you already have an app then you can skip it, otherwise go ahead and create a new one inside your developer account.
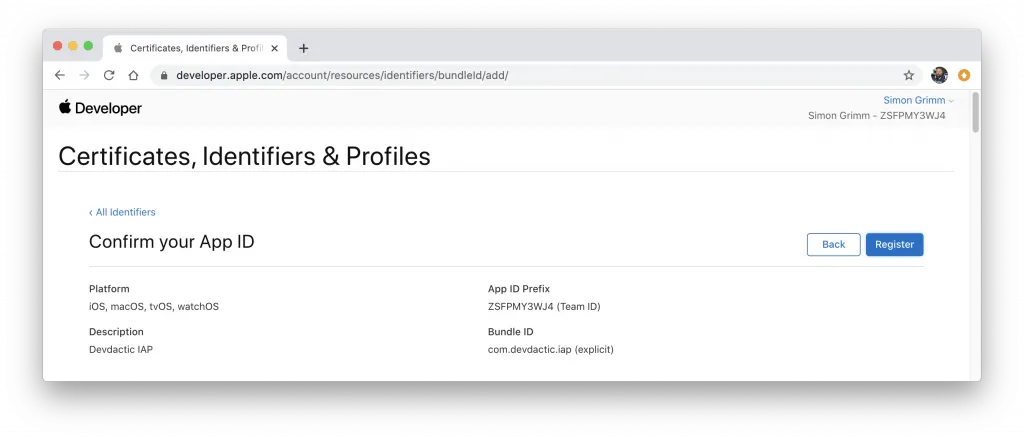
For this identifier we now also need to create an app inside App Store connect, which you might have done if your app is live already. Otherwise, go ahead and create a new app using the bundle identifier you specified in the first step.
Now within your app the important part begins: You need to set up products that can be purchased.
These products could be from 4 different categories like in the image below. 
Today we will focus on the first 2 categories, but using a subscription isn’t too complicated as well and mostly works the same once we get to the implementation.
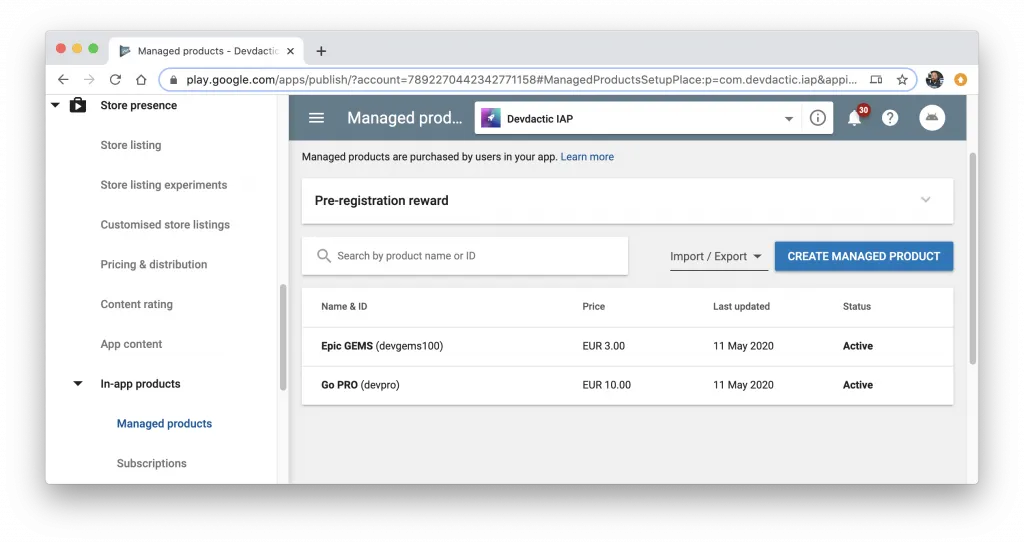
Go ahead and create 2 products, you can pick the same ID for them like I did so you code will also work nicely afterwards.
![]()
To later test everything, you should also add test users within App Store connect and then log in with them on your iOS device for testing the app later.
This is actually enough for iOS, the products will be available while testing our app and you don’t have to wait or perform any other specific steps.
Android App Setup
For Android, we actually need to upload a signed APK to test everything, so a bit more work upfront.
This means, you have to create a new app (or use your existing) inside the Google Play developer console, and fill out all the required information in order to actually upload a first version.
Once you are done with these things, you can start and add products, just like we did for iOS before! I recommend to use the same ID for the products, while the other information like description and pricing can be totally different if you want to.
Besides that, you also might want to create a gmail test account which you can later add as a tester to your app since it’s enough to put our app into the alpha/beta track to test the purchase!
Because you don’t want to pay real money while testing, you should put every tester email into the Licence Test section which you can find in the general settings for your Google Play developer console!
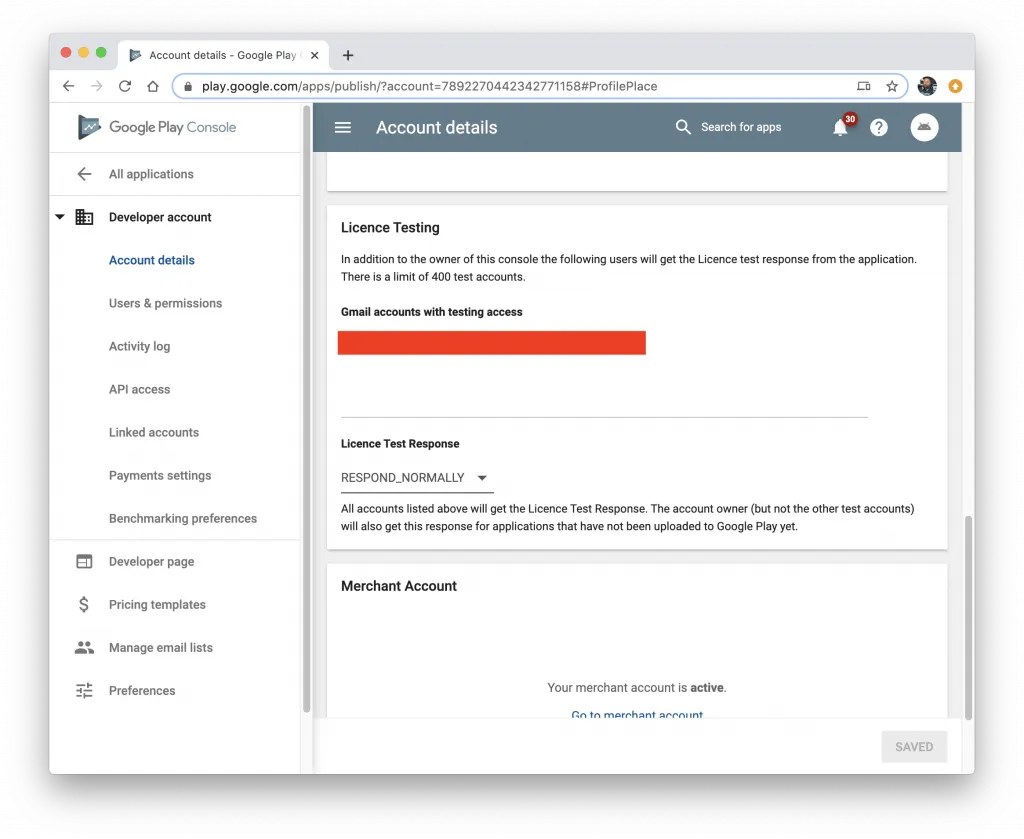
If the email is listed in here and the account is used on an Android device, you will see a notice that it’s a dummy transaction while testing the app!
Apparently, the products we added will only be available after like 6 hours or more, and we also need a real app build to test everything so let’s create our app now.
Ionic In App Purchase Implementation
First of all we can create our new app using the ID we used to create our iOS app, which will also be the bundle identifier for Android (which was set in your config.xml with Cordova in the past).
We can install the plugins we need directly with NPM since we don’t use Cordova, and afterwards add our native platforms after a first dummy build:
ionic start devdacticPurchase blank --type=angular --capacitor --package-id=com.devdactic.iap
cd ./devdacticPurchase

npm install @ionic-native/in-app-purchase-2
npm install cordova-plugin-purchase

ionic build

npx cap add ios
npx cap add android
In the past the Cordova plugin was added with a billing key for Android, but from my understanding after going through this issue it’s not really mandatory anymore and we don’t need to manually add any entry.
Like always with Ionic Native plugins we need to add them to our app/app.module.ts:
import { NgModule } from '@angular/core';
import { BrowserModule } from '@angular/platform-browser';
import { RouteReuseStrategy } from '@angular/router';

import { IonicModule, IonicRouteStrategy } from '@ionic/angular';
import { SplashScreen } from '@ionic-native/splash-screen/ngx';
import { StatusBar } from '@ionic-native/status-bar/ngx';

import { AppComponent } from './app.component';
import { AppRoutingModule } from './app-routing.module';
import { InAppPurchase2 } from '@ionic-native/in-app-purchase-2/ngx';

@NgModule({
  declarations: [AppComponent],
  entryComponents: [],
  imports: [BrowserModule, IonicModule.forRoot(), AppRoutingModule],
  providers: [
    StatusBar,
    SplashScreen,
    { provide: RouteReuseStrategy, useClass: IonicRouteStrategy },
    InAppPurchase2
  ],
  bootstrap: [AppComponent]
})
export class AppModule {}
Now we can use the plugin and we need to cover a few things:
- Register our products: We need to register them by using their ID, so hopefully you used the same ID for the IAP for both iOS and Android!
- Setup listeners: The plugin emits some events to which we can/should liste. These show the state of a product, and I recommend to check out the life-cycle diagram which shows the flow of states nicely!
- Fetch products: We can’t just show hard coded data for products, that will get you a rejection. You need to fetch the real data from iOS/Android and present it, which the plugin can do for us
The only thing we have hard coded are the IDs of the products so we can register them locally and then fetch the real information for them, which we will display the user later based on the products array.
Our listeners takes care of handling a purchase, so if a product moves into the approved state we need to perform any action that’s related to the purchase. Once we call verify and finish, the product state will change again:
- Consumables will go back to valid - they can be purchased again
- Non consumables will move to owned, and you will always get the owned state when you start the app and refresh the store again
In our case we simply perform some dummy operation like increasing the gems count or changing the boolean of a pro version.
Although the store should refresh on start, showing a restore button is sometimes a requirement. You can easily call the refresh in there again, and your handlers will retrieve all the information about your products once more.
Go ahead and change the home/home.page.ts to:
import { Component, ChangeDetectorRef } from '@angular/core';
import { Platform, AlertController } from '@ionic/angular';
import { InAppPurchase2, IAPProduct } from '@ionic-native/in-app-purchase-2/ngx';

const PRODUCT_GEMS_KEY = 'devgems100';
const PRODUCT_PRO_KEY = 'devpro';

@Component({
  selector: 'app-home',
  templateUrl: 'home.page.html',
  styleUrls: ['home.page.scss'],
})
export class HomePage {
  gems = 0;
  isPro = false;
  products: IAPProduct[] = [];

  constructor(private plt: Platform, private store: InAppPurchase2, private alertController: AlertController, private ref: ChangeDetectorRef) {
    this.plt.ready().then(() => {
      // Only for debugging!
      this.store.verbosity = this.store.DEBUG;

      this.registerProducts();
      this.setupListeners();

      // Get the real product information
      this.store.ready(() => {
        this.products = this.store.products;
        this.ref.detectChanges();
      });
    });
  }

  registerProducts() {
    this.store.register({
      id: PRODUCT_GEMS_KEY,
      type: this.store.CONSUMABLE,
    });

    this.store.register({
      id: PRODUCT_PRO_KEY,
      type: this.store.NON_CONSUMABLE,
    });

    this.store.refresh();
  }

  setupListeners() {
    // General query to all products
    this.store.when('product')
      .approved((p: IAPProduct) => {
        // Handle the product deliverable
        if (p.id === PRODUCT_PRO_KEY) {
          this.isPro = true;
        } else if (p.id === PRODUCT_GEMS_KEY) {
          this.gems += 100;
        }
        this.ref.detectChanges();

        return p.verify();
      })
      .verified((p: IAPProduct) => p.finish());


    // Specific query for one ID
    this.store.when(PRODUCT_PRO_KEY).owned((p: IAPProduct) => {
      this.isPro = true;
    });
  }

  purchase(product: IAPProduct) {
    this.store.order(product).then(p => {
      // Purchase in progress!
    }, e => {
      this.presentAlert('Failed', `Failed to purchase: ${e}`);
    });
  }

  // To comply with AppStore rules
  restore() {
    this.store.refresh();
  }

  async presentAlert(header, message) {
    const alert = await this.alertController.create({
      header,
      message,
      buttons: ['OK']
    });

    await alert.present();
  }

}
Now we should have an array of products and can display all information based on this - remember, these are our fetched products which contain exactly the price, description and everything we configured for our apps in the respective portals!
Quickly bring up your home/home.page.html and change it to:
<ion-header>
  <ion-toolbar color="primary">
    <ion-title>
      Devdactic IAP
    </ion-title>
  </ion-toolbar>
</ion-header>

<ion-content>
  <ion-list>
    <ion-item button *ngFor="let p of products" (click)="purchase(p)" detail="false">
      <ion-label class="ion-text-wrap">
        {{ p.title }}
        <p>{{ p.description }}</p>
      </ion-label>
      <ion-button slot="end">
        {{ p.price }} {{ p.currency }}
      </ion-button>
    </ion-item>
  </ion-list>

  <ion-button expand="full" (click)="restore()">Restore</ion-button>

  <ion-item>
    Gems: {{ gems }}
  </ion-item>
  <ion-item>
    Is Pro: {{ isPro }}
  </ion-item>
</ion-content>
Now the app is ready, and you can already test everything on your iOS device. But let’s also take the final step for Android.
Android Release Build with Capacitor
There’s no built in Capacitor command to build an APK, but by using gradlew (the native Android tooling) it becomes pretty easy.
First of all you need a release key for your app. If you don’t already have one, simply create a new one by running:
keytool -genkey -v -keystore android-release.keystore -alias release -keyalg RSA -keysize 2048 -validity 10000If you want an almost automatic build, you can now move that file to android/app/android-release.keystore and configure gradle so it picks up the file and signs your APK on the fly!
To do so, simply add the following lines to your android/gradle.properties:
RELEASE_STORE_FILE=./android-release.keystore
RELEASE_STORE_PASSWORD=xxx
RELEASE_KEY_ALIAS=xxx
RELEASE_KEY_PASSWORD=xxx
Make sure to use the password you used when creating your release key, and the alias will be “release” if you followed my method. Otherwise use your existing key and credentials!
Note: There are more secure ways to keep your signing credentials confident like reading from a file that you don’t commit to Git, but for now we can use this simple local approach.
Now we just need to tell the gradle build to use our signing config when the app is build, and to read the keystore file from the right path.
All of this can be changed right inside the first part of the android/app/build.gradle:
android {
    signingConfigs {
        release {
            storeFile file(RELEASE_STORE_FILE)
            storePassword RELEASE_STORE_PASSWORD
            keyAlias RELEASE_KEY_ALIAS
            keyPassword RELEASE_KEY_PASSWORD

            // Optional, specify signing versions used
            v1SigningEnabled true
            v2SigningEnabled true
        }
    }

    compileSdkVersion rootProject.ext.compileSdkVersion
    defaultConfig {
        applicationId "com.devdactic.iap"
        minSdkVersion rootProject.ext.minSdkVersion
        targetSdkVersion rootProject.ext.targetSdkVersion
        versionCode 1
        versionName "1.0"
        testInstrumentationRunner "androidx.test.runner.AndroidJUnitRunner"
    }
    buildTypes {
        release {
            minifyEnabled false
            proguardFiles getDefaultProguardFile('proguard-android.txt'), 'proguard-rules.pro'
            signingConfig signingConfigs.release
        }
    }
}
Note: Make sure to use your own bundle ID or exchange it after you copy this code! Also, if you want to upload a new build you can simply increase the versionCode in here!
That’s the beauty of Capacitor once again - we can tweak the native project build and commit these files, and the build will work exactly like this in the future without the fear that this code will be lost!
Finally we need to add the billing permission to the android/app/src/main/AndroidManifest.xml which usually the Cordova plugin automatically handles. Simply go ahead and add an entry at the bottom where you can also see the Capacitor default permissions:
<uses-permission android:name="com.android.vending.BILLING" />The final step is to build our APK, which we can do by navigating into the android folder and then simply running the gradle wrapper:
./gradlew assembleReleaseIf everything works correctly you should find your signed APK at android/app/build/outputs/apk/release/app-release.apk!
Go ahead and upload this file in your Play console and move it to the alpha/beta track for testing, where you also add your test emails.
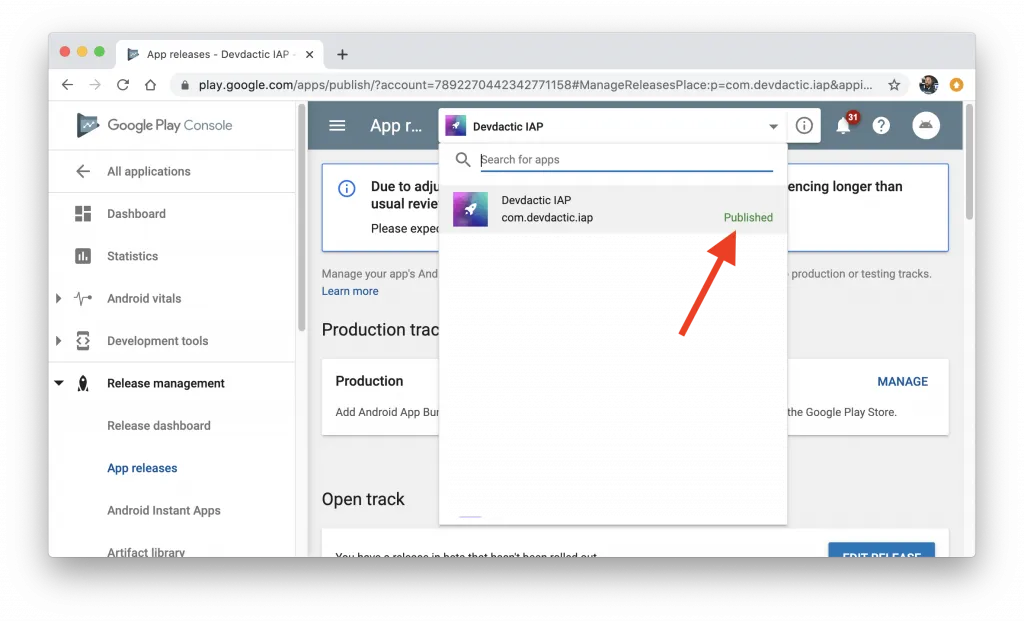
Important: If you are using a new app like I did, you need to wait until this build and the whole app is published. This doesn’t mean it’s live, but before this state, it’s still checked by Google and you won’t see any products in your app.
Conclusion
Configuring in app purchases isn’t too hard, while the testing can be tricky and confusing. Especially for Android you have to be patient until the app is approved and live, and you won’t be able to test anything before that point.
It made basically no difference to our app that we are using Capacitor, and we were even able to build a simple automatic release build by directly configuring our native projects!
You can also find more explanation while I talk about the whole process in the video below.