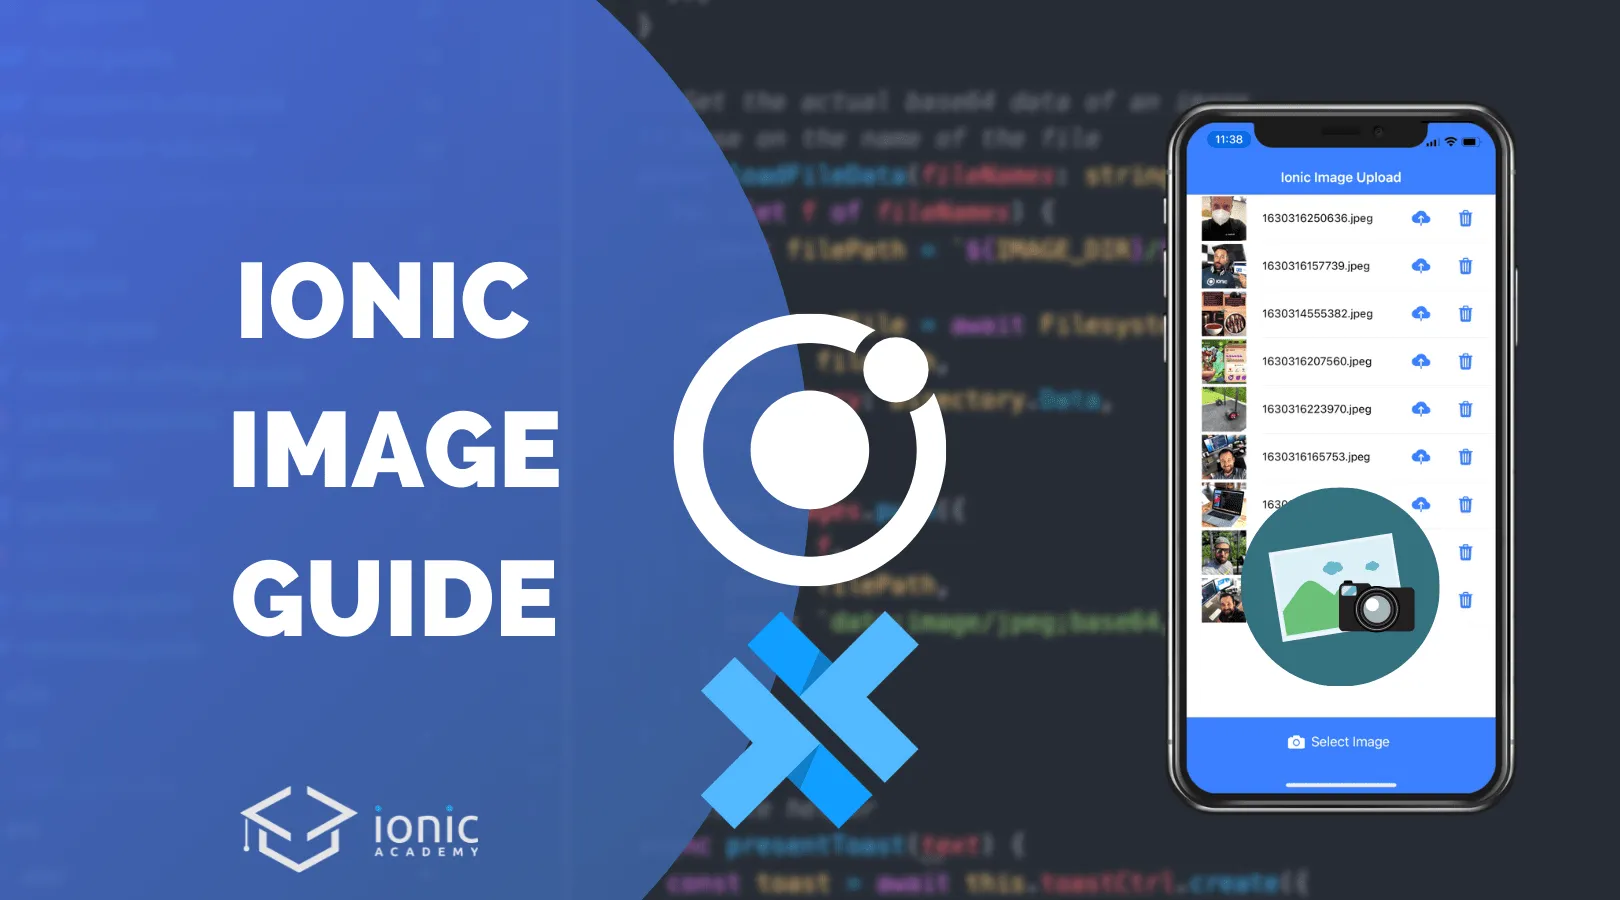
The Ionic Image Guide with Capacitor (Capture, Store & Upload) Last update: 2021-10-05
Capturing, storing and uploading image files with Ionic is a crucial task inside many applications, even if it’s just a small avatar of a user. At the same time, the process to handle images and the filesystem can be challenging sometimes.
Get the Code 🔐
Receive all the files of the tutorial right to your inbox and subscribe to my weekly no BS newsletter!
In this tutorial we will create a simple Ionic image capturing app using Capacitor to first take an image and store it locally, then display all local files and finally offer the ability to upload or delete them.
This app will work both inside the browser and as a native iOS and Android app because the Capacitor APIs work mostly the same across the different platforms!
On top of that I’ve added a simple PHP script at the end that will accept images and we can see a list of all the uploaded files when we run that PHP file within a local server!
Let’s have some fun with images today.
Starting our Ionic Image Upload App
We start as always with a blank new Ionic app and install both the Camera and Filesystem plugin from Capacitor in our new app:
ionic start devdacticImages blank --type=angular --capacitor
cd ./devdacticImages

npm i @capacitor/camera @capacitor/filesystem

# For desktop support
npm i @ionic/pwa-elements

# Add native platforms
ionic build
ionic cap add ios
ionic cap add android
After running the first build you can also already add the native platforms that you want to use.
To test the camera directly in our browser we can also install the pwa-elements which makes our life a lot easier.
In order to use that package, we have to add two lines in our src/main.ts right now:
import { enableProdMode } from '@angular/core';
import { platformBrowserDynamic } from '@angular/platform-browser-dynamic';

import { AppModule } from './app/app.module';
import { environment } from './environments/environment';
import { defineCustomElements } from '@ionic/pwa-elements/loader';

if (environment.production) {
	enableProdMode();
}

platformBrowserDynamic()
	.bootstrapModule(AppModule)
	.catch((err) => console.log(err));

defineCustomElements(window);
Because we are accessing the camera we also need to define the permissions for the native platforms, so let’s start with iOS and add the following permissions (with a good reason in a real app!) to your ios/App/App/Info.plist:
	<key>NSCameraUsageDescription</key>
	<string>To capture images</string>
	<key>NSPhotoLibraryAddUsageDescription</key>
	<string>To add images</string>
	<key>NSPhotoLibraryUsageDescription</key>
	<string>To store images</string>
For Android we need to do the same, also because we are using the Filesystem. Therefore, bring up the android/app/src/main/AndroidManifest.xml and after the line that already sets the internet permission add two more lines:
    <uses-permission android:name="android.permission.INTERNET" />
    <uses-permission android:name="android.permission.READ_EXTERNAL_STORAGE" />
    <uses-permission android:name="android.permission.WRITE_EXTERNAL_STORAGE" />
The last preparation we need is to include the HttpClientModule because our app should make a little request and upload the images in the end, so bring up the src/app/app.module.ts and import the module like this:
import { NgModule } from '@angular/core';
import { BrowserModule } from '@angular/platform-browser';
import { RouteReuseStrategy } from '@angular/router';

import { IonicModule, IonicRouteStrategy } from '@ionic/angular';

import { AppComponent } from './app.component';
import { AppRoutingModule } from './app-routing.module';
import { HttpClientModule } from '@angular/common/http';

@NgModule({
	declarations: [AppComponent],
	entryComponents: [],
	imports: [BrowserModule, IonicModule.forRoot(), AppRoutingModule, HttpClientModule],
	providers: [{ provide: RouteReuseStrategy, useClass: IonicRouteStrategy }],
	bootstrap: [AppComponent]
})
export class AppModule {}
Now the app is prepared for capturing images and working with the FS and we can dive into the core functionality.
The View for our Image Upload
Let’s start with the view, because that one is gonna be pretty boring.
We want to display a list of images, an each image element will have the image data (as base64 string), a name and a path to the file. For each of the elements we can trigger the upload or deletion.
At the bottom we will add a button to capture a new image that will then be added to our list.
Therefore, open the src/app/home/home.page.html and change it to:
<ion-header>
	<ion-toolbar color="primary">
		<ion-title> Ionic Image Upload </ion-title>
	</ion-toolbar>
</ion-header>

<ion-content>
	<h3 *ngIf="images.length == 0" class="ion-padding ion-text-center">Please Select Image!</h3>

	<ion-list>
		<ion-item *ngFor="let file of images; let i = index">
			<ion-thumbnail slot="start">
				<ion-img [src]="file.data"></ion-img>
			</ion-thumbnail>
			<ion-label class="ion-text-wrap"> {{ file.name }} </ion-label>
			<ion-button slot="end" fill="clear" (click)="startUpload(file)">
				<ion-icon slot="icon-only" name="cloud-upload"></ion-icon>
			</ion-button>
			<ion-button slot="end" fill="clear" (click)="deleteImage(file)">
				<ion-icon slot="icon-only" name="trash"></ion-icon>
			</ion-button>
		</ion-item>
	</ion-list>
</ion-content>

<ion-footer>
	<ion-toolbar color="primary">
		<ion-button fill="clear" expand="full" color="light" (click)="selectImage()">
			<ion-icon slot="start" name="camera"></ion-icon>
			Select Image
		</ion-button>
	</ion-toolbar>
</ion-footer>
It will underline all the missing functionality but we’ll now develop those important bits one by one.
Loading stored image files
To begin, we want to load all stored images from the filesystem. In the previous article about Ionic image handling with Cordova we also used Ionic Storage to store the file references and additional information, however we don’t really need that addition if we simply want to load all files!
The reason is simple, we can call readdir() to get the content of a folder and because we are storing all captured images in one folder, that’s enough to later resolve the image names to their data!
Note: If you want to store additional information with the image like a description, text, anything you want, then adding Ionic Storage to keep track of that information might make sense.
After reading the files from a directory we either get a list of file names or an error - because when you first run the app the folder (with the name stored in IMAGE_DIR) doesn’t even exist.
So if there’s an error, we simply create that folder with mkdir().
If we get a list of file names, we can continue by resolving the plain name to the actual content of each image inside the loadFileData() function.
This function will now iterate all the names, construct the real path by putting our folder name in front of it and then calling the readFile() function to get the content of that file.
The result will be pushed to our local array as a base64 string plus the name and the path to that image which will come in handy at a later point.
Now get started with the first changes in our src/app/home/home.page.ts:
import { Component, OnInit } from '@angular/core';
import { Filesystem, Directory } from '@capacitor/filesystem';
import { HttpClient } from '@angular/common/http';
import { LoadingController, Platform, ToastController } from '@ionic/angular';

const IMAGE_DIR = 'stored-images';

interface LocalFile {
	name: string;
	path: string;
	data: string;
}

@Component({
	selector: 'app-home',
	templateUrl: 'home.page.html',
	styleUrls: ['home.page.scss']
})
export class HomePage implements OnInit {
	images: LocalFile[] = [];

	constructor(
		private plt: Platform,
		private http: HttpClient,
		private loadingCtrl: LoadingController,
		private toastCtrl: ToastController
	) {}

	async ngOnInit() {
		this.loadFiles();
	}

	async loadFiles() {
		this.images = [];

		const loading = await this.loadingCtrl.create({
			message: 'Loading data...'
		});
		await loading.present();

		Filesystem.readdir({
			path: IMAGE_DIR,
			directory: Directory.Data
		})
			.then(
				(result) => {
					this.loadFileData(result.files.map((x) => x.name));
				},
				async (err) => {
					// Folder does not yet exists!
					await Filesystem.mkdir({
						path: IMAGE_DIR,
						directory: Directory.Data
					});
				}
			)
			.then((_) => {
				loading.dismiss();
			});
	}

	// Get the actual base64 data of an image
	// base on the name of the file
	async loadFileData(fileNames: string[]) {
		for (let f of fileNames) {
			const filePath = `${IMAGE_DIR}/${f}`;

			const readFile = await Filesystem.readFile({
				path: filePath,
				directory: Directory.Data
			});

			this.images.push({
				name: f,
				path: filePath,
				data: `data:image/jpeg;base64,${readFile.data}`
			});
		}
	}

	// Little helper
	async presentToast(text) {
		const toast = await this.toastCtrl.create({
			message: text,
			duration: 3000
		});
		toast.present();
	}

	async selectImage() {
		// TODO
	}

	async startUpload(file: LocalFile) {
		// TODO
	}

	async deleteImage(file: LocalFile) {
		// TODO
	}
}
This will make your app work for now, but since we haven’t captured any image the view will still be blank.
Capture and Store images with Capacitor
Now it’s time to get some images into our filesystem, and we can use the Capacitor camera plugin for this.
We are using the CameraResultType.Uri because I usually had better performance with that, but you can also give it a try and directly use base64 as a result type for getPhoto() which might make your life easier in some places.
Once we’ve captured an image that way it’s time to store it using the Capacitor Filesystem plugin.
Because we can only write strings to a new file with this plugin, we need to convert our image URI to a base64 string (you see why it might make sense to use base64 right away).
The process to read that file as a base64 string is a bit different for the web and native platforms, so we add a switch inside the readAsBase64() and either read that URI ior on the web, simply use the fetch API! The second requires an additional helper function for the blob conversion.
After getting all that data we can finally call writeFile() to create a new file inside our specific folder and then update our local list by calling the initial load again.
Note: If you simply retrieve the information for that new file you can directly add it to the local array, which would prevent the app from flicker during that reload. I just wanted to keep it simple for now, but that’s definitely a recommendation!
Now we can go ahead and replace the empty functions in our src/app/home/home.page.ts with:
// Add the new import
import { Camera, CameraResultType, CameraSource, Photo } from '@capacitor/camera';

async selectImage() {
    const image = await Camera.getPhoto({
        quality: 90,
        allowEditing: false,
        resultType: CameraResultType.Uri,
        source: CameraSource.Photos // Camera, Photos or Prompt!
    });

    if (image) {
        this.saveImage(image)
    }
}

// Create a new file from a capture image
async saveImage(photo: Photo) {
    const base64Data = await this.readAsBase64(photo);

    const fileName = new Date().getTime() + '.jpeg';
    const savedFile = await Filesystem.writeFile({
        path: `${IMAGE_DIR}/${fileName}`,
        data: base64Data,
        directory: Directory.Data
    });

    // Reload the file list
    // Improve by only loading for the new image and unshifting array!
    this.loadFiles();
}

  // https://ionicframework.com/docs/angular/your-first-app/3-saving-photos
  private async readAsBase64(photo: Photo) {
    if (this.plt.is('hybrid')) {
        const file = await Filesystem.readFile({
            path: photo.path
        });

        return file.data;
    }
    else {
        // Fetch the photo, read as a blob, then convert to base64 format
        const response = await fetch(photo.webPath);
        const blob = await response.blob();

        return await this.convertBlobToBase64(blob) as string;
    }
}

// Helper function
convertBlobToBase64 = (blob: Blob) => new Promise((resolve, reject) => {
    const reader = new FileReader;
    reader.onerror = reject;
    reader.onload = () => {
        resolve(reader.result);
    };
    reader.readAsDataURL(blob);
});
You can now already run the app, capture images both on the web and inside a native app and see the result in your list - even after reloading the app!
Upload Images and Delete Files
The last step is to perform some actions on our stored files, and the easy part of this is deleting a file.
For the deletion, all we have to do is call deleteFile() with the right path to our file (which is present in our LocalFile interface after loading the data) and the file is gone.
Uploading the file (in our case) requires the conversion to a blob: This might be different for you, but for the simple PHP script that I will show you in the end a blob is expected. Also, this is the usual way of handling a file upload in any backend, so it should fit most cases.
Once we got the blob from again using the fetch API on our base64 string of the image, we can create a FormData element and append our blob.
This data can be added to a simple POST request to your API endpoint, and that’s already the whole magic of uploading a locally stored file with Ionic!
Therefore bring up the src/app/home/home.page.ts one last time and change the last functions to:
// Add one more import
import { finalize } from 'rxjs/operators';

// Convert the base64 to blob data
// and create  formData with it
async startUpload(file: LocalFile) {
    const response = await fetch(file.data);
    const blob = await response.blob();
    const formData = new FormData();
    formData.append('file', blob, file.name);
    this.uploadData(formData);
}

// Upload the formData to our API
async uploadData(formData: FormData) {
    const loading = await this.loadingCtrl.create({
        message: 'Uploading image...',
    });
    await loading.present();

    // Use your own API!
    const url = 'http://localhost:8888/images/upload.php';

    this.http.post(url, formData)
        .pipe(
            finalize(() => {
                loading.dismiss();
            })
        )
        .subscribe(res => {
            if (res['success']) {
                this.presentToast('File upload complete.')
            } else {
                this.presentToast('File upload failed.')
            }
        });
}

async deleteImage(file: LocalFile) {
    await Filesystem.deleteFile({
        directory: Directory.Data,
        path: file.path
    });
    this.loadFiles();
    this.presentToast('File removed.');
}
If you now serve your application you can trigger the deletion and upload of files (if your API is running) but be aware that once you deploy your Ionic app to a real device, using localhost as the API URL won’t work anymore and you need to use the local IP of your computer instead.
The PHP Upload Logic
Now I’m not a PHP expert so I’ll make this as quick as possible.
If you have a server you can use that one, otherwise I simply recommend to download XAMPP and install it local.
I’m not going to cover that process since this is about Ionic image upload and not how to configure PHP. If you have set it up, you can first of all create a upload.php to accept uploads:
<?php
header('Access-Control-Allow-Origin: *');
$target_path = "uploads/";

$target_path = $target_path . basename( $_FILES['file']['name']);

if(move_uploaded_file($_FILES['file']['tmp_name'], $target_path)) {
    header('Content-type: application/json');
    $data = ['success' =>
true, 'message' => 'Upload and move success']; echo json_encode( $data ); } else{
header('Content-type: application/json'); $data = ['success' => false, 'message' => 'There was an
error uploading the file, please try again!']; echo json_encode( $data ); } ?>
Also, make sure to create a uploads folder next to this file, as it will copy the images into that folder and fail if it doesn’t exist.
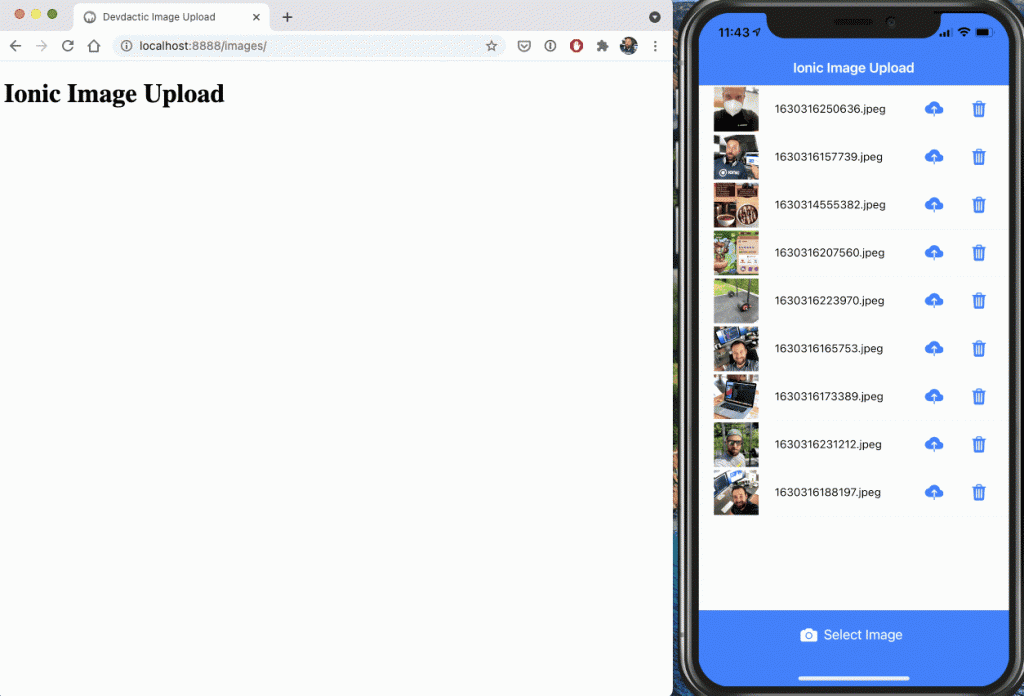
Additionally, to see the results of our hard work, I created a little HTML file that will scan the uploads folder and show them so we can directly see if our upload worked, create this as index.php next to the previous file and insert:
<!DOCTYPE html>
<html>
<head>
  <meta charset="utf-8">
  <meta name="viewport" content="initial-scale=1, maximum-scale=1, user-scalable=no, width=device-width">
  <title>Devdactic Image Upload</title>
</head>
<body>
<h1>Ionic Image Upload</h1>
  <?php
  $scan = scandir('uploads');
  foreach($scan as $file)
  {
    if (!is_dir($file))
    {
        echo '<h3>'.$file.'</h3>';
      echo '<img src="uploads/'.$file.'" style="width: 400px;"/><br />';
    }
  }
  ?>
</body>
</html>
You can now start your local MAMP server and navigate to http://localhost:8888 which will display your Ionic Images overview.
Again, in our example we used this URL for the upload, but this will only work if you run the app on the simulator. If you deploy the app to your iOS or Android device you need to change the URL to the IP of your computer!
Conclusion
Handling files and especially images with Ionic is crucial to most apps, and while we haven’t created an Ionic file explorer with Capacitor the functionality we added should be sufficient for most apps.
If you want to store more information with the image, you should also add Ionic Storage to keep track of that information and probably the path to each image instead of reading the filesystem.
But otherwise, I don’t recommend to store the image data within Ionic Storage and instead write that information to files (like we did) to keep your app as performant as possible!