Building an Ionic Fitness App with iOS HealthKit Integration Last update: 2017-08-01
If you want to create the next killer lifestyle fitness app, chances are high you want to log your measurements into the official Health app on iOS using HealthKit.
With the help of a Cordova plugin we can easily access the health data of a user to read and write the information our app needs.
In this tutorial we will read and set the height of a user, check his 24 hour step count (I know it’s embarrassing sometimes) and also log a specific type of workout to the iOS Health app.

The hardest part is actually figuring out which permissions you need and what parameters we need to pass to the health app, but we will go through all of it step by step.
Setting up our HealthKit App
First of all we need the Cordova plugin and the according Ionic native plugin to access the iOS Health app. There is another package which tries to cover both iOS and Android behaviour which I haven’t tested so far, perhaps you have some experience with it?
Anyway, we start our app and setup the plugin so go ahead and run:
ionic start devdacticHealth blank
cd devdacticHealth
ionic cordova plugin add com.telerik.plugins.healthkit
npm install --save @ionic-native/health-kit
Like always we need to import it to our module as well, so open your src/app/app.moudle.ts and insert:
import { BrowserModule } from '@angular/platform-browser';
import { ErrorHandler, NgModule } from '@angular/core';
import { IonicApp, IonicErrorHandler, IonicModule } from 'ionic-angular';
import { SplashScreen } from '@ionic-native/splash-screen';
import { StatusBar } from '@ionic-native/status-bar';
import { MyApp } from './app.component';
import { HomePage } from '../pages/home/home';
import { HealthKit } from '@ionic-native/health-kit';
@NgModule({
declarations: [
MyApp,
HomePage
],
imports: [
BrowserModule,
IonicModule.forRoot(MyApp)
],
bootstrap: [IonicApp],
entryComponents: [
MyApp,
HomePage
],
providers: [
StatusBar,
SplashScreen,
{provide: ErrorHandler, useClass: IonicErrorHandler},
HealthKit
]
})
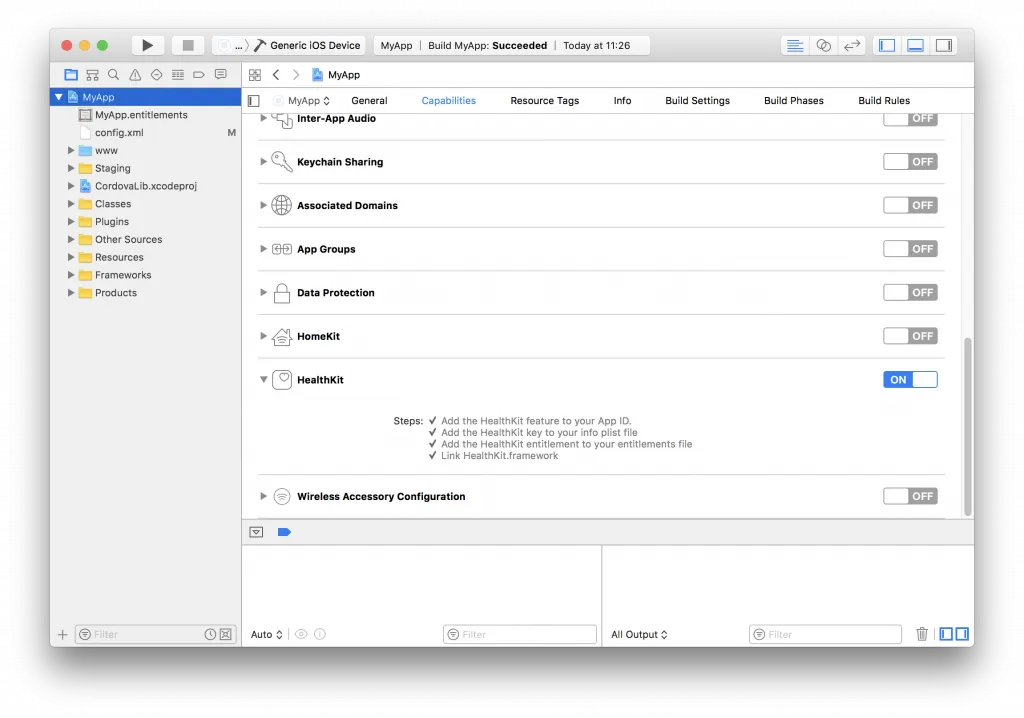
export class AppModule {}Also, when you build your app through Xcode you have to make sure that the Capabilities for HealthKit are enabled like in the image below!
Reading and Writing HealthKit Data
Now we got the basics and can start to code the actual app. Our view is quite unspectacular, we need an input to set our height and 2 more fields that will be readonly to show some data.
We will also craft a list of cards for all the workouts we get back from the Health app below, but this list might be empty in the beginning for your so don’t worry.
For now open your src/pages/home/home.html and change it to:
<ion-header>
  <ion-navbar>
    <ion-title>
      Devdactic Health
    </ion-title>
  </ion-navbar>
</ion-header>

<ion-content>
  <ion-item>
    <ion-label stacked>Set Height</ion-label>
    <ion-input type="text" [(ngModel)]="height" placeholder="My Height today (in cm)"></ion-input>
  </ion-item>
  <ion-item>
    <ion-label stacked>Current Height</ion-label>
    <ion-input type="text" [(ngModel)]="currentHeight" readonly></ion-input>
  </ion-item>
  <ion-item>
    <ion-label stacked>Steps last 24h</ion-label>
    <ion-input type="text" [(ngModel)]="stepcount" readonly></ion-input>
  </ion-item>

  <button ion-button full (click)="saveHeight()">Set Height</button>
  <button ion-button full (click)="saveWorkout()">Set a Workout</button>

  <ion-list>
    <ion-card *ngFor="let workout of workouts">
      <ion-card-header>{{ workout.calories }}</ion-card-header>
      <ion-card-content>
        <p>Activity: {{ workout.activityType }}</p>
        <p>Duration: {{ workout.duration / 100 }} min</p>
        <p>Date: {{ workout.startDate | date:'short' }}</p>
        <p>Distance: {{ workout.miles }} miles</p>
      </ion-card-content>
    </ion-card>
  </ion-list>
</ion-content>
Now we get to the meat of the HealthKit integration.
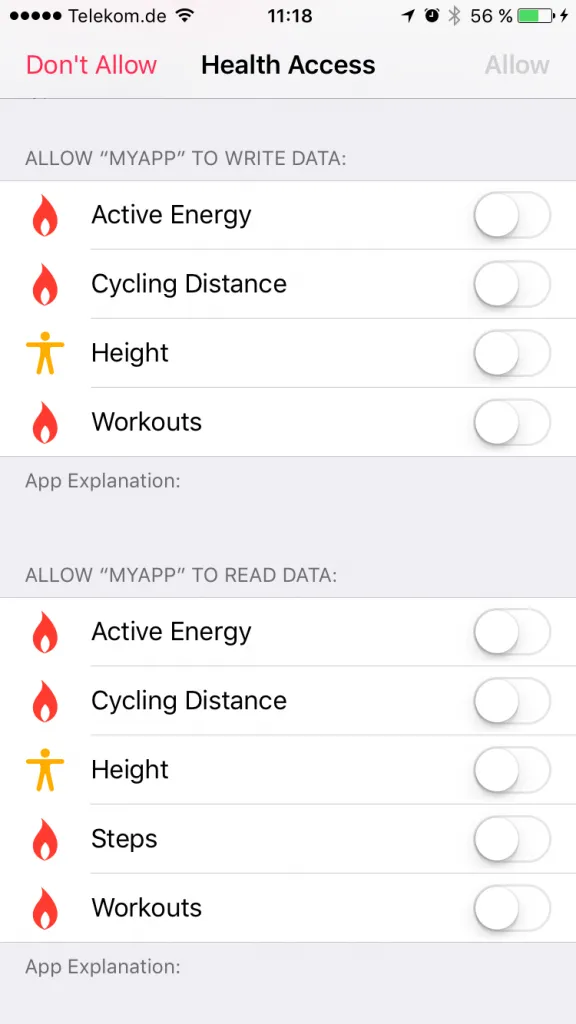
In our example we will ask for all the permissions we need upfront. You don’t have to do this and you can wait until you use a call to HealthKit, but if you request different things the pop-up might come up multiple times which can be quite annoying.
In our case we will only see this pop-up once asking for all the needed permissions
You can look through the official Apple documentation for some more general information and the names of the permissions which you might need.
I did not find everything so easy there, so you can see all available identifiers on the header file of this repo, which is way easier than going through all the Apple documentation!
Ok enough on permissions, actually setting our height is just one simple call with the new value as amount and also the unit (in our case “cm”).
Setting a workout requires a bit bigger object which we construct upfront. Of course you need to log some information for the workout, but once you got this object the call is again just one simple line!
For now open your src/pages/home/home.ts and insert:
import { HealthKit, HealthKitOptions } from '@ionic-native/health-kit';
import { Component } from '@angular/core';
import { NavController, Platform } from 'ionic-angular';

@Component({
  selector: 'page-home',
  templateUrl: 'home.html'
})
export class HomePage {
  height: number;
  currentHeight = 'No Data';
  stepcount = 'No Data';
  workouts = [];

  constructor(private healthKit: HealthKit, private plt: Platform) {
    this.plt.ready().then(() => {
      this.healthKit.available().then(available => {
        if (available) {
          // Request all permissions up front if you like to
          var options: HealthKitOptions = {
            readTypes: ['HKQuantityTypeIdentifierHeight', 'HKQuantityTypeIdentifierStepCount', 'HKWorkoutTypeIdentifier', 'HKQuantityTypeIdentifierActiveEnergyBurned', 'HKQuantityTypeIdentifierDistanceCycling'],
            writeTypes: ['HKQuantityTypeIdentifierHeight', 'HKWorkoutTypeIdentifier', 'HKQuantityTypeIdentifierActiveEnergyBurned', 'HKQuantityTypeIdentifierDistanceCycling']
          }
          this.healthKit.requestAuthorization(options).then(_ => {
            this.loadHealthData();
          })
        }
      });
    });
  }

  // Save a new height
  saveHeight() {
    this.healthKit.saveHeight({ unit: 'cm', amount: this.height }).then(_ => {
      this.height = null;
      this.loadHealthData();
    })
  }

  // Save a new dummy workout
  saveWorkout() {
    let workout = {
      'activityType': 'HKWorkoutActivityTypeCycling',
      'quantityType': 'HKQuantityTypeIdentifierDistanceCycling',
      'startDate': new Date(), // now
      'endDate': null, // not needed when using duration
      'duration': 6000, //in seconds
      'energy': 400, //
      'energyUnit': 'kcal', // J|cal|kcal
      'distance': 5, // optional
      'distanceUnit': 'km'
    }
    this.healthKit.saveWorkout(workout).then(res => {
      this.loadHealthData();
    })
  }

  // Reload all our data
  loadHealthData() {
    this.healthKit.readHeight({ unit: 'cm' }).then(val => {
      this.currentHeight = val.value;
    }, err => {
      console.log('No height: ', err);
    });

    var stepOptions = {
      startDate: new Date(new Date().getTime() - 24 * 60 * 60 * 1000),
      endDate: new Date(),
      sampleType: 'HKQuantityTypeIdentifierStepCount',
      unit: 'count'
    }

    this.healthKit.querySampleType(stepOptions).then(data => {
      let stepSum = data.reduce((a, b) => a + b.quantity, 0);
      this.stepcount = stepSum;
    }, err => {
      console.log('No steps: ', err);
    });

    this.healthKit.findWorkouts().then(data => {
      this.workouts = data;
    }, err => {
      console.log('no workouts: ', err);
      // Sometimes the result comes in here, very strange.
      this.workouts = err;
    });

  }
}
The final function we haven’t touched yet is the one that reloads our data whenever we update something or inside the constructor.
Again, some data can be received quite simple like the height here. For the step count we need to create a SampleType query with a timeframe, the units and the actual sample type which is HKQuantityTypeIdentifierStepCount for the user step count.
Also, we get back an array of step entries so we need to sum up this array to get to our final step count!
Finally loading the workouts is just one call, but in my example I got the actual array data inside the error block back. I haven’t figured out why this happens, perhaps just a problem on my side but that’s why I also set the workouts array inside the error completion block. All of data lives of course not only inside our app, you can open your Health app on the device and check the metrics we have changed like the health or the workouts of a user. You will find that there is a new workout added which will look somehow like this: 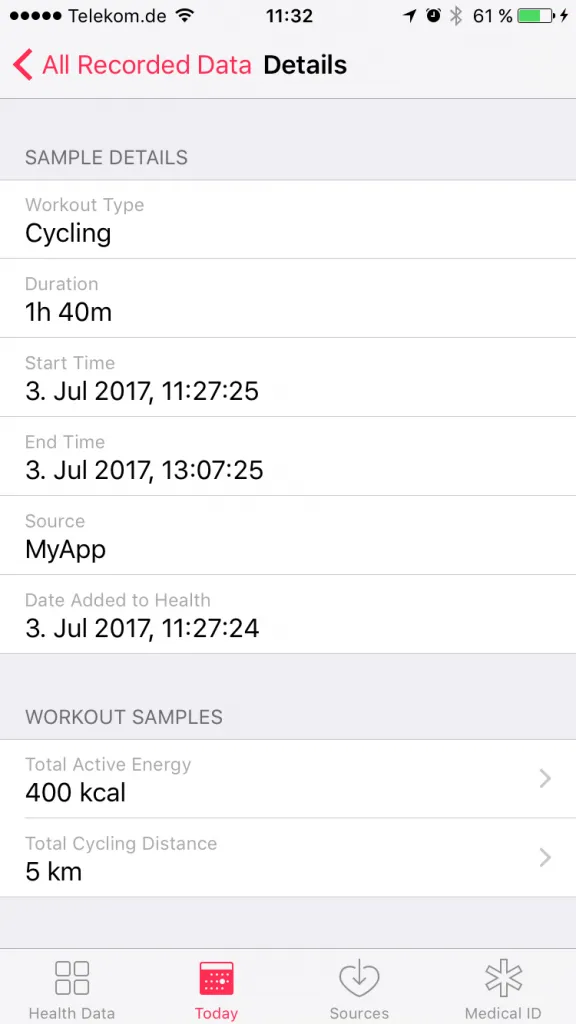
So now our data is persisted inside the official Health app on the device of a user!
Conclusion
A “super native” functionality like HealthKit integration can be accessed quite easily through Ionic and allows us to build fitness apps that talk directly with the core metrics of a users device!
To make the approach even more cross-platform we need to evaluate the plugin which covers Android as well, but perhaps anyone has already given that one a try?
You can also find a video version of this article below.