Ionic E2E Tests with Cypress.io Last update: 2021-06-15
Since the Ioniconf 2020, Cypress caught my attention as a better E2E testing framework instead of Protractor for our Angular Ionic apps, and we’ll see why in this tutorial.
With Angular v12, Portractir tests won’t be included by default and Angular also recommends other testing frameworks for E2E tests, one of them being Cypress.
Cypress runs your tests automatically while watching code changes, you get a decent dashboard for managing and debugging test cases, and you can easily see what Cypress does when running your tests as if it was a real person interacting with your app!
In this tutorial we will integrate Cypress into an existing Ionic Angular project and step through different cases to understand the basics of Cypress.
Setting up the Testing App with Cypress
Since a blank Ionic app doesn’t make sense today, I’ve prepared a little repository from a previous tutorial that we will use for testing.
To get started, clone the repository and install Cypress in the project. Since it didn’t create all the necessary folders for me initially, also run the open command afterwards to open the test suite and get the folders in your project:
ngit clone https://github.com/saimon24/devdactic-testing-app
cd ./devdactic-testing-app
npm i

# Install Cypress
npm install cypress --save-dev
npx cypress open

# Create a new testing file
touch cypress/integration/tests.spec.js
There are a few things I recommend to change to make Cypress work better with your IDE. First, set the jsHint version inside your package.json like this to remove some warnings you would get all the time:
{
  "jshintConfig": {
    "esversion": 6
  }
}
Next we enable Typescript support by adding Cypress inside the tsconfig.json types:
  "compilerOptions": {
    "types": ["cypress"],
    ...
  }
Finally we need to tell Cypress where to look for our Ionic application. By default this will be port 8100 when you serve the Ionic app, but of course use a different port if you don’t serve the Ionic app on that port.
We can define the URL now inside the cypress.json:
{
    "baseUrl": "http://localhost:8100"
}
Alright, that’s it for the configuration. Make sure you serve your Ionic application now before writing the tests as Cypress will look for the running instance on that port to use it for E2E tests.
Testing Navigation with Cypress
To start with something easy, let’s just try to move around in our app. By using cy.visit() we can easily check out the different routes of our app, so let’s start a new test suite inside the cypress/integration/tests.spec.js like this (create the file if you haven’t):
describe('Web App Testing', () => {

    it('shows the landing page', () => {
        cy.visit('/');
        cy.contains('Welcome to our shop!');
    });

    it('shows the about page', () => {
        cy.visit('/about');
        cy.contains('Lorem ipsum dolor sit amet');
    });

    it('shows 4 jewelery products', () => {
        cy.visit('/products?category=jewelery');
        cy.get('ion-card').should('have.length', '4');
    });
});
On our different pages we simply check if a string is contained on that page. On top of that we try to get an array of ion-card elements on the products page, which should result in 4 objects being displayed on that page (check the dummy app to see it in action).
One recommendation upfront: First make your tests fail!
Having all green tests is cool, but sometimes the test case was simply wrong and therefore you should always make your tests fail first, and then write the correct version to verify that your tests work like you think.
By now you should have the test runner open, if not simply run npx cypress open to see all available test cases:
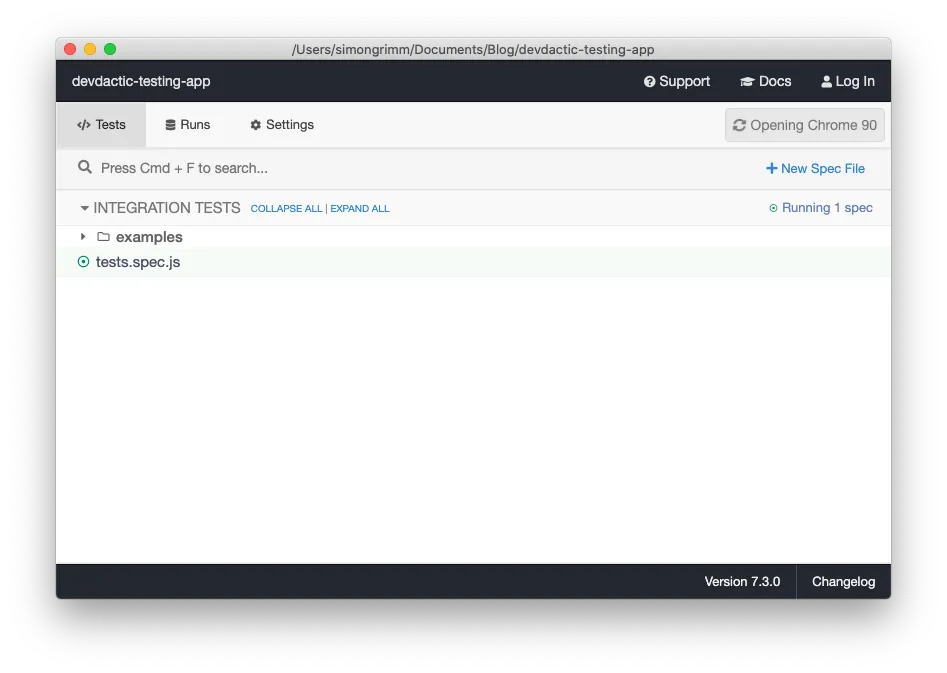
We are not interested in the examples, but we want to run our own file so click it and a new browser should open which runs your tests.

This view will now automatically refresh once we add more tests, so leave it open and let’s write some more advanced tests!
Testing Mobile Screens & Click Actions
You might have noticed that the test runner actually used the default full width version of our Ionic app. If you want to test mobile behaviour instead, you can easily add a beforeEach block which runs before every test and define the size of your viewport.
Let’s change that and also mimic a more natural usage of a mobile app by not routing to the different pages but actually clicking on the elements inside our side menu on small screens:
describe('Mobile App Testing', () => {

    beforeEach(() => {
        cy.viewport('iphone-x');
        cy.visit('/');
    });

    it('shows the about page', () => {
        cy.get('ion-menu-button').click();
        cy.get('ion-menu-toggle').eq(2).click();
        cy.contains('Lorem ipsum dolor sit amet');
    });

    it('shows 4 jewelery products', () => {
        cy.get('ion-menu-button').click();
        cy.get('ion-menu-toggle').eq(1).click();
        cy.get('ion-card').should('have.length', '20');
    });
});
You can have this suite next to the previous web tests or even create separate files. The test runner will now use a smaller frame for the app tests like this:
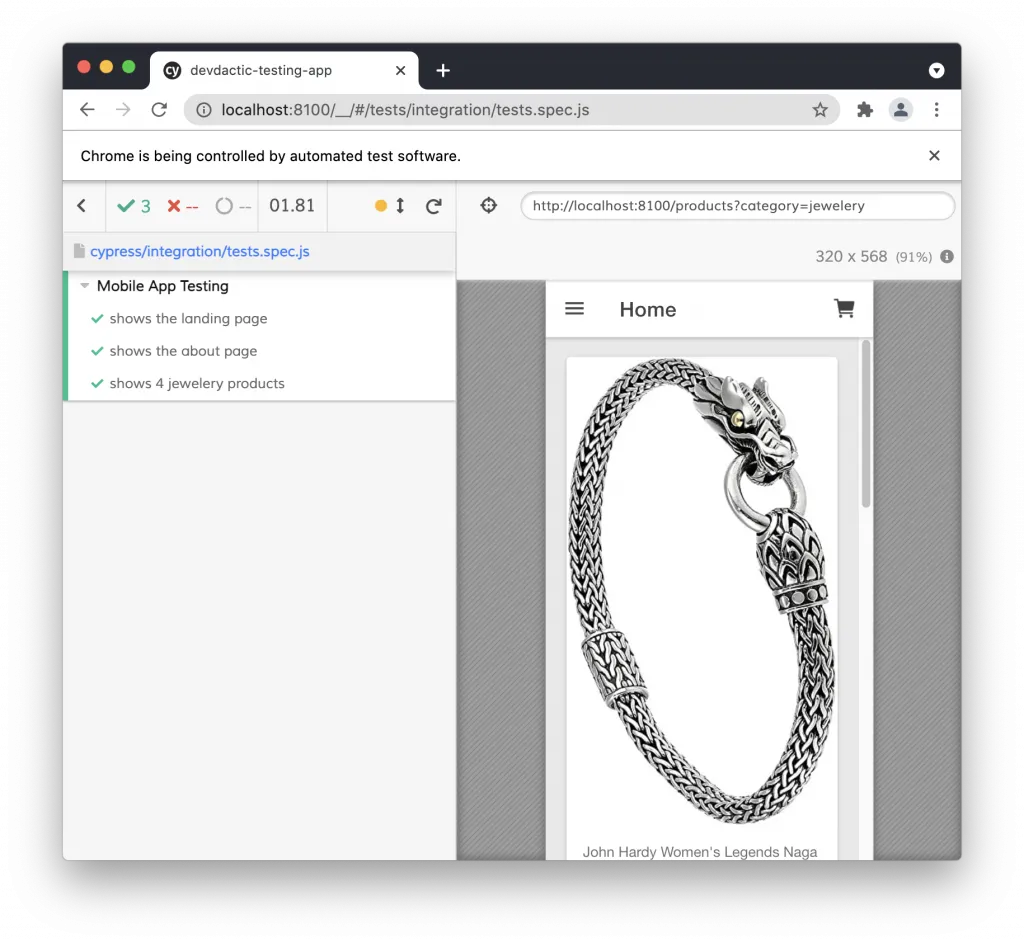
Keep in mind that this is only a smaller version of your app on the web - this is not a native app!
That means, you can’t really test Cordova stuff or actual native devices functionalities this way.
Using Cypress Commands
Let’s say you want to perform something all the time in your tests like clicking the menu and selecting a page. If you have a fixed set of instructions, you can refactor them as a Cypress command so let’s open the cypress/support/commands.js and create our own command to open the menu on a small screen:
Cypress.Commands.add('openMobileProducts', () => {
    cy.viewport('iphone-x');
    cy.get('ion-menu-button').click();
    cy.get('ion-menu-toggle').eq(1).click();
});
Defining a functions like this is enough to make them available for our test cases, and we can now replace the previous test by directly calling our custom command instead:
    it('shows 4 jewelery products', () => {
        cy.openMobileProducts();
        cy.get('ion-card').should('have.length', '20');
    });
While this is not a huge benefit in our example, you could also easily interact with something like Capacitor plugins to fake the storage in your app and fill it with some test data like this:
import { Plugins } from '@capacitor/core';
const { Storage } = Plugins;

Cypress.Commands.add('setDummyData', () => {
    cy.visit('/', {
      onBeforeLoad () {
        const arr = ['First Todo', 'another todo'];
        Storage.set({ key: 'todos', value: JSON.stringify(arr) });
      }
    });
});
If you find yourself writing the same chunk of code in your test cases over and over, remember that you should refactor it into a custom command to make life easier!
Testing CSS Values
Besides navigation we can also directly test CSS values and classes with Cypress. You’ve already seen that we can get() all the elements with a little query, and now we can also add some expectations about by using e.g. have.class or have.css.
All these assertions can be found on the Cypress assertion list which uses Chai under the hood.
Let’s make sure our web header gives the active-item class to a button once we navigate there, and we can even check if it has the exact color which should be the Ionic primary color:
describe('Web App Testing', () => {

    it('marks the active page', () => {
        cy.visit('/');
        cy.get('.header ion-button').should('have.length', '4');
        cy.get('.header ion-button').eq(0).should('have.class', 'active-item');

        cy.visit('/products');
        cy.get('.header ion-button').eq(1).should('have.class', 'active-item');

        cy.visit('/about');
        cy.get('.header ion-button').eq(2).should('have.class', 'active-item');
    });

    it('has a blue border when active', () => {
        cy.visit('/');
        cy.get('.header ion-button').eq(0).should('have.css', 'border-bottom', '2px solid rgb(56, 128, 255)');
    });

});
I encountered some problems with shadow DOM elements before, so be prepared to debug those lines in case your assertions fail.
Testing Responsive Elements
We can’t only test on one viewport size, we can also simply switch between sizes during our tests if we want to test the exact responsive behaviour of our app!
What made these tests work for me was adding a little wait() after changing the viewport.
You could now tests whether certain elements are visible or not. Only testing for their existence is sometimes not enough as they might still linger in the DOM but could be hidden, so a safer test for our responsive functinality could look like this:
describe('Web App Testing', () => {

    it('shows a menu on small screens', () => {
        cy.visit('/');
        cy.get('ion-menu-button').should('be.not.visible');
        cy.viewport('iphone-x');
        cy.wait(200);
        cy.get('ion-menu-button').should('be.visible');
    });

    it('shows a menu on small screens', () => {
        cy.visit('/');
        cy.get('.mobile-header').should('be.not.visible');
        cy.get('.header').should('be.visible');

        cy.viewport('iphone-x');
        cy.wait(200);
        cy.get('.mobile-header').should('be.visible');
        cy.get('.header').should('be.not.visible');
    });

});
We also don’t need to have an assertion that checks if something exists in the first place as that’s the default behaviour of Cypress. Your tests will fail anyway if a certain element doesn’t exist.
Accessing Specific Elements
For all the previous tests we tried to access Ionic components by tag or class name, or even by their position inside an array of potential elements.
This is not the recommended behaviour, and instead you should assign unique data-cy tags to elements in your code that you want to test. For example, the src/app/components/header/header.component.html has a button like this:
    <ion-button data-cy="btn-cart" fill="clear" color="dark" (click)="openCart()">
      <ion-icon slot="icon-only" name="cart"></ion-icon>
    </ion-button>
Given that name it’s super easy to directly access exactly this button inside a test:
describe('Web App Testing', () => {

    it('opens and closes the cart modal', () => {
        cy.visit('/');
        cy.get('[data-cy=btn-cart]').click();
        cy.get('ion-modal').should('exist');
        cy.get('ion-modal ion-header').contains('Cart');

        cy.get('[data-cy=btn-close]').click();
        cy.wait(200);
        cy.get('ion-modal').should('not.exist');
    });

});
Although it might look a bit ugly and blow up your templates code, this is the Cypress recommendation for accessing elements of your DOM.
Intercepting HTTP Calls & Fixtures
I never thought about faking API calls within E2E test but I noticed that it’s really THAT easy with Cypress!
We already got a folder called fixtures inside our Cypress folder which can hold some dummy data. Let’s add a new file cypress/fixtures/data.json in which we define just one result from the API that we use normally in our app:
[{
  "id": 1,
  "title": "Fjallraven - Foldsack No. 1 Backpack, Fits 15 Laptops",
  "price": 109.95,
  "description": "Your perfect pack for everyday use and walks in the forest. Stash your laptop (up to 15 inches) in the padded sleeve, your everyday",
  "category": "men's clothing",
  "image": "https://fakestoreapi.com/img/81fPKd-2AYL._AC_SL1500_.jpg"
}]
To use that information in the right place you need to know when and where your application makes a certain API call, but then you can simply intercept that call and supply your fixture data as a result instead.
You can then give it a name and wat until it’s called to make sure your fake provider was used, and afterwards check if we really only got one product with our dummy data:
describe('Web App Testing', () => {

    it('shows local test JSON', () => {
        cy.intercept({method: 'GET', url:'https://fakestoreapi.com/products'}, { fixture: 'data' }).as('getProducts');
        cy.visit('/products');
        cy.wait(['@getProducts']);
        cy.get('ion-card').should('have.length', '1');
    });

});
If you want to have even more power about those calls and return values or wildcards, make sure to check out the official intercept docs on it!
Capturing Screenshots & Videos
Maybe you also want to have a video of the test run in the end, or capture a screenshot in specific places of your test cases to compare it against a previous result later?
Well, Cypress already records a video when running it from the CLI, and to capture a screenshot simply add the screenshot() call in any place you wish:
describe('Mobile App Testing', () => {

    beforeEach(() => {
        cy.viewport('iphone-5');
        cy.visit('/');
    });

    it('shows 4 jewelery products', () => {
        cy.openMobileProducts();
        cy.get('ion-card').should('have.length', '20');
        cy.screenshot();
    });
});
Now this won’t work with the way we ran the tests before, so you need to run Cypress from your CL and since we only want our tests, we can pass the exact spec file we want to run like this:
npx cypress run --spec cypress/integration/tests.spec.jsAfter the command has finished you should now find a videos and screenshots folder inside the Cypress folder with the result of your test run!
Plugins & Integration
While we haven’t used them in this tutorial, I thought it’s worth mentioning that we can improve the testing environment and setup even more.
First, there’s a good amount of additional plugins for our favourite VSC IDE (or as well for others) like commands to generate test cases and blocks of code.
And since Cypress is basically a Node process there’s a good amount of additional Plugins that you can install to add even more power to your tests and test runner.
Conclusion
I highly enjoyed using Cypress tests for my Ionic project and will continue using it in the future when E2E tests are required.
Since Angular v12 anyway recommends a different framework besides Protractor, perhaps it’s about time you give Cypress a try when you want to automate some users tests for your Ionic app next time.
You can also find a video version of this tutorial below.