Building Ionic Desktop Apps with Capacitor and Electron Last update: 2020-04-21

If you want to build your Ionic app for multiple platforms you can not only build it for iOS, Android and a web app - you can also use the same code for building a desktop application!
All of this can be achieved with Electron, which can simply wrap your web application inside a native container that can be used as a real native desktop application on Windows and Mac OS!

We will build a simple Ionic app with Capacitor and add Electron to finally build a native desktop out of our basic application.
Setting up our App
We start with the most basic app and integrate all features one by one. So first of all we create a blank Ionic application with Capacitor support, then we need to install a few packages.
These packages will later help us to communicate with our Electron app from Angular and to package our final app.
It’s also recommended to update to the latest Angular version in case you are not yet on Angular 9.
Before you can add the Electron platform with Capacitor you also have to run an initial build, but then you can simply add the platform and open the Electron app.
Go ahead and run the following commands:
ionic start devdacticElectron blank --type=angular --capacitor
cd ./devdacticElectron

npm install ngx-electron electron
npm install electron-packager --save-dev

// If your template is not yet using Angular 9
ng update @angular/cli @angular/core --allow-dirty

// Needed to run once before adding Capacitor platforms
ionic build

npx cap add electron
npx cap open electron
Right now you might see an error - and to fix this quickly open the src/index.html and simply add a dot before the slash in this line (there is usually only a slash):
<base href="./" />Now you can run a build again and copy all contents to your electron platform and launch the app again. These are the commands you need to run whenever you want to create an updated Electron build:
ionic build && npx cap copy
npx cap open electron
In order to prepare our app we also need to open the app/app.module.ts and add the package we installed in the beginning:
import { NgModule } from '@angular/core';
import { BrowserModule } from '@angular/platform-browser';
import { RouteReuseStrategy } from '@angular/router';

import { IonicModule, IonicRouteStrategy } from '@ionic/angular';
import { SplashScreen } from '@ionic-native/splash-screen/ngx';
import { StatusBar } from '@ionic-native/status-bar/ngx';

import { AppComponent } from './app.component';
import { AppRoutingModule } from './app-routing.module';
import { NgxElectronModule } from 'ngx-electron';

@NgModule({
  declarations: [AppComponent],
  entryComponents: [],
  imports: [BrowserModule, IonicModule.forRoot(), AppRoutingModule,
    NgxElectronModule],
  providers: [
    StatusBar,
    SplashScreen,
    { provide: RouteReuseStrategy, useClass: IonicRouteStrategy }
  ],
  bootstrap: [AppComponent]
})
export class AppModule {}
Now we are ready to build out more functionality!
Capacitor Functions & Electron IPC
Since we can use most of the Capacitor core API on all platforms, we can use the plugins within our Electron app as well!
Let’s start with the easiest part, which is a simple view to call some functions. In a real application you would have to make sure your view is responsive since the desktop window can be resized just like a browser window.
Go ahead and change the home/home.page.html to:
<ion-header>
  <ion-toolbar>
    <ion-title>
      Devdactic Electron
    </ion-title>
  </ion-toolbar>
</ion-header>

<ion-content>
  <ion-button expand="full" (click)="scheduleNotification()">Schedule Notification</ion-button>

  <ion-input [(ngModel)]="myText"></ion-input>
  <ion-button expand="full" (click)="copyText()">Copy to Clipboard</ion-button>
</ion-content>
Now the interesting part begins, and we import a few Capacitor plugins to schedule a notification or to copy some text to the clipboard, which could then be pasted anywhere outside your app!
But there’s another important part here, which happens inside our constructor: We use the ngx-electron package we installed in the beginning to communicate with the Electron main process!
There’s a main and a renderer process, and these processes can communicate with each other.
For example, you might trigger an action from the menu of your app (not like the side menu in Ionic, really the desktop menu!) and the Angular application needs to react to this.
So we can use the ipcRenderer and listen for events, in our case the event name is trigger-alert and it will simply show a modal.
Now go ahead and change your home/home.page.ts to:
import { Component } from '@angular/core';
import { Plugins } from '@capacitor/core';

const { LocalNotifications, Clipboard, Modals } = Plugins;
import { ElectronService } from 'ngx-electron';

@Component({
  selector: 'app-home',
  templateUrl: 'home.page.html',
  styleUrls: ['home.page.scss']
})
export class HomePage {
  myText = 'My dummy text';

  constructor(private electronService: ElectronService) {
    if (this.electronService.isElectronApp) {
      console.log('I AM ELECTRON');
      this.electronService.ipcRenderer.on('trigger-alert', this.showElectronAlert);
    }
  }

  async showElectronAlert() {
    Modals.alert({
      title: 'Hello!',
      message: 'I am from your menu :)'
    });
  }

  async scheduleNotification() {
    LocalNotifications.schedule({
      notifications: [
        {
          title: 'My Test notification',
          body: 'My notificaiton content',
          id: 1,
          schedule: { at: new Date(Date.now() + 1000 * 5) },
          sound: null,
          attachments: null,
          actionTypeId: '',
          extra: null
        }
      ]
    });
  }

  async copyText() {
    Clipboard.write({
      string: this.myText
    });

    Modals.alert({
      title: 'Ok',
      message: 'Text is in your clipboard.'
    });
  }
}
We can use the 2 functions of our app already inside Ionic serve, but the other function only works when the message is received by the renderer.
Changing your Electron App
To emit events from our Electron main process we can apply some changes inside the electron folder that Capacitor created for us.
This folder contains a index.js, which is the entry point for the Electron app. This file defines the window, the menu and can contain more code specific to Electron.
Let’s apply a little change by altering the menu inside the electron/index.js:
const menuTemplateDev = [
  {
    label: 'Options',
    submenu: [
      {
        label: 'Open Dev Tools',
        click() {
          mainWindow.openDevTools();
        },
      },
    ],
  },
  {
    label: 'Simons Tools',
    submenu: [
      {
        label: 'Trigger Menu alert',
        click() {
          mainWindow.webContents.send('trigger-alert');
        }
      },
        {
          label: 'Quit!',
          click() {
            app.quit();
          }
      }
    ]
  }
];
Replace the previously existing menu with this snippet, which adds another label and submenu with two more buttons.
To make this menu appear also in the final application, look for the line towards the end of the electron/index.js file where we set the menu of our app. Right now it’s inside an if and will only be displayed in dev mode - move the line out of the if to show it all the time!
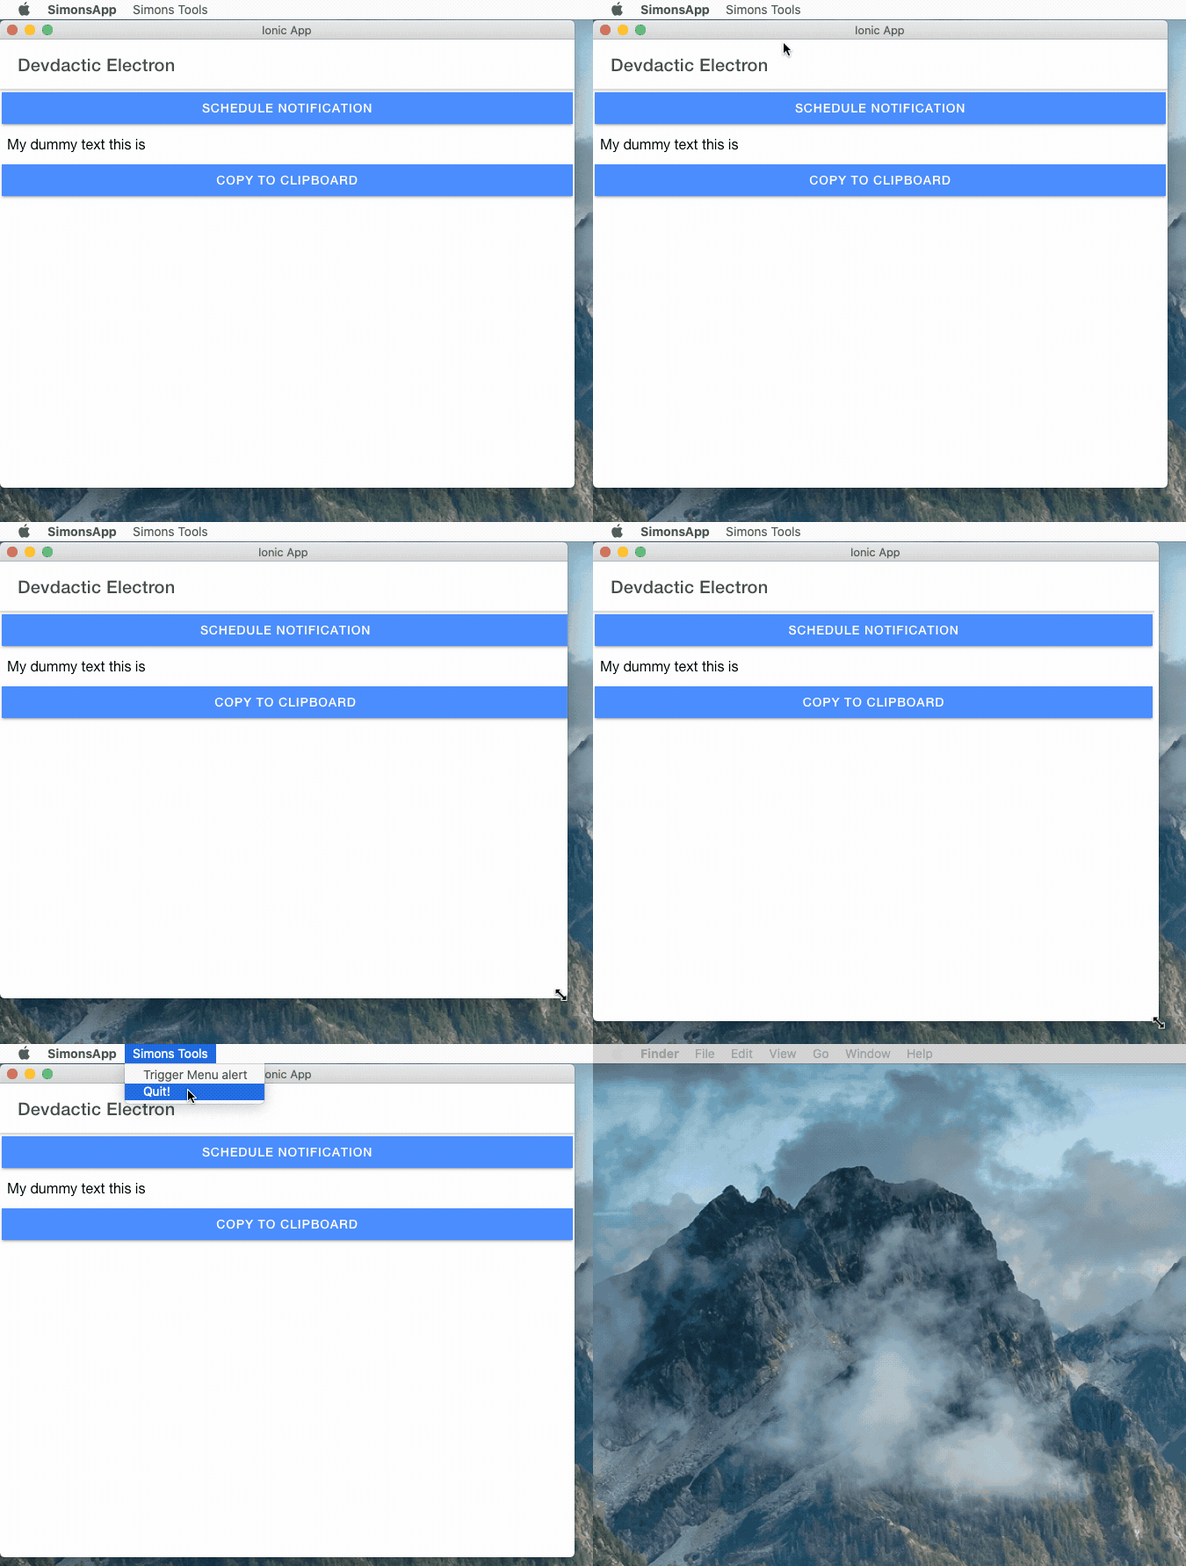
Menu.setApplicationMenu(Menu.buildFromTemplate(menuTemplateDev));Now we have changed the menu a bit, and we can already see the changes if we build our app again. We are now also able to send out the message from the menu, which is then recognized inside our Angular app and gives us a simple way to communicate between the two processes!
Building your Electron App
Finally you might also want to distribute your app at some point, and since we installed the Electron Packager in the beginning we can now add a small snippet to our package.json to easily build our app:
"electron:mac": "electron-packager ./electron SimonsApp --overwrite --platform=darwin --arch=x64 --prune=true --out=release-builds",
"electron:win": "electron-packager ./electron SimonsApp --overwrite --asar=true --platform=win32 --arch=ia32 --prune=true --out=release-builds --version-string.CompanyName=CE --version-string.FileDescription=CE --version-string.ProductName='Simons Electron App'"
You can now go ahead and run npm run electron:mac to build a native desktop app for Mac OS (or Windows). You will find the files inside the release-builds folder of your Ionic application, and you could use these files to distribute your application!
Conclusion
With Capacitor and the available APIs it becomes really easy to add Electron support to your Ionic app. Always make sure you get in the right mindset for desktop apps, since these will have a different size than a mobile app and need to be really responsive as well.
Also, with the inter process communication (IPC) shown in this tutorial you are ready to communicate between your Angular code and the Electron main process to build a powerful desktop application right from your Ionic Code!
You can also find a video version of this tutorial below.
