Ionic App Navigation with Login, Guards & Tabs Area Last update: 2020-09-22

Most apps require a certain kind of boilerplate code, with login, introduction page, routing and security - and that’s what we will create in this tutorial.
Get the Code 🔐
Receive all the files of the tutorial right to your inbox and subscribe to my weekly no BS newsletter!
We will start with a tabs template from Ionic and use Capacitor to store some data. Additionally we will secure the routing in our app and use a dummy JWT from the reqres.in API.
 At the end you’ll have a complete understanding about routing, securing your app, using guards and reactive forms and all the basics to start your next Ionic app!
If you need help with boilerplate more often, also check out my tool KickoffIonic.
You can also check out this updated example with Ionic 7 and Angular standalone components, created by Erwin from the community!
Starting our Ionic 5 App Navigation
As promised, we start with a tabs template today so we can save a bit of time. We generate a service that will keep our authentication logic, additional pages for the introduction and login screen, and guards to add some cool functionality to our app:
ionic start devdacticApp tabs --type=angular --capacitor
cd ./devdacticApp

# Manage your authentication state (and API calls)
ionic g service services/authentication

# Additional Pages
ionic g page pages/intro
ionic g page pages/login

# Secure inside area
ionic g guard guards/auth --implements CanLoad

# Show intro automatically once
ionic g guard guards/intro --implements CanLoad

# Automatically log in users
ionic g guard guards/autoLogin --implements CanLoad

# Install Capacitor Storage for v3
npm install @capacitor/storage
We can actually tell the CLI already which interface inside the guard should be implemented, which will come in very handy later.
Because we will do a little dummy HTTP request, also add the according module to the src/app/app.module.ts:
import { NgModule } from '@angular/core';
import { BrowserModule } from '@angular/platform-browser';
import { RouteReuseStrategy } from '@angular/router';

import { IonicModule, IonicRouteStrategy } from '@ionic/angular';

import { AppRoutingModule } from './app-routing.module';
import { AppComponent } from './app.component';

import { HttpClientModule } from '@angular/common/http';

@NgModule({
	declarations: [AppComponent],
	entryComponents: [],
	imports: [BrowserModule, IonicModule.forRoot(), AppRoutingModule, HttpClientModule],
	providers: [{ provide: RouteReuseStrategy, useClass: IonicRouteStrategy }],
	bootstrap: [AppComponent]
})
export class AppModule {}
We will use the Capacitor Storage plugin so we don’t need any additional Cordova plugin or other library.
Routing Setup
Our routing file is a bit messed up from the generation of additional pages, and we also want to add a few guards to our pages. We have the following guards for specific reasons:
- IntroGuard: Check if the user has already seen the intro and show the page if not
- AutoLoginGuard: Automatically log in a user on app startup if already authenticated before
- AuthGuard: Secure the internal pages of your app
We can use multiple guards for a page, and we use canLoad instead of canActivate since this will protect the whole lazy loaded module and not even load the file if the user is not allowed to access a path!
By securing the /tabs path at the top level, we also automatically secure every other path and page that you might later add to your tabs routing, since the guard will always be applied in that case.
Go ahead now and change the src/app/app-routing.module.ts to:
import { AuthGuard } from './guards/auth.guard';
import { NgModule } from '@angular/core';
import { PreloadAllModules, RouterModule, Routes } from '@angular/router';
import { IntroGuard } from './guards/intro.guard';
import { AutoLoginGuard } from './guards/auto-login.guard';

const routes: Routes = [
	{
		path: 'login',
		loadChildren: () => import('./pages/login/login.module').then((m) => m.LoginPageModule),
		canLoad: [IntroGuard, AutoLoginGuard] // Check if we should show the introduction or forward to inside
	},
	{
		path: 'intro',
		loadChildren: () => import('./pages/intro/intro.module').then((m) => m.IntroPageModule)
	},
	{
		path: 'tabs',
		loadChildren: () => import('./tabs/tabs.module').then((m) => m.TabsPageModule),
		canLoad: [AuthGuard] // Secure all child pages
	},
	{
		path: '',
		redirectTo: '/login',
		pathMatch: 'full'
	}
];
@NgModule({
	imports: [RouterModule.forRoot(routes, { preloadingStrategy: PreloadAllModules })],
	exports: [RouterModule]
})
export class AppRoutingModule {}
Since we renamed the paths a bit we now come to the tabs routing file with just an empty path, beacuse the “tabs” part of the URL will already be resolved. Check out my Angular routing tutorial for more information about routing as well.
Therefore, we remove the parent path and slightly change the redirect logic inside the src/app/tabs/tabs-routing.module.ts now as well:
import { NgModule } from '@angular/core';
import { RouterModule, Routes } from '@angular/router';
import { TabsPage } from './tabs.page';

const routes: Routes = [
	{
		path: '',
		component: TabsPage,
		children: [
			{
				path: 'tab1',
				loadChildren: () => import('../tab1/tab1.module').then((m) => m.Tab1PageModule)
			},
			{
				path: 'tab2',
				loadChildren: () => import('../tab2/tab2.module').then((m) => m.Tab2PageModule)
			},
			{
				path: 'tab3',
				loadChildren: () => import('../tab3/tab3.module').then((m) => m.Tab3PageModule)
			},
			{
				path: '',
				redirectTo: '/tabs/tab1',
				pathMatch: 'full'
			}
		]
	}
];

@NgModule({
	imports: [RouterModule.forChild(routes)],
	exports: [RouterModule]
})
export class TabsPageRoutingModule {}
We’ll see how each of the different guards work along the tutorial, for now we start with the introduction logic.
Creating the Introduction Page
Of course we could also make the tutorial page simply the first page, but usually you don’t want to bore your users more often than necessary with this page.
Therefore the idea is to use a guard that checks if we’ve already seen the tutorial and shows it if not. Otherwise, the guard will return true and the page the user wanted to access will be shown as usual.
Within our routing we have only added this guard to the login page, but of course it could be added to other pages as well. But since the login is the very first page that would be shown when the app is opened on a device, this is the place where it really makes sense.
The guard will make use of the Capacitor Storage plugin to check for a certain key, which is actually a string and not a boolean. This API only allows to store arbitrary strings, but that’s fine for us.
Go ahead now and change the src/app/guards/intro.guard.ts to:
import { Injectable } from '@angular/core';
import { CanLoad, Router } from '@angular/router';
import { Storage } from '@capacitor/storage';


export const INTRO_KEY = 'intro-seen';

@Injectable({
  providedIn: 'root'
})
export class IntroGuard implements CanLoad {

  constructor(private router: Router) { }

  async canLoad(): Promise<boolean> {
      const hasSeenIntro = await Storage.get({key: INTRO_KEY});
      if (hasSeenIntro && (hasSeenIntro.value === 'true')) {
        return true;
      } else {
        this.router.navigateByUrl('/intro', { replaceUrl:true });
        return false;
      }
  }
}
</boolean>
So if needed, we directly transition to the introduction without even showing the login page. That means, no flash of a page you don’t want to present!
Within the introduction we will add some slides, which are very common to present your apps features. You can even access the slides element from code as a ViewChild to interact directly with them to e.g. scroll to the next/previous slide.
Once the users finishes the introduction, we will write the according key to our storage and move on to our login page. From that point on, the user won’t see that page again!
Open the src/app/pages/intro/intro.page.ts and change it to:
import { Component, OnInit, ViewChild } from '@angular/core';
import { IonSlides } from '@ionic/angular';
import { INTRO_KEY } from 'src/app/guards/intro.guard';
import { Router } from '@angular/router';
import { Storage } from '@capacitor/storage';

@Component({
	selector: 'app-intro',
	templateUrl: './intro.page.html',
	styleUrls: ['./intro.page.scss']
})
export class IntroPage implements OnInit {
	@ViewChild(IonSlides) slides: IonSlides;

	constructor(private router: Router) {}

	ngOnInit() {}

	next() {
		this.slides.slideNext();
	}

	async start() {
		await Storage.set({ key: INTRO_KEY, value: 'true' });
		this.router.navigateByUrl('/login', { replaceUrl: true });
	}
}
Now we just need a cool UI for the introduction, and we will make the slides cover the whole screen and also use a background image. But from HTML, the only thing we need are the basics and the buttons to trigger our actions, so change the src/app/pages/intro/intro.page.html to:
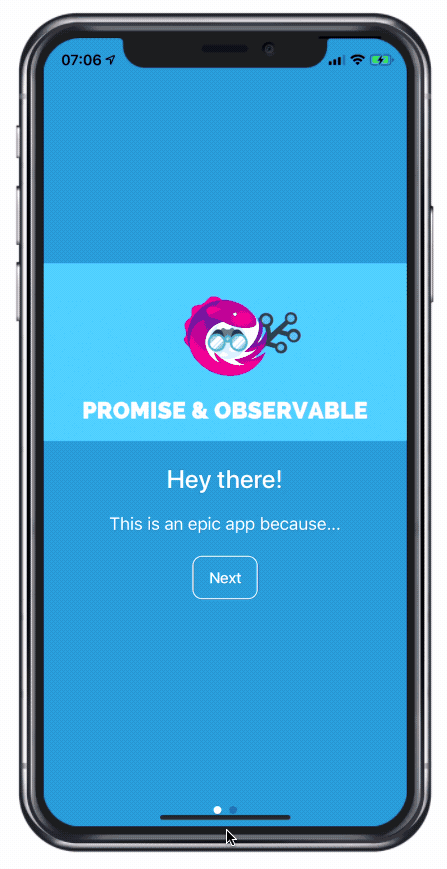
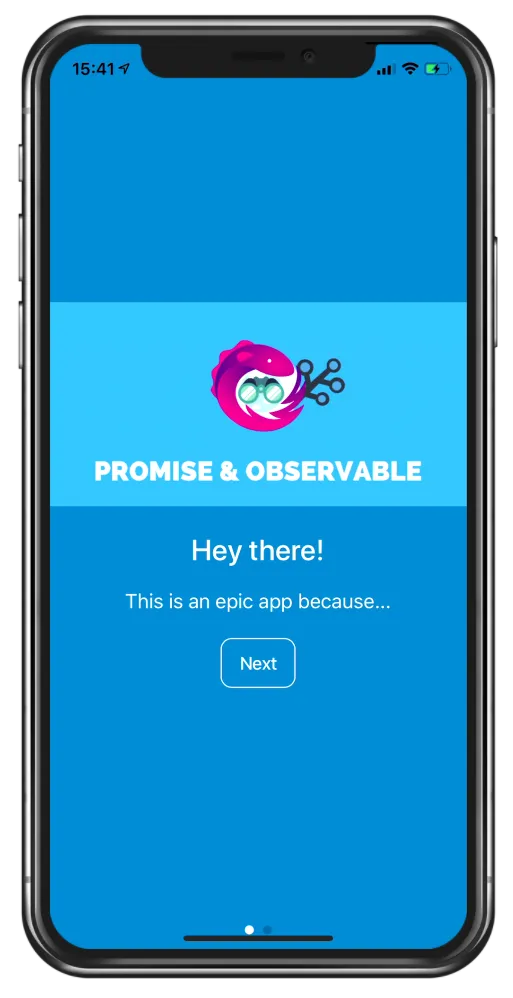
<ion-content>
	<ion-slides pager="true">
		<!-- Slide 1 -->
		<ion-slide>
			<ion-text color="light">
				<img
					src="/img/blog/wp-img/ionicacademy.com-wp-content-uploads-2019-10-async-code-course.webp"
				/>
				<h1>Hey there!</h1>
				<p>This is an epic app because...</p>
				<ion-button (click)="next()" fill="outline" color="light">Next</ion-button>
			</ion-text>
		</ion-slide>

		<!-- Slide 2 -->
		<ion-slide>
			<ion-text color="light">
				<img
					src="/img/blog/wp-img/ionicacademy.com-wp-content-uploads-2020-06-ionic-everywhere-course.webp"
				/>
				<h1>It's Ionic!</h1>
				<p>... it shows all the basics you need!</p>
				<ion-button (click)="start()" fill="outline" color="light">Start</ion-button>
			</ion-text>
		</ion-slide>
	</ion-slides>
</ion-content>
Now this won’t look that good out of the box, but with a few lines of CSS inside the src/app/pages/intro/intro.page.scss everything becomes a lot better:
ion-content {
	--background: #0081ca;
}

ion-slides {
	height: 100%;
	--bullet-background-active: #fff;
	--bullet-background: #000;
}
Now you can server your app and the first thing you should see is the introduction, which at the end guides you to the login.
If you reload the app at that point, the introduction won’t be shown again since the guard evaluates that we’ve already seen the intro.
Creating the Authentication Logic
Now on to the login, which will use a dummy implementation for retrieving a token. Usually you would plug in your own API, but by doing it like this we can actually replicate a real world scenario pretty accurate.
If you are building a real app check out Practical Ionic, my book to help you build more complex apps!
Our service will also hold a BehaviorSubject, which we initialise with null in the beginning for a reason: Our guard will later catch this very first value, which doesn’t indicate a lot about the authentication state of a user. Therefore, we can later easily filter out this value in the guard so users can directly access pages of our app if they were previously authenticated.
When we request a token after login, we will store it locally (with a bit of RxJS fun since Storage returns a Promise and we need an Observable) and also set the new value to our behaviour subject.
After that, everyone calling the subject would get the latest value, which is true after a login and set back to false in the case of a logout.
Continue with the src/app/services/authentication.service.ts and change it to:
import { Injectable } from '@angular/core';
import { HttpClient } from '@angular/common/http';
import { map, tap, switchMap } from 'rxjs/operators';
import { BehaviorSubject, from, Observable, Subject } from 'rxjs';

import { Storage } from '@capacitor/storage';

const TOKEN_KEY = 'my-token';

@Injectable({
	providedIn: 'root'
})
export class AuthenticationService {
	// Init with null to filter out the first value in a guard!
	isAuthenticated: BehaviorSubject<boolean> = new BehaviorSubject<boolean>(null);
	token = '';

	constructor(private http: HttpClient) {
		this.loadToken();
	}

	async loadToken() {
		const token = await Storage.get({ key: TOKEN_KEY });
		if (token && token.value) {
			console.log('set token: ', token.value);
			this.token = token.value;
			this.isAuthenticated.next(true);
		} else {
			this.isAuthenticated.next(false);
		}
	}

	login(credentials: { email; password }): Observable<any> {
		return this.http.post(`https://reqres.in/api/login`, credentials).pipe(
			map((data: any) => data.token),
			switchMap((token) => {
				return from(Storage.set({ key: TOKEN_KEY, value: token }));
			}),
			tap((_) => {
				this.isAuthenticated.next(true);
			})
		);
	}

	logout(): Promise<void> {
		this.isAuthenticated.next(false);
		return Storage.remove({ key: TOKEN_KEY });
	}
}
Now we got all the logic in place in the background so we can build the login and later secure the pages of our app.
Building a User Login Page
Since we want to build a cool login process with decent error messages, we are going to use a reactive form. And the first step to use it is to add it to the module of the page, in our case that’s the src/app/pages/login/login.module.ts:
import { NgModule } from '@angular/core';
import { CommonModule } from '@angular/common';
import { FormsModule, ReactiveFormsModule } from '@angular/forms';

import { IonicModule } from '@ionic/angular';

import { LoginPageRoutingModule } from './login-routing.module';

import { LoginPage } from './login.page';

@NgModule({
	imports: [CommonModule, FormsModule, IonicModule, LoginPageRoutingModule, ReactiveFormsModule],
	declarations: [LoginPage]
})
export class LoginPageModule {}
Now we will use a simply form with a few validators, that we will access from the template as well. In order to get the form elements more easily later we also define two getter functions for them at the bottom of the class.
Within the actual login we will use our service from before and handle the outcome: Either navigate forward or display an alert.
Notice how we set the replaceUrl key as an extra for the navigation! This prevents the case where users can simply navigate back in the history of your application on Android, and we’ll use it in a few places where it fits.
It’s basically the same as calling a setRoot() on the Ionic navigation controller, which also simply proxies the Angular router. Therefore continue with the src/app/pages/login/login.page.ts now:
import { AuthenticationService } from './../../services/authentication.service';
import { Component, OnInit } from '@angular/core';
import { FormBuilder, FormGroup, Validators } from '@angular/forms';
import { AlertController, LoadingController } from '@ionic/angular';
import { Router } from '@angular/router';
@Component({
selector: 'app-login',
templateUrl: './login.page.html',
styleUrls: ['./login.page.scss']
})
export class LoginPage implements OnInit {
credentials: FormGroup;
constructor(
private fb: FormBuilder,
private authService: AuthenticationService,
private alertController: AlertController,
private router: Router,
private loadingController: LoadingController
) {}
ngOnInit() {
this.credentials = this.fb.group({
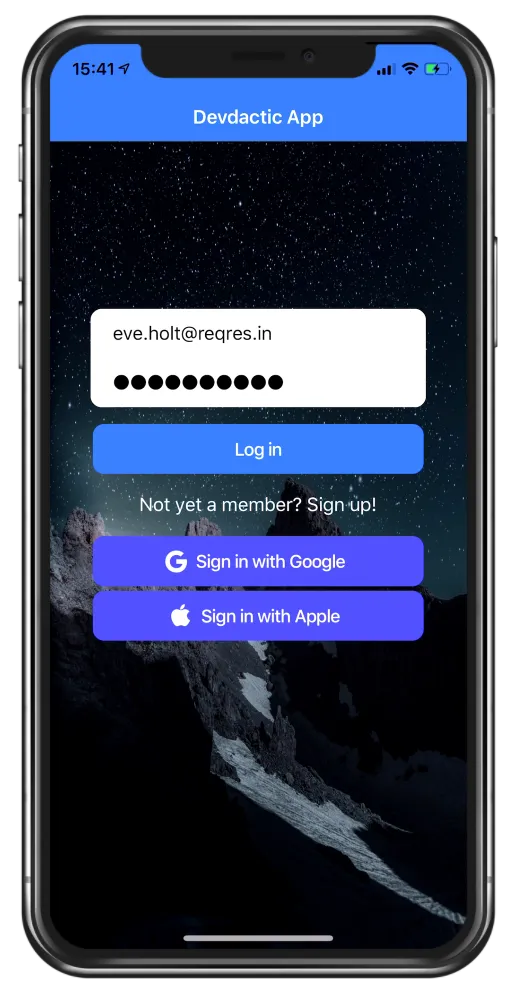
email: ['eve.holt@reqres.in', [Validators.required, Validators.email]],
password: ['cityslicka', [Validators.required, Validators.minLength(6)]]
});
}
async login() {
const loading = await this.loadingController.create();
await loading.present();
this.authService.login(this.credentials.value).subscribe(
async (res) => {
await loading.dismiss();
this.router.navigateByUrl('/tabs', { replaceUrl: true });
},
async (res) => {
await loading.dismiss();
const alert = await this.alertController.create({
header: 'Login failed',
message: res.error.error,
buttons: ['OK']
});
await alert.present();
}
);
}
// Easy access for form fields
get email() {
return this.credentials.get('email');
}
get password() {
return this.credentials.get('password');
}
}I’ve added some default values, which are the combination for a successful login request - change them and the request will fail (you hear that Galadriel voice?)!
We have prepared the form code, now we just need an according view around it. The form elements itself are not very special, but for each field we can check if it was touched or dirty, which basically meansthe user has interacted with the field.
You don’t want to show all possible errors to your users before any interaction happened!
It’s possible to check for specific errors of a field, and that’s what we check inside those blocks to show specific error messages for different errors, which occur because we added the validators to these form elements in the step before.
Additionally I added several buttons without functionality, but always make sure to use the type=button on buttons inside a form that shouldn’t trigger the submit - that type is only used on the button that should really trigger the submit action.
With that information, go ahead and change the src/app/pages/login/login.page.html:
<ion-header>
	<ion-toolbar color="primary">
		<ion-title>Devdactic App</ion-title>
	</ion-toolbar>
</ion-header>

<ion-content>
	<form (ngSubmit)="login()" [formGroup]="credentials">
		<div class="input-group">
			<ion-item>
				<ion-input type="email" placeholder="Email" formControlName="email"></ion-input>
			</ion-item>
			<div *ngIf="(email.dirty || email.touched) && email.errors" class="errors">
				<span *ngIf="email.errors?.required">Email is required</span>
				<span *ngIf="email.errors?.email">Email is invalid</span>
			</div>
			<ion-item>
				<ion-input type="password" placeholder="Password" formControlName="password"></ion-input>
			</ion-item>
			<div *ngIf="(password.dirty || password.touched) && password.errors" class="errors">
				<span *ngIf="password.errors?.required">Password is required</span>
				<span *ngIf="password.errors?.minlength">Password needs to be 6 characters</span>
			</div>
		</div>

		<ion-button type="submit" expand="block" [disabled]="!credentials.valid">Log in</ion-button>
		<ion-button type="button" expand="block" color="light" fill="clear"
			>Not yet a member? Sign up!
		</ion-button>

		<ion-button type="button" expand="block" color="tertiary">
			<ion-icon name="logo-google" slot="start"></ion-icon>
			Sign in with Google
		</ion-button>
		<ion-button type="button" expand="block" color="tertiary">
			<ion-icon name="logo-apple" slot="start"></ion-icon>
			Sign in with Apple
		</ion-button>
	</form>
</ion-content>
This doesn’t look very special yet, but you can spice up basically every view in about minutes with some additional CSS. For example, we could define a background image, use some rounded borders and colors for distinction like this inside the src/app/pages/login/login.page.scss:
ion-content {
	--padding-top: 40%;
	--padding-start: 10%;
	--padding-end: 10%;
	--background: url('https://images.unsplash.com/photo-1536431311719-398b6704d4cc?ixlib=rb-1.2.1&ixid=eyJhcHBfaWQiOjEyMDd9&auto=format&fit=crop&w=1234&q=80')
		0 0/100% 100% no-repeat;
}

.input-group {
	background: #fff;
	border-radius: 10px;
	overflow: hidden;
	margin-bottom: 15px;
}

.errors {
	font-size: small;
	color: #fff;
	background: var(--ion-color-danger);
	padding-left: 15px;
	padding-top: 5px;
	padding-bottom: 5px;
}
Now we’ve got a lovely login screen that should bring us to the inside area upon successful login!
 I’ve left out the signup screen, but I’m quite sure you are capable of adding the page and building it almost like the login with this information.
Adding the Logout
This part is actually quite boring but necessary to test out our further security features. We’ve already created a logout inside the services previously, so let’s now just add a function ton the first page of the inside area, which is the src/app/tab1/tab1.page.ts:
import { AuthenticationService } from './../services/authentication.service';
import { Component } from '@angular/core';
import { Router } from '@angular/router';

@Component({
	selector: 'app-tab1',
	templateUrl: 'tab1.page.html',
	styleUrls: ['tab1.page.scss']
})
export class Tab1Page {
	constructor(private authService: AuthenticationService, private router: Router) {}

	async logout() {
		await this.authService.logout();
		this.router.navigateByUrl('/', { replaceUrl: true });
	}
}
To call that, let’s just add a button to the src/app/tab1/tab1.page.html and we are good to go:
<ion-header>
	<ion-toolbar>
		<ion-title> Tab 1 </ion-title>
	</ion-toolbar>
</ion-header>

<ion-content>
	<ion-button expand="full" (click)="logout()">Logout</ion-button>
</ion-content>
The logout will bring you back to the login, but what you notice is that you can e.g. directly navigate to the URL http://localhost:8100/tabs/tab1/ although you are not authenticated.
That’s actually no surprise because we haven’t added the code for our guard that should protect our inside are.
Protecting Pages with the Auth Guard
In the beginning we used a guard to perform a quick check if we’ve seen the tutorial already, now we want to check if a user is allowed to enter a certain page.
That means, within the guard we need to check the authentication state from our service, and because that would be way too easy, there’s a bit more complexity in here:
The initial value of the behaviour subject inside the service is null. If we would simply retrieve that value inside the guard, any direct access of a page (like inside a web application) would be forbidden since the guard assumes an unauthenticated user.
It’s not a huge deal for a mobile application, but if you are using it on the web, or later direct links to open pages of your mobile app, this is a very annoying behaviour.
Therefore, we filter out the null value inside the guard and only then check the authentication state.
Go ahead and change the src/app/guards/auth.guard.ts to:
import { AuthenticationService } from './../services/authentication.service';
import { Injectable } from '@angular/core';
import { CanLoad, Router } from '@angular/router';
import { Observable } from 'rxjs';
import { filter, map, take } from 'rxjs/operators';

@Injectable({
	providedIn: 'root'
})
export class AuthGuard implements CanLoad {
	constructor(private authService: AuthenticationService, private router: Router) {}

	canLoad(): Observable<boolean> {
		return this.authService.isAuthenticated.pipe(
			filter((val) => val !== null), // Filter out initial Behaviour subject value
			take(1), // Otherwise the Observable doesn't complete!
			map((isAuthenticated) => {
				if (isAuthenticated) {
					return true;
				} else {
					this.router.navigateByUrl('/login');
					return false;
				}
			})
		);
	}
}
There are also cases when your guard evaluates to true, but the app simply doesn’t change: In these cases, the problem is usually that the Observable is not complete.
Basically, the guard is still listening and doesn’t end, but we have fixed this by using take(1), which will take only one result and then complete the Observable!
Now you can log in, directly access any of the tabs pages with a URL like http://localhost:8100/tabs/tab1, and after a logout, those pages aren’t accessible anymore and you would be redirected to the login.
Very simple mechanism, but powerful to protect the inside area of your application.
Automatic Login
If the user was previously authenticated and then closes the app, the user would still start on the login page again right now. But we can actually automatically forward authenticated users to the inside area with a little trick!
We will use our third guard as a check if the current user is authenticated using basically the same logic like the previous authentication guard.
But this time, we will handle the result a bit differently and forward authenticated users to the inside area.
Go ahead and change our last pipe inside the src/app/guards/auto-login.guard.ts to:
import { Injectable } from '@angular/core';
import { CanLoad, Router } from '@angular/router';
import { Observable } from 'rxjs';
import { AuthenticationService } from '../services/authentication.service';
import { filter, map, take } from 'rxjs/operators';

@Injectable({
	providedIn: 'root'
})
export class AutoLoginGuard implements CanLoad {
	constructor(private authService: AuthenticationService, private router: Router) {}

	canLoad(): Observable<boolean> {
		return this.authService.isAuthenticated.pipe(
			filter((val) => val !== null), // Filter out initial Behaviour subject value
			take(1), // Otherwise the Observable doesn't complete!
			map((isAuthenticated) => {
				console.log('Found previous token, automatic login');
				if (isAuthenticated) {
					// Directly open inside area
					this.router.navigateByUrl('/tabs', { replaceUrl: true });
				} else {
					// Simply allow access to the login
					return true;
				}
			})
		);
	}
}
This guard was only added to our login page in the beginning, but could (like the other guards) be used in different places as well.
But now, every authenticated users will be logged in directly!
Conclusion
This tutorial was a basic example for a very common use case, an introduction with login screen before tabs navigation.
With a simple routing setup and helpful guards, you have by now already a powerful template for the rest of your application!