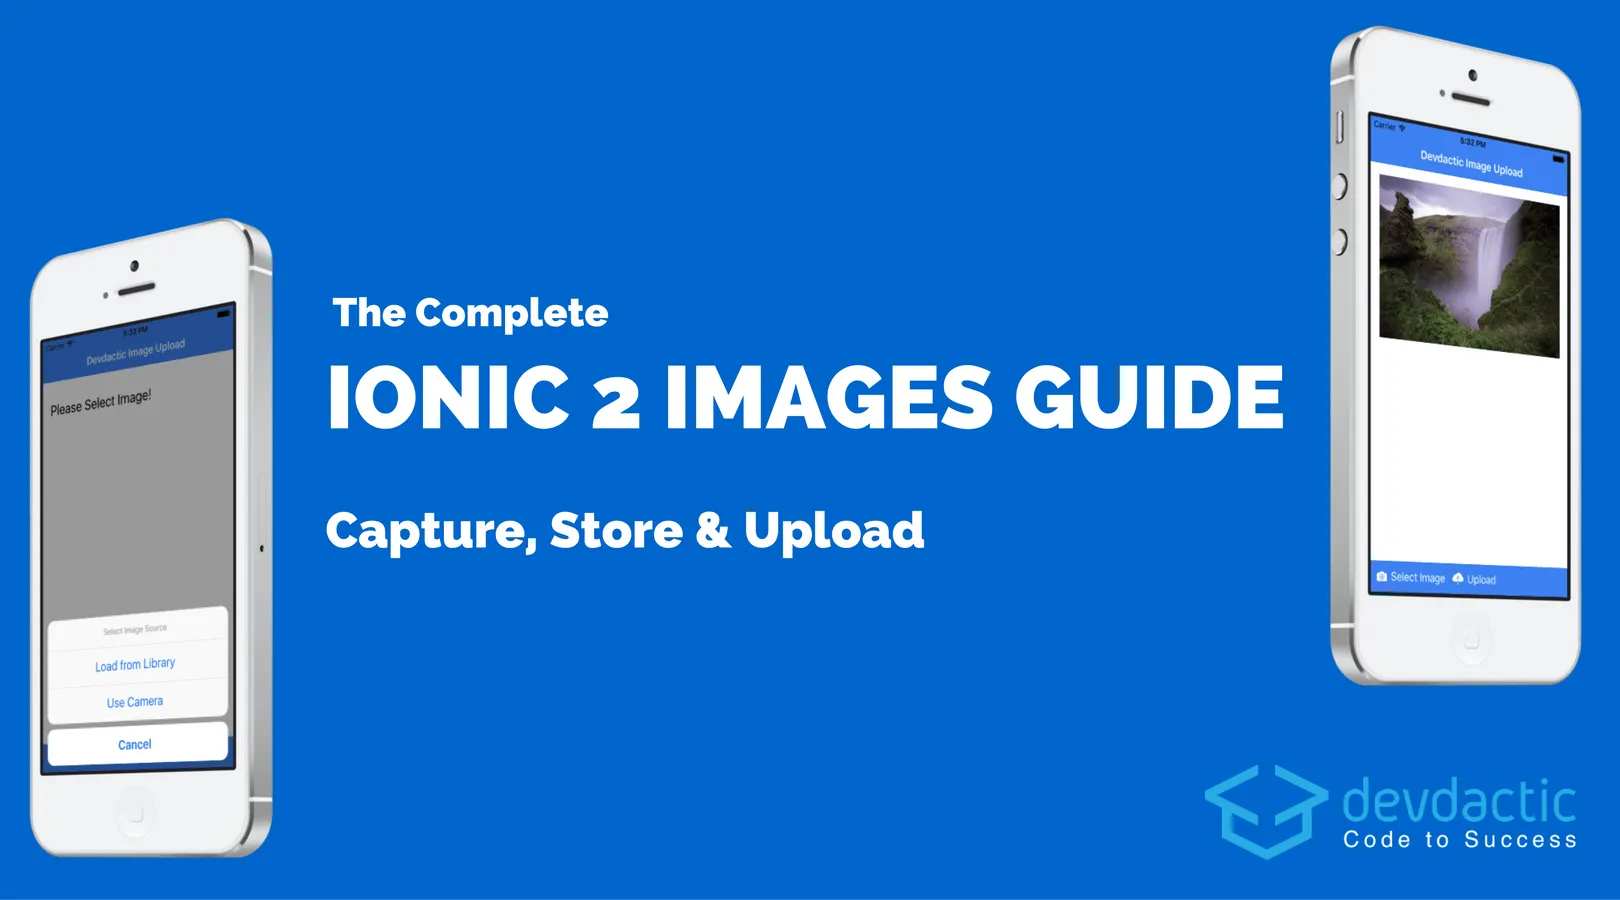
The Complete Ionic Images Guide (Capture, Store & Upload) Last update: 2016-11-24
In this guide to Ionic images we will learn to capture images from library & camera, copy files on your device and build a simple PHP upload to a server.
This Tutorial was updated for Ionic 3.2!
In this article we will build a simple app to capture images (camera/ library), store it in our apps folder and finally build a simple PHP server to upload our captured images. You don’t need PHP knowledge, this is just an example for a backend and a very simple one as well.
Prerequisite
Learning Ionic can become overwhelming, I know that feeling. Is learning from tutorials and videos sometimes not enough for you? Then I got something for you.
If you want to learn Ionic with step-by-step video courses, hands-on training projects and a helpful community who has your back, then take a look at the Ionic Academy.
Starting our Ionic Images App
First of all we create a new blank Ionic app. Additional we install a bunch of Cordova plugins, so go ahead and run:
ionic start devdactic-imageupload-2 blank
cd devdactic-imageupload-2
npm install --save @ionic-native/camera @ionic-native/file @ionic-native/file-path @ionic-native/transfer
ionic plugin add cordova-plugin-camera --save
ionic plugin add cordova-plugin-file --save
ionic plugin add cordova-plugin-file-transfer --save
ionic plugin add cordova-plugin-filepath --save
In detail these plugins are used for:
- cordova-plugin-camera: Needed for using the Ionic native camera
- cordova-plugin-file: Needed for copying the result of the camera into our filesystem
- cordova-plugin-file-transfer: Needed for uploading files
- cordova-plugin-filepath: Utility for fixing some Android paths to files
To load all of our plugins we have to add them to our src/app/app.module.ts, so go ahead and change it to:
import { BrowserModule } from '@angular/platform-browser';
import { ErrorHandler, NgModule } from '@angular/core';
import { IonicApp, IonicErrorHandler, IonicModule } from 'ionic-angular';
import { SplashScreen } from '@ionic-native/splash-screen';
import { StatusBar } from '@ionic-native/status-bar';

import { MyApp } from './app.component';
import { HomePage } from '../pages/home/home';

import { File } from '@ionic-native/file';
import { Transfer } from '@ionic-native/transfer';
import { FilePath } from '@ionic-native/file-path';
import { Camera } from '@ionic-native/camera';

@NgModule({
  declarations: [
    MyApp,
    HomePage
  ],
  imports: [
    BrowserModule,
    IonicModule.forRoot(MyApp)
  ],
  bootstrap: [IonicApp],
  entryComponents: [
    MyApp,
    HomePage
  ],
  providers: [
    StatusBar,
    SplashScreen,
    File,
    Transfer,
    Camera,
    FilePath,
    {provide: ErrorHandler, useClass: IonicErrorHandler}
  ]
})
export class AppModule {}
Now we are ready to use them all with the latest version of Ionic Native!
Building the Ionic images capturing class
To start the capturing process we need to distinguish between camera and library, therefore we will display the user a simple action sheet with those options. Also, we already import all the stuff we need later so don’t worry if they are marked as unused at this point.
Make sure to add all your plugins to the constructor as well, as this is needed since Ionic Native 3!
We work with the already generated home page, so open the src/pages/home/home.ts and replace everything inside with:
import { Component } from '@angular/core';
import { NavController, ActionSheetController, ToastController, Platform, LoadingController, Loading } from 'ionic-angular';
import { File } from '@ionic-native/file';
import { Transfer, TransferObject } from '@ionic-native/transfer';
import { FilePath } from '@ionic-native/file-path';
import { Camera } from '@ionic-native/camera';
declare var cordova: any;
@Component({
selector: 'page-home',
templateUrl: 'home.html'
})
export class HomePage {
lastImage: string = null;
loading: Loading;
constructor(public navCtrl: NavController, private camera: Camera, private transfer: Transfer, private file: File, private filePath: FilePath, public actionSheetCtrl: ActionSheetController, public toastCtrl: ToastController, public platform: Platform, public loadingCtrl: LoadingController) { }
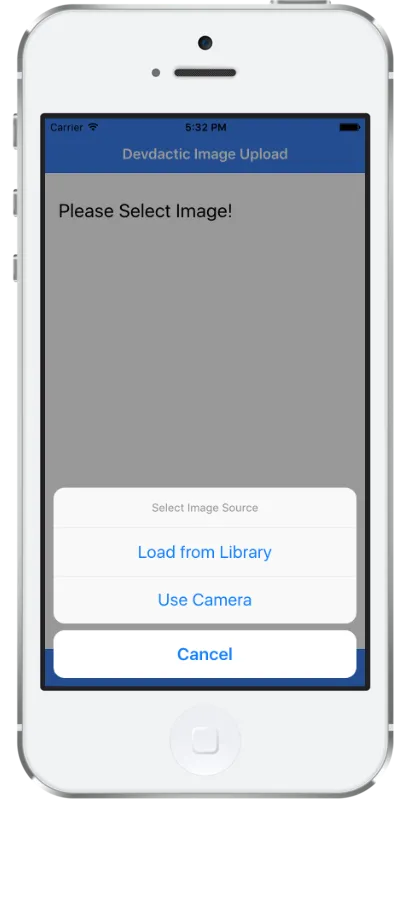
public presentActionSheet() {
let actionSheet = this.actionSheetCtrl.create({
title: 'Select Image Source',
buttons: [
{
text: 'Load from Library',
handler: () => {
this.takePicture(this.camera.PictureSourceType.PHOTOLIBRARY);
}
},
{
text: 'Use Camera',
handler: () => {
this.takePicture(this.camera.PictureSourceType.CAMERA);
}
},
{
text: 'Cancel',
role: 'cancel'
}
]
});
actionSheet.present();
}
}The user can select between these 2 options inside the action sheet, and for each we can pass the specific sourceType to our takePicture function which is not yet implemented. Let’s change that, and prepare yourself as this is going to be a bit tricky.
In general we want to call the native camera dialog with some options, and get a path to the image back inside the then block. Once we got the image path we want to copy that file into our own apps directory, just because we might want to store it and make sure the user won’t delete it.
As this is not really working on the combination Android + library we need an additional function that resolves that special image path. But after we got the image right, we do the same stuff as in the regular block:
- currentName: Grab the current name of the image from the path
- correctPath: Get only the path to the image without the name
- copyFileToLocalDir: Copy from the current path to our app and use new name from
createFileName
All of that is inside the function below, so add that to your HomePage now:
public takePicture(sourceType) {
  // Create options for the Camera Dialog
  var options = {
    quality: 100,
    sourceType: sourceType,
    saveToPhotoAlbum: false,
    correctOrientation: true
  };

  // Get the data of an image
  this.camera.getPicture(options).then((imagePath) => {
    // Special handling for Android library
    if (this.platform.is('android') && sourceType === this.camera.PictureSourceType.PHOTOLIBRARY) {
      this.filePath.resolveNativePath(imagePath)
        .then(filePath => {
          let correctPath = filePath.substr(0, filePath.lastIndexOf('/') + 1);
          let currentName = imagePath.substring(imagePath.lastIndexOf('/') + 1, imagePath.lastIndexOf('?'));
          this.copyFileToLocalDir(correctPath, currentName, this.createFileName());
        });
    } else {
      var currentName = imagePath.substr(imagePath.lastIndexOf('/') + 1);
      var correctPath = imagePath.substr(0, imagePath.lastIndexOf('/') + 1);
      this.copyFileToLocalDir(correctPath, currentName, this.createFileName());
    }
  }, (err) => {
    this.presentToast('Error while selecting image.');
  });
}
After that hard stuff we need some more helper functions we already used inside our previous functions. The 3 functions below are used to create a new image name simply from the current timestamp, to copy a file from one location to our app, to present a message for errors and success and finaly to resolve the path of an image to our current apps folder.
The path to our app can change, so whenever you plan to store these images somehow make sure to save the name of the image and not the complete path as this can change from time to time!
Anyway, for now just add these functions to our HomePage:
// Create a new name for the image
private createFileName() {
  var d = new Date(),
  n = d.getTime(),
  newFileName =  n + ".jpg";
  return newFileName;
}

// Copy the image to a local folder
private copyFileToLocalDir(namePath, currentName, newFileName) {
  this.file.copyFile(namePath, currentName, cordova.file.dataDirectory, newFileName).then(success => {
    this.lastImage = newFileName;
  }, error => {
    this.presentToast('Error while storing file.');
  });
}

private presentToast(text) {
  let toast = this.toastCtrl.create({
    message: text,
    duration: 3000,
    position: 'top'
  });
  toast.present();
}

// Always get the accurate path to your apps folder
public pathForImage(img) {
  if (img === null) {
    return '';
  } else {
    return cordova.file.dataDirectory + img;
  }
}
We are now done with the process of capturing and storing images. Actually it wasn’t that long and quite easy to achieve using the Ionic native wrapper. Let’s continue with the last missing function for our images app before we hook up everything inside the view.
Building the Ionic image upload function
After we have captured the image and moved it into our apps folder, we want to give the user to upload this image. Upload to a server can look very different depending on the endpoint and architecture.
For this example we will make a simple upload to a PHP backend as this is quite usual and lots of you have requests to see it with PHP. If you want to see something different (like POST to a REST API) please let me know below in the comments!
To upload our file we use the FileTransfer plugin we initially installed. We have to create an object of different options which need to be passed to the transfer, you can experiment with them if you need different values or more information that needs to reach the server.
We are also showing a progress indicator as it can sometimes take a few second and it’s a good idea to inform your user about the stuff going on (unless you want to perform the upload hidden in the background).
Now append our last function to the HomePage:
public uploadImage() {
  // Destination URL
  var url = "http://yoururl/upload.php";

  // File for Upload
  var targetPath = this.pathForImage(this.lastImage);

  // File name only
  var filename = this.lastImage;

  var options = {
    fileKey: "file",
    fileName: filename,
    chunkedMode: false,
    mimeType: "multipart/form-data",
    params : {'fileName': filename}
  };

  const fileTransfer: TransferObject = this.transfer.create();

  this.loading = this.loadingCtrl.create({
    content: 'Uploading...',
  });
  this.loading.present();

  // Use the FileTransfer to upload the image
  fileTransfer.upload(targetPath, url, options).then(data => {
    this.loading.dismissAll()
    this.presentToast('Image succesful uploaded.');
  }, err => {
    this.loading.dismissAll()
    this.presentToast('Error while uploading file.');
  });
}
Right now we are done with the logic but can’t actually use it because the view is still missing, so let’s craft something really simple.
Building the view for our app
Actually we only need an image where we can display the currently captured image and two buttons for capturing and uploading images. We are not storing all of the images, but you can very easily store the names as you can always simply add the rest of the path. This is even recommend as your apps path might change!
Additional we use the [hidden] or [disabled] attribute on some of our elements to hide/disable those elements if we don’t have an image selected yet. Now go ahead and put everything below into your src/pages/home/home.html:
<ion-header>
  <ion-navbar color="primary">
    <ion-title>
      Devdactic Image Upload
    </ion-title>
  </ion-navbar>
</ion-header>

<ion-content padding>
  <img src={{pathForImage(lastImage)}} style="width: 100%" [hidden]="lastImage === null">
  <h3 [hidden]="lastImage !== null">Please Select Image!</h3>
</ion-content>

<ion-footer>
  <ion-toolbar color="primary">
    <ion-buttons>
      <button ion-button icon-left (click)="presentActionSheet()">
        <ion-icon name="camera"></ion-icon>Select Image
      </button>
      <button ion-button icon-left (click)="uploadImage()" [disabled]="lastImage === null">
        <ion-icon name="cloud-upload"></ion-icon>Upload
      </button>
    </ion-buttons>
  </ion-toolbar>
</ion-footer>
Your app is now ready to run! But keep in mind: We are using Cordova plugins, so this won’t work inside the browser!
To test the app you need to run it on a device and use those functions (or use the simulator and chose the library for images). Also, our backend is not yet existing so the upload won’t work at this point. Anyway, you app should look like below at this point.
Creating our simple image upload PHP server
As this is the same as the last tutorial about Ionic images I’m not really making any changes to the code.
I am not using PHP frequently, but many of you asked for a PHP solution and I found it quite easy to setup this littler server to accept files. I am mostly more a fan of Firebase, but for this example PHP works perfectly.
If you have a server you can use that one, otherwise I simply recommend to download XAMPP and install it local.
I’m not going to cover that process since this is about Ionic image upload and not how to configure PHP. If you have set it up, you can first of all create a upload.php to accept uploads:
<?php
header('Access-Control-Allow-Origin: *');
$target_path = "uploads/";

$target_path = $target_path . basename( $_FILES['file']['name']);

if (move_uploaded_file($_FILES['file']['tmp_name'], $target_path)) {
    echo "Upload and move success";
} else {
echo $target_path;
    echo "There was an error uploading the file, please try again!";
}
?>
Also, make sure to create a uploads folder next to this file, as it will copy the images into that folder.
Additionally, to see the results of our hard work, I created a little HTML file that will scan the uploads folder and show them so we can directly see if our upload worked, Create this as index.php next to the previous file and insert:
<!DOCTYPE html>
<html>
<head>
  <meta charset="utf-8">
  <meta name="viewport" content="initial-scale=1, maximum-scale=1, user-scalable=no, width=device-width">
  <title>Devdactic Image Upload</title>
</head>
<body>
<h1>Ionic Image Upload</h1>
  <?php
  $scan = scandir('uploads');
  foreach($scan as $file)
  {
    if (!is_dir($file))
    {
        echo '<h3>'.$file.'</h3>';
      echo '<img src="uploads/'.$file.'" style="width: 400px;"/><br />';
    }
  }
  ?>
</body>
</html>
Now you got everything in place and can start your Ionic image upload adventures!
If you now pick an image and upload it, you should see this dialog as a result (after finished upload).

Conclusion
Just like Ionic 1 it’s quite easy to work with images in Ionic 2+. I hope this article helps you to overcome any issues you had while working with Ionic images and files.
Happy Coding, Simon