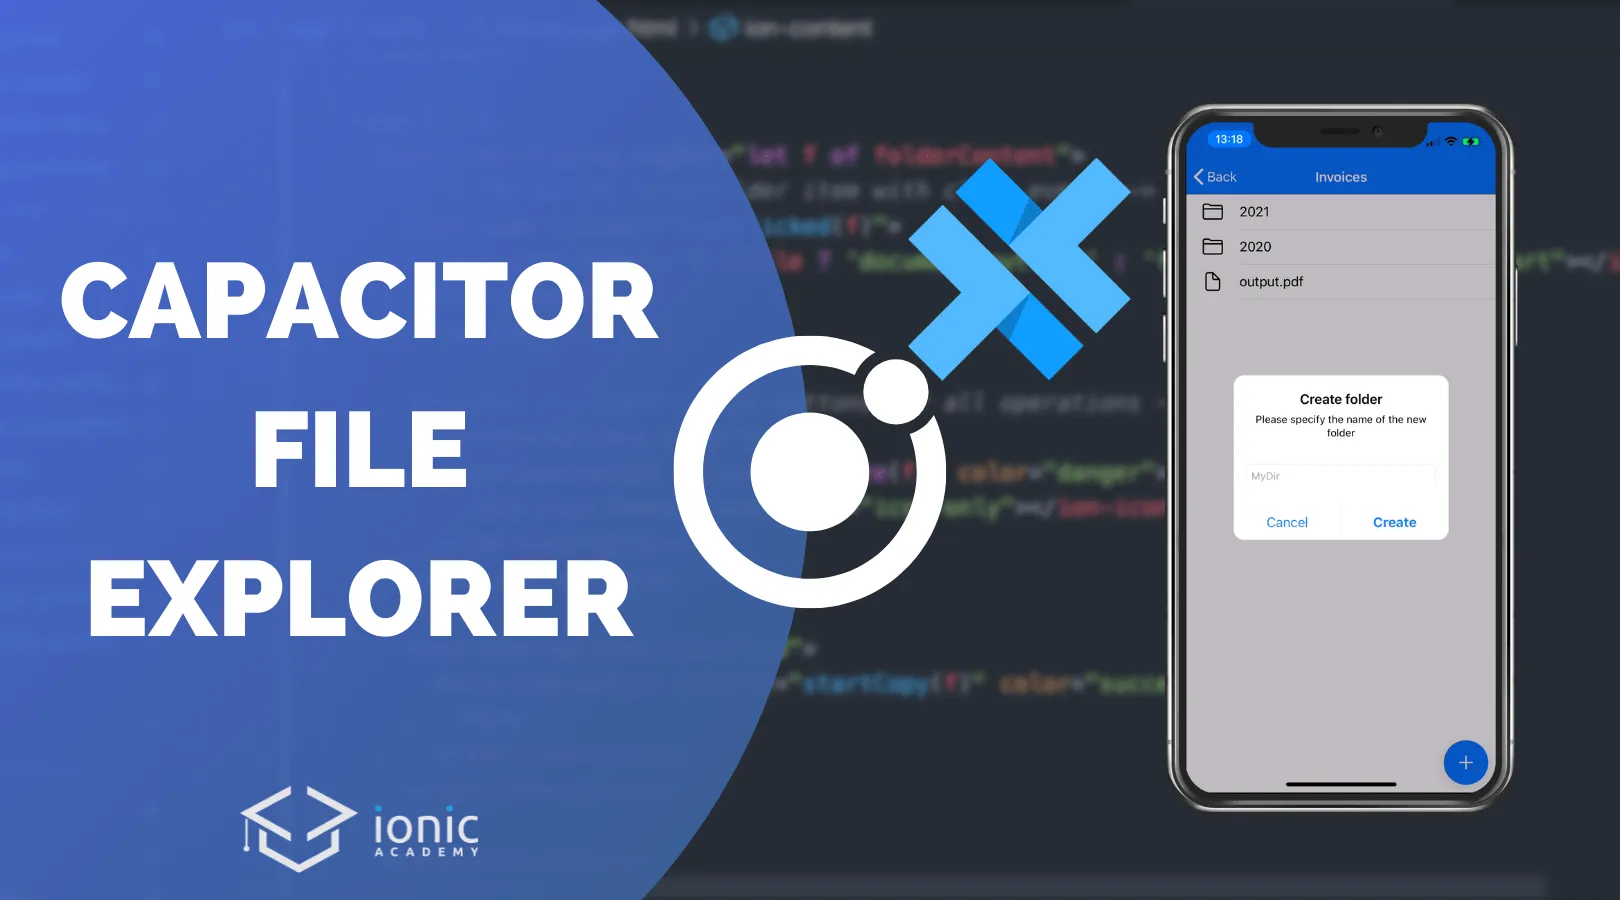
How to Build a Capacitor File Explorer with Ionic Angular Last update: 2021-08-10
Working with the underlying filesystem on iOS and Android has always been challenging given the differences in both platforms, but with Capacitor you can take a simple approach that works for all platforms.
In this tutorial we will build a file explorer to create files and folders, navigate through your different folder levels and add all necessary functions to copy, delete and open files! 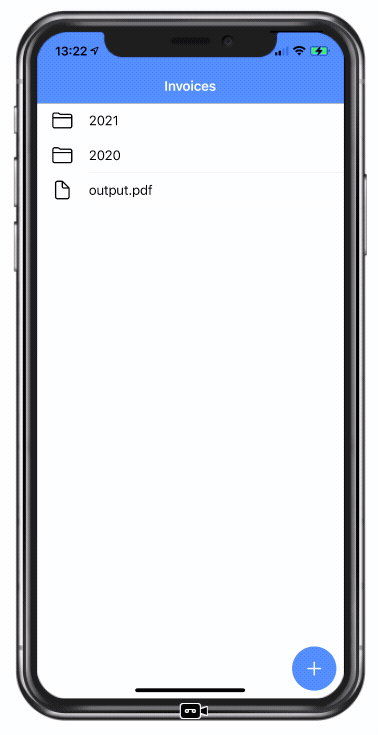
Get the Code 🔐
Receive all the files of the tutorial right to your inbox and subscribe to my weekly no BS newsletter!
The basic operations can all be achieved with the Capacitor filesystem plugin, but we’ll add two more plugins to our app for even better performance and a preview functionality of files!
Setting up the Capacitor file explorer
We start with a blank Ionic app and enable Capacitor. On top of that we need the following plugins for our file explorer:
- Since Capacitor 3 we need to install the Filesystem plugin from its own package
- We add the Capacitor blob writer for more efficient write operations
- We add the the preview-any-file Cordova plugin and the according Ionic native wrapper to open files on a device
Go ahead and install all of that now:
ionic start devdacticExplorer blank --type=angular --capacitor
cd ./devdacticExplorer

# Capacitor plugins
npm i @capacitor/filesystem
npm i capacitor-blob-writer

# Add a Cordova plugin to preview files
npm i @ionic-native/core
npm i cordova-plugin-preview-any-file
npm i @ionic-native/preview-any-file

# Add your platforms
ionic capacitor add ios
ionic capacitor add android
In the end you should also add the ios/android platforms because we need to perform some customisation as well soon.
Since we have added an Ionic native wrapper for the Cordova plugin we also need to add it to the array of providers inside our src/app/app.module.ts:
import { NgModule } from '@angular/core';
import { BrowserModule } from '@angular/platform-browser';
import { RouteReuseStrategy } from '@angular/router';

import { IonicModule, IonicRouteStrategy } from '@ionic/angular';

import { AppComponent } from './app.component';
import { AppRoutingModule } from './app-routing.module';
import { PreviewAnyFile } from '@ionic-native/preview-any-file/ngx';

@NgModule({
	declarations: [AppComponent],
	entryComponents: [],
	imports: [BrowserModule, IonicModule.forRoot(), AppRoutingModule],
	providers: [{ provide: RouteReuseStrategy, useClass: IonicRouteStrategy }, PreviewAnyFile],
	bootstrap: [AppComponent]
})
export class AppModule {}
Finally we can change the routing a bit in order to make our default page accessible through different paths. This will help us build the navigation inside our app by passing a folder name for the :folder parameter inside the path.
Open the src/app/app-routing.module.ts and change it to:
import { NgModule } from '@angular/core';
import { PreloadAllModules, RouterModule, Routes } from '@angular/router';

const routes: Routes = [
	{ path: '', redirectTo: 'home', pathMatch: 'full' },
	{ path: 'home', loadChildren: () => import('./home/home.module').then((m) => m.HomePageModule) },
	{
		path: 'home/:folder',
		loadChildren: () => import('./home/home.module').then((m) => m.HomePageModule)
	}
];

@NgModule({
	imports: [RouterModule.forRoot(routes, { preloadingStrategy: PreloadAllModules })],
	exports: [RouterModule]
})
export class AppRoutingModule {}
Before we dive into the actual application we quickly need to change some settings for Android.
Android permissions
To make our blob writer plugin work, we need to create a new file at android/app/src/main/res/xml/network_security_config.xml with the following content:
<?xml version="1.0" encoding="utf-8"?>
<network-security-config>
	<domain-config cleartextTrafficPermitted="true">
		<domain includeSubdomains="false">localhost</domain>
		<!-- Add your IP if you want to use livereload on a device -->
		<domain includeSubdomains="true">192.168.2.114</domain>
	</domain-config>
</network-security-config>
This is necessary as the writer uses local server under the hood (read more on the Github page) and if you also want to run your app with livereload on your Android device you need to add the local IP of your computer in this file.
Now we need to tell Android about that file, and to make all the other Capacitor filesystem stuff work we also need to set the android:requestLegacyExternalStorage inside the application tag of the android/app/src/main/AndroidManifest.xml:
<application
	android:networkSecurityConfig="@xml/network_security_config"
	android:requestLegacyExternalStorage="true"
	android:allowBackup="true"
	android:icon="@mipmap/ic_launcher"
	android:label="@string/app_name"
	android:roundIcon="@mipmap/ic_launcher_round"
	android:supportsRtl="true"
	android:theme="@style/AppTheme"
></application>
For iOS we don’t need any additional plugins right now, so let’s dive into the fun!
Display and create folders
We start with the basics, so first of all we need a way to load all files and folders at a specific location which we can do through the Capacitor filesystem plugin.
I’ve created another APP_DIRECTORY variable so we can use the same directory in our app in all places - feel free to use a different location but usually the Directory.Documents is the best place for user generated content that shouldn’t be cleared from the OS.
Since our home page will be used with a variable in the path when we navigate, we can load the value from the active route and afterwards call the Filesystem.readdir() with our current path.
Creating a folder is likewise easy, since we have the current path level we can simply create a new folder at that location using the Filesystem.mkdir() function.
I’ve created the outline for all the other functions already so you only need to implement them later. Go ahead for now by changing the src/app/home/home.page.ts to:
import { Component, ElementRef, OnInit, ViewChild } from '@angular/core';
import { ActivatedRoute, Router } from '@angular/router';
import { Filesystem, Directory } from '@capacitor/filesystem';
import { AlertController, isPlatform, ToastController } from '@ionic/angular';
import write_blob from 'capacitor-blob-writer';
import { PreviewAnyFile } from '@ionic-native/preview-any-file/ngx';

const APP_DIRECTORY = Directory.Documents;

@Component({
	selector: 'app-home',
	templateUrl: 'home.page.html',
	styleUrls: ['home.page.scss']
})
export class HomePage implements OnInit {
	folderContent = [];
	currentFolder = '';
	copyFile = null;
	@ViewChild('filepicker') uploader: ElementRef;

	constructor(
		private route: ActivatedRoute,
		private alertCtrl: AlertController,
		private router: Router,
		private previewAnyFile: PreviewAnyFile,
		private toastCtrl: ToastController
	) {}

	ngOnInit() {
		this.currentFolder = this.route.snapshot.paramMap.get('folder') || '';
		this.loadDocuments();
	}

	async loadDocuments() {
		const folderContent = await Filesystem.readdir({
			directory: APP_DIRECTORY,
			path: this.currentFolder
		});

		// The directory array is just strings
		// We add the information isFile to make life easier
		this.folderContent = folderContent.files.map((file) => {
			return {
				name: file,
				isFile: file.includes('.')
			};
		});
	}

	async createFolder() {
		let alert = await this.alertCtrl.create({
			header: 'Create folder',
			message: 'Please specify the name of the new folder',
			inputs: [
				{
					name: 'name',
					type: 'text',
					placeholder: 'MyDir'
				}
			],
			buttons: [
				{
					text: 'Cancel',
					role: 'cancel'
				},
				{
					text: 'Create',
					handler: async (data) => {
						await Filesystem.mkdir({
							directory: APP_DIRECTORY,
							path: `${this.currentFolder}/${data.name}`
						});
						this.loadDocuments();
					}
				}
			]
		});

		await alert.present();
	}

	addFile() {}

	async fileSelected($event) {}

	async itemClicked(entry) {}

	async openFile(entry) {}
	b64toBlob = (b64Data, contentType = '', sliceSize = 512) => {};

	async delete(entry) {}

	startCopy(file) {}

	async finishCopyFile(entry) {}
}
Since the filesystem only returns the file name as string, we manually check if the path contains a dot to set a flag for files/directories as we need to perform different functions later. You could also improve that by using the stat() function, but then you’d have to handle all those async calls correctly.
For now we can also implement the whole view, let’s outline the most important parts:
- We will change the header color when we start a copy action (later)
- Use a hidden input to upload files later
- Iterate through all files of the current level and display an item with basic information
- Add option buttons to trigger delete and copy
- Use a fab list to create folders and files
Most of this won’t work yet, but once we got this in place we can focus on the actual functionality so open the src/app/home/home.page.html and change it to:
<ion-header>
	<ion-toolbar [color]="copyFile ? 'secondary' : 'primary'">
		<ion-buttons slot="start" *ngIf="currentFolder != ''">
			<ion-back-button></ion-back-button>
		</ion-buttons>
		<ion-title> {{ currentFolder || 'Devdactic Explorer' }} </ion-title>
	</ion-toolbar>
</ion-header>

<ion-content>
	<!-- For opening a standard file picker -->
	<input hidden type="file" #filepicker (change)="fileSelected($event)" />

	<!-- Info if the directory is empty -->
	<ion-text color="medium" *ngIf="folderContent.length == 0" class="ion-padding ion-text-center">
		<p>No documents found</p>
	</ion-text>

	<ion-list>
		<ion-item-sliding *ngFor="let f of folderContent">
			<!-- The actual file/folder item with click event -->
			<ion-item (click)="itemClicked(f)">
				<ion-icon [name]="f.isFile ? 'document-outline' : 'folder-outline'" slot="start"></ion-icon>
				{{ f.name }}
			</ion-item>

			<!-- The start/end option buttons for all operations -->
			<ion-item-options side="start">
				<ion-item-option (click)="delete(f)" color="danger">
					<ion-icon name="trash" slot="icon-only"></ion-icon>
				</ion-item-option>
			</ion-item-options>

			<ion-item-options side="end">
				<ion-item-option (click)="startCopy(f)" color="success"> Copy </ion-item-option>
			</ion-item-options>
		</ion-item-sliding>
	</ion-list>

	<!-- Fab to add files & folders -->
	<ion-fab vertical="bottom" horizontal="end" slot="fixed">
		<ion-fab-button>
			<ion-icon name="add"></ion-icon>
		</ion-fab-button>
		<ion-fab-list side="top">
			<ion-fab-button (click)="createFolder()">
				<ion-icon name="folder"></ion-icon>
			</ion-fab-button>
			<ion-fab-button (click)="addFile()">
				<ion-icon name="document"></ion-icon>
			</ion-fab-button>
		</ion-fab-list>
	</ion-fab>
</ion-content>
At this point you should be able to create folders at the top level, and we will add the navigation later.
Adding files with a standard input
To also add files to our explorer, we can use our hidden file input and simply trigger it - a cool trick that can be helpful in a lot of places.
This will open a file selection inside your browser or native app, so we don’t need to implement the camera capturing today.
Once we select a file, this file is a blob and since we can only write strings to the FS using the Capacitor plugin, we instead use the blob writer plugin that will work more efficiently!
We can use the current path and our overall file directory for this plugin as well, so change the according function to this now:
  addFile() {
    this.uploader.nativeElement.click();
  }

  async fileSelected($event) {
    const selected = $event.target.files[0];

    await write_blob({
      directory: APP_DIRECTORY,
      path: `${this.currentFolder}/${selected.name}`,
      blob: selected,
      on_fallback(error) {
        console.error('error: ', error);
      }
    });

    this.loadDocuments();
  }
After selecting a file, we reload the list and it should appear in your folder!
If you want to debug this, simply check out the IndexedDB inside the Chrome dev tools:
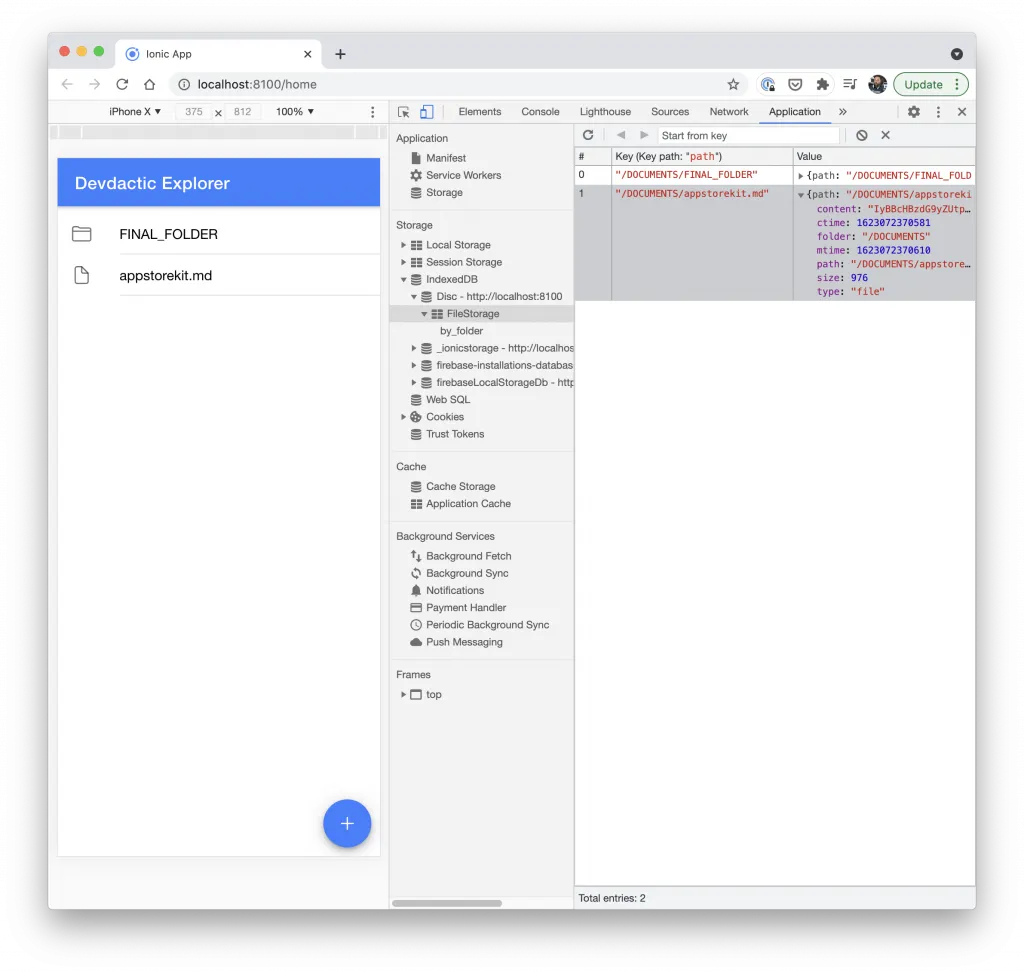
From there, you can remove all the generated files and folders from now on!
Navigating through folders
Next step is making sure you can navigate through all your folders, so we update our click function with a few checks. Only if the selected entry is a directory we gonna append that name to our current path and then navigate to it - it’s really that easy, the same page will init again and load the files for that new level:
  async itemClicked(entry) {
    if (this.copyFile) {
      // TODO
    } else {
      // Open the file or folder
      if (entry.isFile) {
        this.openFile(entry);
      } else {
        let pathToOpen =
          this.currentFolder != '' ? this.currentFolder + '/' + entry.name : entry.name;
        let folder = encodeURIComponent(pathToOpen);
        this.router.navigateByUrl(`/home/${folder}`);
      }
    }
  }
We will take care of the other functions soon, but now we are able to navigate through the app with just one actual page!
Open a file preview
Opening a preview of files is a bit tricky since this won’t really work inside a browser. As a fallback I added a function to download the file instead, but most likely you will anyway need a different behaviour in your web app.
For native platforms we can now use the Cordova plugin we initially installed. To make it find the right item, we need to retrieve the full URI for a file upfront by calling the Filesystem.getUri() function and the resulting URI can be passed to the plugin like this:
  async openFile(entry) {
    if (isPlatform('hybrid')) {
      // Get the URI and use our Cordova plugin for preview
      const file_uri = await Filesystem.getUri({
        directory: APP_DIRECTORY,
        path: this.currentFolder + '/' + entry.name
      });

      this.previewAnyFile.preview(file_uri.uri)
        .then((res: any) => console.log(res))
        .catch((error: any) => console.error(error));
    } else {
      // Browser fallback to download the file
      const file = await Filesystem.readFile({
        directory: APP_DIRECTORY,
        path: this.currentFolder + '/' + entry.name
      });

      const blob = this.b64toBlob(file.data, '');
      const blobUrl = URL.createObjectURL(blob);

      let a = document.createElement('a');
      document.body.appendChild(a);
      a.setAttribute('style', 'display: none');
      a.href = blobUrl;
      a.download = entry.name;
      a.click();
      window.URL.revokeObjectURL(blobUrl);
      a.remove();
    }
  }
Feel free to use the following implementation which I also found only to convert a base64 string back to a blob:
// Helper for browser download fallback
// https://betterprogramming.pub/convert-a-base64-url-to-image-file-in-angular-4-5796a19fdc21
b64toBlob = (b64Data, contentType = '', sliceSize = 512) => {
	const byteCharacters = atob(b64Data);
	const byteArrays = [];

	for (let offset = 0; offset < byteCharacters.length; offset += sliceSize) {
		const slice = byteCharacters.slice(offset, offset + sliceSize);

		const byteNumbers = new Array(slice.length);
		for (let i = 0; i < slice.length; i++) {
			byteNumbers[i] = slice.charCodeAt(i);
		}

		const byteArray = new Uint8Array(byteNumbers);
		byteArrays.push(byteArray);
	}

	const blob = new Blob(byteArrays, { type: contentType });
	return blob;
};
Again, this is just a browser fallback - for native devices we can directly show a preview with this cool plugin!
Copy and delete files
The last missing action is the delete and copy functionality. For the first part, this is pretty easy.
To delete a file or a folder, just call the according function on the filesystem with the path to either the file or folder and it will be removed. BY passing the recursive flag to the deletion of a folder we can also directly delete all the content of that folder:
  async delete(entry) {
    if (entry.isFile) {
      await Filesystem.deleteFile({
        directory: APP_DIRECTORY,
        path: this.currentFolder + '/' + entry.name
      });
    } else {
      await Filesystem.rmdir({
        directory: APP_DIRECTORY,
        path: this.currentFolder + '/' + entry.name,
        recursive: true // Removes all files as well!
      });
    }
    this.loadDocuments();
  }
To copy a file we need two steps. First, we trigger the copy action on a file/directory and set our copyFile to that item, which basically enables the copy action.
With the second click, we can now select a folder and then our finishCopyFile() will be called.
We will also filter out files on the second click as this won’t make any sense, so go ahead and change the click function to:
  async itemClicked(entry) {
    if (this.copyFile) {
      // We can only copy to a folder
      if (entry.isFile) {
        let toast = await this.toastCtrl.create({
          message: 'Please select a folder for your operation'
        });
        await toast.present();
        return;
      }
      // Finish the ongoing operation
      this.finishCopyFile(entry);

    } else {
      // Open the file or folder
      if (entry.isFile) {
        this.openFile(entry);
      } else {
        let pathToOpen =
          this.currentFolder != '' ? this.currentFolder + '/' + entry.name : entry.name;
        let folder = encodeURIComponent(pathToOpen);
        this.router.navigateByUrl(`/home/${folder}`);
      }
    }
  }
When we want to finish the copy operation, we could normally just call the copy function the filesystem but with normal strings this didn’t work on Android.
So instead of using that relative path that we used all the time, we get the absolute URI to the file and the destination first by using the getUri() function and then pass those values to the copy function:
  startCopy(file) {
    this.copyFile = file;
  }

  async finishCopyFile(entry) {
    // Make sure we don't have any additional slash in our path
    const current = this.currentFolder != '' ? `/${this.currentFolder}` : ''

    const from_uri = await Filesystem.getUri({
      directory: APP_DIRECTORY,
      path: `${current}/${this.copyFile.name}`
    });

    const dest_uri = await Filesystem.getUri({
      directory: APP_DIRECTORY,
      path: `${current}/${entry.name}/${this.copyFile.name}`
    });

    await Filesystem.copy({
      from: from_uri.uri,
      to: dest_uri.uri
    });
    this.copyFile = null;
    this.loadDocuments();
  }
Note that there is no move function in the filesystem plugin right now. But move is basically just a copy operation with a delete of the original file afterwards, so you could easily replicate that behaviour yourself.
And with that last missing piece our Capacitor file explorer is done!
Conclusion
Working with the filesystem used to be challenging, but with the Capacitor plugin (and some additional plugins to make life easier) we can build a full blown file explorer and hopefully get a better understanding about the usage of the filesystem.
The best part is that this really works across all platforms, and you can test all functionality even on your browser and inspect how the IndexedDB is changed!