How to Add Ionic Animations Using Angular (2 Different Ways!) Last update: 2017-05-09

One of the most viewed articles on Devdactic is about Animations for Ionic Apps. Today we will take look at 2 different but both great ways to easily create Ionic Animations using Angular!
In this post we will take a look at how to integrate the Angular way of doing animations by using the Web Animations API. You can find more about Web Animations API in this great post.
Besides that we will also add an external packages for animation to our app as an alternative for people who are not so fancy about the first way. So it’s something in here for everyone!
Prerequisite
Before going through this tutorial you should be familiar with Angular 2+ and the general Ionic concepts. You also need to have the latest version of Ionic set up on your machine.
If you want to learn Ionic with step-by-step video courses, hands-on training projects and a helpful community who has your back, then take a look at the Ionic Academy.
Using Web Animations
 With the Web Animations API we will build an effect like in the image above. Of course not super fancy, but this post is more about getting animations for your Ionic app up and running, not who can build the most freaky key frames animation.
To use web animations we need to install the Angular animations package and also the web animations polyfill so our animations will work in every browser. If you don’t install it, your animations might work on your local machine but perhaps not on the devices later.
You can also create a blank new project for this app, then you can install the dependencies like this:
npm install web-animations-js @angular/animations@4.0.0 --saveTo make use of the polyfill we need to add something to our src/app/main.ts anywhere:
import 'web-animations-js/web-animations.min';Ok we got the dependencies and polyfill, finally we need to add everything we need to our module. Especially this means we need the BrowserAnimationsModule, so go ahead and import it in your src/app/app.module.ts
import { BrowserAnimationsModule } from '@angular/platform-browser/animations';
...
...
imports: [
    BrowserModule,
    BrowserAnimationsModule,
    IonicModule.forRoot(MyApp)
  ],
As you have already seen, the goal is to simply animate a text block to appear and disappear, but in a very gentle way. If we simply toggle the alpha value, the element would plop and there would be now animation flow, therefore we create an animations block inside our @Component decorator which is the Angular way of adding animations
Inside this block you can define all kind of flows, in our case our element will have 2 different states: visible and invisible.
These 2 states are inside what is called a trigger. This is more or less they keyword we will also use later on inside the HTML to connect the animation to elements.
Now, both of our states got a very simple styling, either opacity 0 or 1. We could now already switch between states, but we want it to be animated.
Therefore we define the transition and use the wildcard pattern ’* => *’ which means whenever the state changes to another state, do this. And in this case, we want it to be animated for .5s which is half a second.
Now open your src/pages/home/home.ts and insert:
import { Component } from '@angular/core';
import { NavController } from 'ionic-angular';
import { trigger, state, style, transition, animate } from '@angular/animations'

@Component({
  selector: 'page-home',
  templateUrl: 'home.html',
  animations: [
    trigger('myvisibility', [
      state('visible', style({
        opacity: 1
      })),
      state('invisible', style({
        opacity: 0
      })),
      transition('* => *', animate('.5s'))
    ])
  ]
})
export class HomePage {
  visibleState = 'visible';

  constructor(public navCtrl: NavController) { }

  toggleVisible() {
    this.visibleState = (this.visibleState == 'visible') ? 'invisible' : 'visible';
  }
}
The toggleVisible function helps to change the state of our variable, which will be connected with our trigger in the next step.
If you have any questions so far, just leave a comment below!
Otherwise, we continue with the actual view. There is not really much we need to do besides adding a button to call our toggle function, and adding the actual element that will be animated.
To do so, we simply apply the trigger with @ to the element, and we pass it the value of visibleState so the trigger will get noticed once that value changes.
Inside your src/home/home.html this would look like this:
<ion-content padding>

  <button ion-button (click)="toggleVisible()">Toggle it!</button>

  <p [@myvisibility]="visibleState">
    I am sometimes here and sometimes there.
  </p>

</ion-content>
Through the trigger myvisibility the element will get appeared if the state of the variable visibleState changes. Pretty cool, huh?
Of course this was the most basic of all possible animations. But this way shows you the concept of Angular animations, which might be rather strange and new to some of you. But once you use it a few times, I’m sure you will feel quite comfortable writing your animations with Javascript.
If you want to get deeper into animations, the Ionic Academy also offers a course on animations!
Using External Packages
The previous way is the general, basic way of adding all kinds of animation to your Ionic app. This way is a bit more for the lazy ones or those that are simply not really skilled with CSS animations or keyframes. I count myself to that group as well from time to time, just because it’s so easy to use code that already does exactly what you need.
We will animate a button very easily, which will in the end look like the animation below. Remember, doing this with the previous way would involve some solide tinkering about which part of the animation has which length, how much to expand and so on. 
We will use a library called css-animator which helps us to use something like animate.css with Angular 2+. First of all install the package inside your app running:
npm install --save css-animatorNow we also need to load animate.css, which is possible in 2 ways.For the simplicity of this article we will simply import a link to the hosted file inside our src/index.html somewhere inside the head area:
<head>
<!-- other stuff... -->
<link rel="stylesheet" href="https://cdnjs.cloudflare.com/ajax/libs/animate.css/3.5.2/animate.min.css">
You could also add the package with NPM as well and add a special copy config to automatically copy the file to your build folder. For a production app, I would recommend this and you can find more about including CSS or JS files from NPM packages here.
Now back to our business.
Like before we also need to import some stuff, so open your src/app/app.module.ts and load the AnimationService and AnimatesDirective:
import { AnimationService, AnimatesDirective } from 'css-animator';
...
...
 declarations: [
    ...
    AnimatesDirective
 ]
 providers: [
    StatusBar,
    SplashScreen,
    {provide: ErrorHandler, useClass: IonicErrorHandler},
    AnimationService
  ]
The directive will now help us to already use animations without anything else.
Simply go to your src/pages/home/home.ts and insert this button which is inside a div block that has our animations directive:
<ion-content padding>
  <div animates #animation="animates" text-center>
    <button ion-button (click)="animation.start({type: 'rubberBand', duration: '1000'})">Click me!</button>
  </div>
</ion-content>
If you run this code, you should see our button animation called rubberBand.
This is perhaps the most easiest way to add the predefined animations which you can check out here.
The package also allows us to create animations using an AnimationBuilder, so let’s take a final look at how to use them on a different way.
Now we need to grab a reference to our DOM element by using @ViewChild and the name of the element. Inside a function we can now directly animate the nativeElement of our child with an animation using the AnimationBuilder.
Add this code to your src/pages/home/home.ts:
import { Component, ViewChild } from '@angular/core';
import { NavController } from 'ionic-angular';
import { AnimationService, AnimationBuilder } from 'css-animator';

@Component({
  selector: 'page-home',
  templateUrl: 'home.html'
})
export class HomePage {
  @ViewChild('myElement') myElem;
  private animator: AnimationBuilder;

  constructor(public navCtrl: NavController, animationService: AnimationService) {
    this.animator = animationService.builder();
  }

  animateElem() {
    this.animator.setType('flipInX').show(this.myElem.nativeElement);
  }
}
As you can see we need to import both AnimationBuilder and AnimationService, and the second is also inject inside the constructor to initialise our builder. Now we still need to change our view so that we actually have a viewChild like the one we are looking for.
Therefore, change your src/pages/home/home.html to this:
<button ion-button (click)="animateElem()">Animate it!</button>
<ion-card #myElement>
  <ion-card-header>My Animation Card</ion-card-header>
  <ion-card-content>So much awesome content and animations. AMAZING!</ion-card-content>
</ion-card>
Now we got a basic Ionic card we can animate!
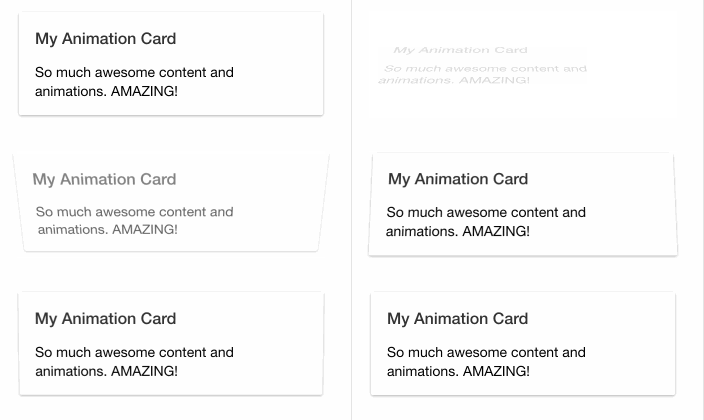
Hit the button and the card should do the flipInX animation like in the animation below!

Conclusion
You have learned 2 ways to animate your Ionic app: The standard Angular way and using external packages.
Actually I think both have their pros and cons, so building all animations by hand can be quite painful especially if you are not really a designer or have no experience with CSS animations (or no interest in them). An external package however makes you dependent on other peoples code, so perhaps the package won’t work with Ionic 5+ and you are stuck in older version for that reason.
If you just want to have a few animations so your app looks more charming, try out the package.
If you are serious about your app and rely on all animations because your app would suck otherwise, perhaps build them with the Web animations API!
You can find a video version of this article below!
