From React Web to Native Mobile App with Capacitor & Ionic Last update: 2022-06-14
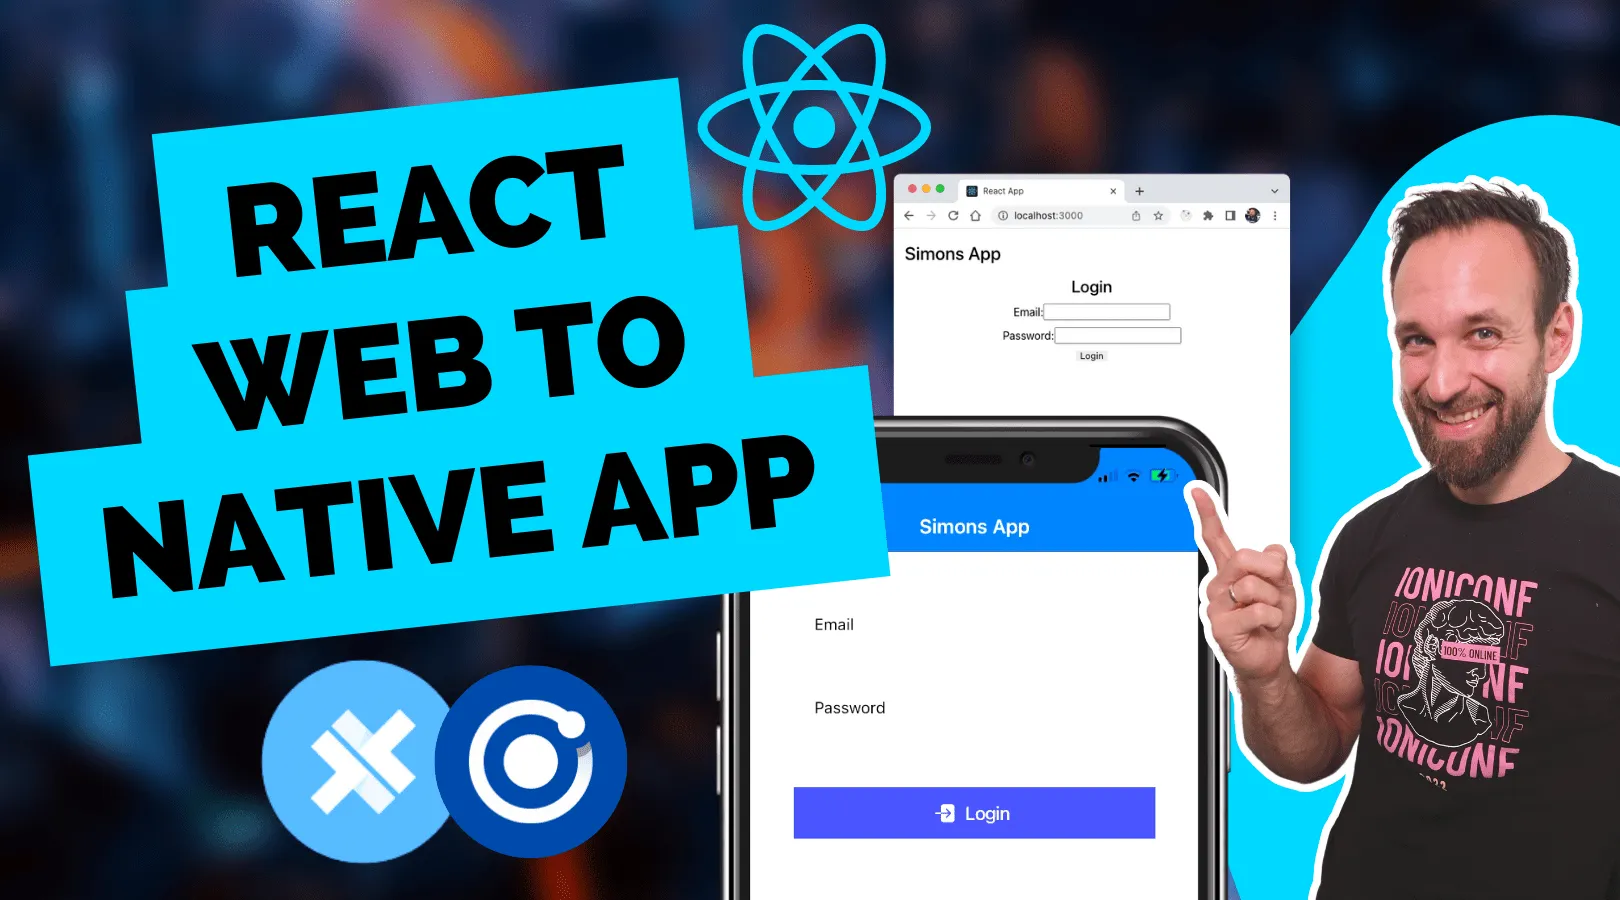
You can build a native mobile app from your React app without even using React Native. Sounds crazy?
All of this is possible due to the advancements in web technology. Just like Electron claimed its space as the default to build desktop applications with web code, you can use Capacitor to do the same for mobile apps!
In this tutorial we will create a simple React app with a dummy login page and inside page and then convert it into a native mobile application using Capacitor.

The fascinating thing is that the process takes like 10 minutes, and you open up your app (and your developer career) to infinite possibilities!
Prefer watching videos? Here’s the tutorial on my YouTube channel (to which you should definitely subscribe if you haven’t):
https://www.youtube.com/watch?v=IwHt_QpIa8A
Want to continue reading? Here we go with our React mobile app!
App Setup
Let’s start with a pretty basic React app using create-react-app and the typescript template:
npx create-react-app capacitor-app --template typescript
cd ./capacitor-app

npm i react-router-dom
The only additionally dependency we need right now is the router to easily navigate to another page.
Now add an empty folder at src/routes and create two new files at:
- src/routes/Dashboard.tsx
- src/routes/Login.tsx
You can fill both of them with some placeholder code like this:
function Dashboard() {


  return (
    <>
      Dashboard
    </>
  );
}

export default Dashboard;
Follow the same scheme for the login page and rename the keywords to Login!
With our two pages in place we can define the routes for the React router inside of our src/index.tsx:
import React from 'react';
import ReactDOM from 'react-dom/client';
import './index.css';
import App from './App';
import { BrowserRouter, Routes, Route, Link } from 'react-router-dom';
import Login from './routes/Login';
import Dashboard from './routes/Dashboard';

const root = ReactDOM.createRoot(document.getElementById('root') as HTMLElement);
root.render(
	<React.StrictMode>
		<BrowserRouter>
			<Routes>
				<Route path="/" element={<App />}>
					<Route path="" element={<Login />} />
					<Route path="/app/dashboard" element={<Dashboard />} />
					<Route
						path="*"
						element={
							<main style={{ padding: '1rem' }}>
								<p>There's nothing here!</p>
								<Link to="/">Back home!</Link>
							</main>
						}
					/>
				</Route>
			</Routes>
		</BrowserRouter>
	</React.StrictMode>
);
Let me explain what we did within the BrowserRouter:
- Defined a route / to use the
Appcomponent - Added all other routes below this so the router will always load the app file first and then resolve the rest of the path
- If no other path component is present the
Loginwill be rendered, and for /app/dashboard theDashboardwill be used - If no path match we have a fallback HTML code right in there, but we could easily supply our own 404 page here
For the fallback page we are using the wildcard path and also directly use the Link element from the React router so it triggers the right route of our app!
Additionally we need to add an Outlet somewhere in our view so the React router can render the actual elements within.
Because the App element is the parent of all routes, we can do it in there so bring up the src/App.tsx and change it to:
import './App.css';
import { Outlet } from 'react-router-dom';

function App() {
	return (
		<div style={{ margin: '1rem' }}>
			<h1>Simons App</h1>
			<Outlet />
		</div>
	);
}

export default App;
Now we have some header text and under it the routes would be rendered when navigating to the URL.
At this point you should be able to serve your application by running:
npm run startYou can see the default page being the login, and you can also directly navigate to http://localhost:3000/app/dashboard to see the second page.
Off to a great start, now let’s implement a dummy login flow.
Creating a Simple React Login
Because we don’t really have a backend we gonna keep things easy and just fake a loading of our login and then use the useNavigate hook to route to our dashboard from code.
Besides that we can put in useState to show or hide a loading indicator while we are “submitting” our form.
Go ahead and change the src/routes/Login.tsx to this now:
import { useState } from 'react';
import { useNavigate } from 'react-router-dom';
function Login() {
const [loading, setLoading] = useState(false);
const navigate = useNavigate();
const onSubmit = (event: any) => {
event.preventDefault();
setLoading(true);
console.log('submit!');
setTimeout(() => {
setLoading(false);
navigate('/app/dashboard');
}, 1500);
};
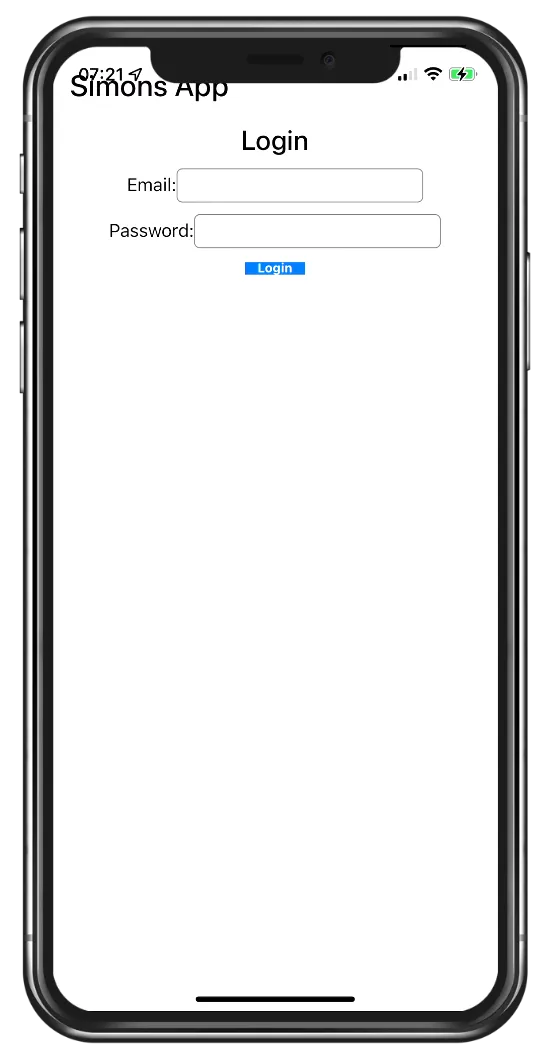
return (
<main style={{ textAlign: 'center' }}>
<h2>Login</h2>
<form onSubmit={onSubmit}>
<div
style={{ display: 'flex', flexDirection: 'column', alignItems: 'center', gap: '10px' }}
>
<div>
<label>Email:</label>
<input type="text"></input>
</div>
<div>
<label>Password:</label>
<input type="password"></input>
</div>
{loading ? <div>Loading...</div> : <button type="submit">Login</button>}
</div>
</form>
</main>
);
}
export default Login;Not sure about those hooks? Check out the useState docs to learn more about it!
On our dashboard page we will simply render a different title and button to go back, so bring up the src/routes/Dashboard.tsx and quickly change it to:
import { useNavigate } from 'react-router-dom';

function Dashboard() {
	const navigate = useNavigate();

	const onLogout = () => {
		navigate('/');
	};

	return (
		<>
			<h2>Dashboard</h2>
			<button onClick={onLogout}>Logout</button>
		</>
	);
}

export default Dashboard;
Nothing really new in here!
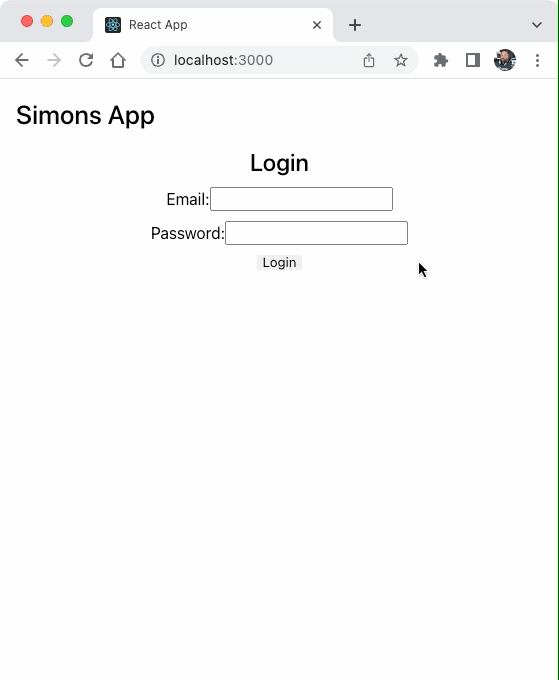
I know, probably not the best login page you’ve ever seen. More like the worst.
At this point we are able to navigate around and finished our most basic example of a React login page. Now let’s see how fast we can build a mobile app from this.
Installing Capacitor
To wrap any web app into a native mobile container we need to take a few steps - but those have to be done just one initial time, later it’s as easy as running a sync command.
First of all we can install the Capacitor CLI locally and then initialise it in our project.
Now we need to install the core package and the respective packages for the iOS and Android platform.
Finally you can add the platforms, and that’s it!
# Install the Capacitor CLI locally
npm install @capacitor/cli --save-dev

# Initialize Capacitor in your React project
npx cap init

# Install the required packages
npm install @capacitor/core @capacitor/ios @capacitor/android

# Add the native platforms
npx cap add ios
npx cap add android
At this point you should see a new ios and android folder in your React project.
Those are real native projects!
To open the Android project later you should install Android Studio, and for iOS you need to be on a Mac and install Xcode.
Additionally you should see a capacitor.config.ts in your project, which holds some basic settings for Capacitor that are used during sync. The only thing you need to worry about is the webDir which should point to the output of your build command, but usually this should already be correct.
Give it a try by running the following commands:
npm run build
npx cap sync
The first command will simply build your React project, while the second command will sync all the web code into the right places of the native platforms so they can be displayed in an app.
Additionally the sync command might update the native platforms and install plugins to access native functionality like camera, but we are not going that far today.
Without noticing you are now actually done, so let’s see the app on a device!
Build and Deploy native apps
You now need Xcode for iOS and Android Studio for Android apps on your machine. Additionally you need to be enrolled in the Apple Developer Program if you want to build and distribute apps on the app store, and same for the Google Play Store.
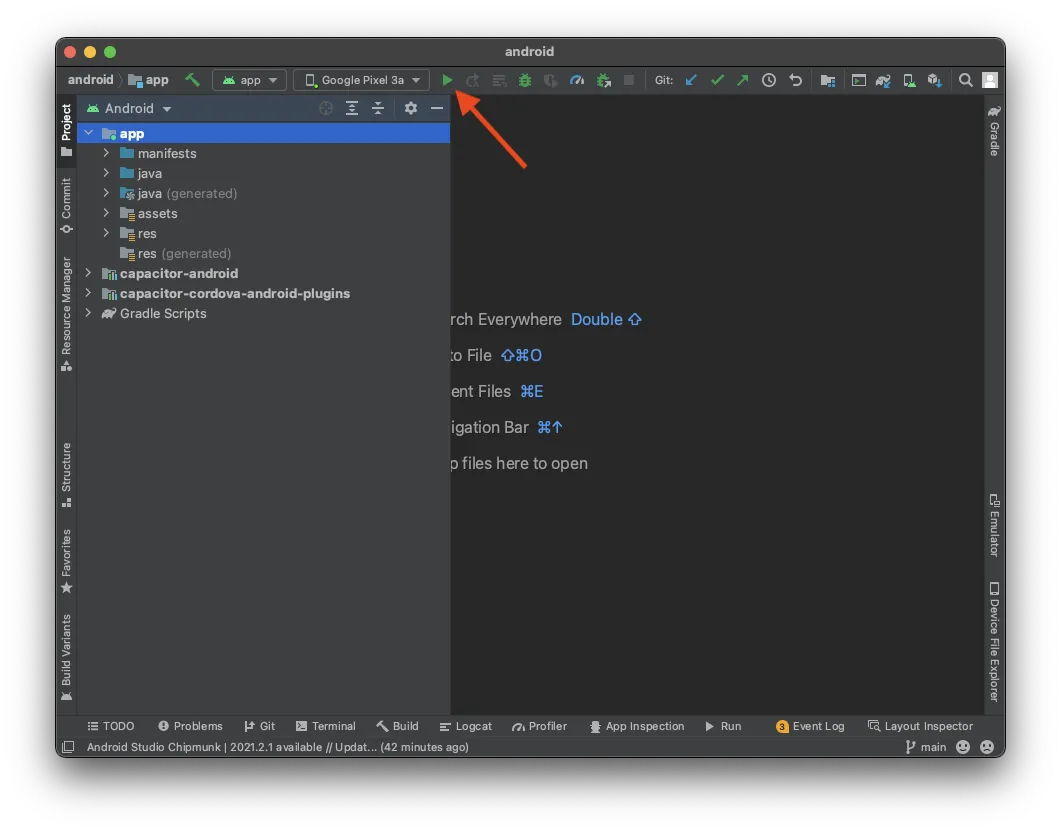
If you never touched a native mobile project, you can easily open both native projects by running:
npx cap open ios
npx cap open android
Inside Android Studio you now just need to wait until everything is ready, and you can deploy your app to a connected device without changing any of the settings!
Inside Xcode it’s almost the same, but you need to setup your signing account if you wan to deploy your app to a real device and not just the simulator. Xcode guides you through this if you’ve never done it (but again, you need to be enrolled in the Developer Program).
After that it’s as easy as hitting play and run the app on your connected device which you can select at the top! 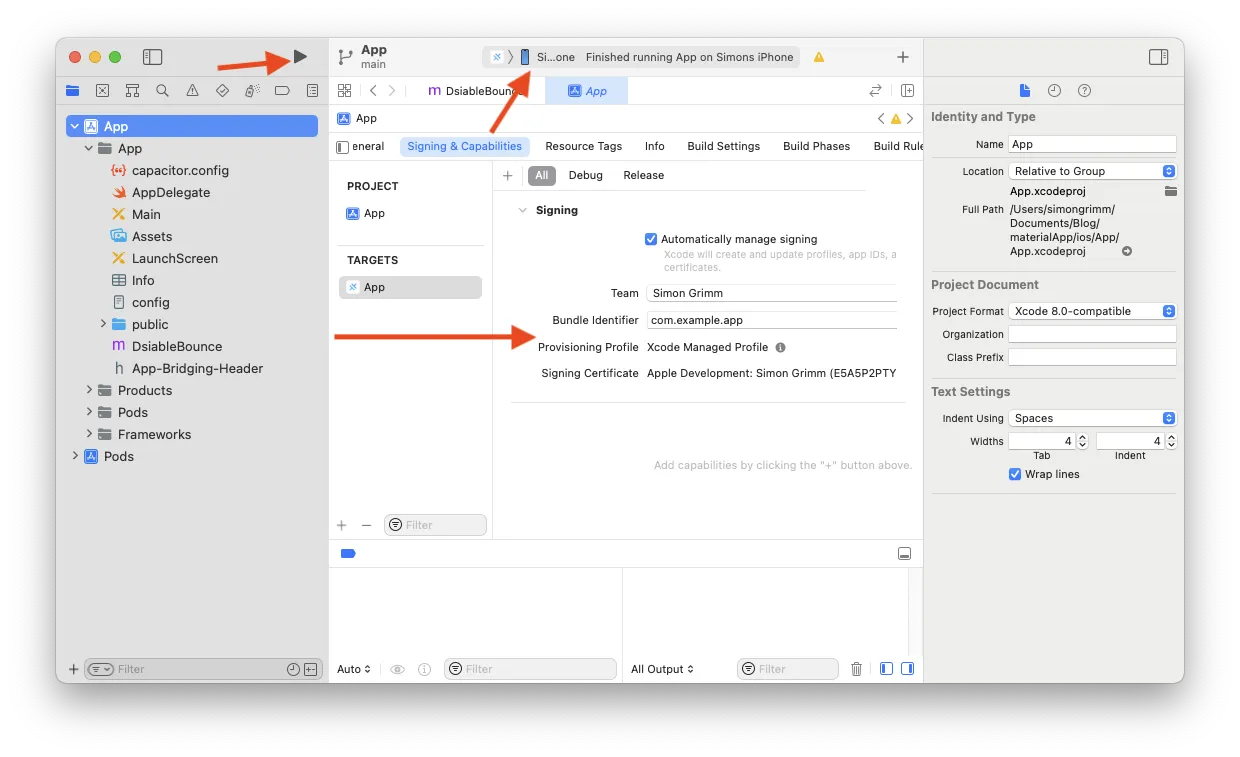
Congratulations, you have just deployed your React web app to a mobile device!
But there are still some challenges ahead, especially on iOS the UI doesn’t look good yet. Before we fix that, let’s make our debugging process faster.
Capacitor Live Reload
By now you are used to have live reload with all modern frameworks, and we can have the same functionality even on a mobile device with minimum effort!
The idea is to make your locally served app with live reload available on your network, and the Capacitor app will simply load the content from that URL.
First step is figuring out your local IP, which you can get on a Mac by running:
ipconfig getifaddr en0On Windows, run ipconfig and look for the IPv4 address.
Now we only need to tell Capacitor to load the app directly from this server, which we can do right in our capacitor.config.ts with another entry:
import { CapacitorConfig } from '@capacitor/cli';

const config: CapacitorConfig = {
	appId: 'com.example.app',
	appName: 'capacitor-app',
	webDir: 'build',
	bundledWebRuntime: false,
	server: {
		url: 'http://192.168.x.xx:3000',
		cleartext: true
	}
};

export default config;
Make sure you use the right IP and port, I’ve simply used the default React port in here.
To apply those changes we can now copy over the changes to our native project:
npx cap copyCopy is mostly like sync, but will only copy over the changes of the web folder and config, not update the native project.
Now you can deploy your app one more time through Android Studio or Xcode and then change something in your React app - the app will automatically reload and show the changes!
Caution: If you install new plugins like the camera, this still requires a rebuild of your native project because native files are changed which can’t be done on the fly.
Fix the Mobile UI of React
Now we can tackle the open issues of our mobile app more easily.
To begin with, we need to change a meta tag inside our public/index.html and also include viewport-fit:
<meta name="viewport" content="width=device-width, initial-scale=1, viewport-fit=cover" />By doing this we can now access an environment variable that gives us information about the iOS notch area at the top which you usually need to keep empty.
Therefore bring up the src/App.tsx and include the value as paddingTop for our wrapper element:
import './App.css';
import { Outlet } from 'react-router-dom';

function App() {
	return (
		<div style={{ margin: '0 1rem 0 1rem', paddingTop: 'env(safe-area-inset-top)' }}>
			<h1>Simons App</h1>
			<Outlet />
		</div>
	);
}

export default App;
Now we got the padding right in our app, and if you have built a responsive good looking React app before you are pretty much done at this point!
However, if you also want to test a simply way to add adaptive mobile styling to our React app then we can take things a step further.
Using Ionic UI Components with React
I’ve worked years with Ionic to build awesome cross platform applications and it’s one of the best choices if you want a really great looking mobile UI that adapts to iOS and Android specific styling.
To use it, we only need to install the Ionic react package now:
npm install @ionic/reactAdditionally Ionic usually ships with Ionicons, a great icon library that again adapts to the platform it’s running on. Let’s also add it by running:
npm install ioniconsIn order to use the styling of Ionic we now need to change our src/App.tsx and include:
/* Core CSS required for Ionic components to work properly */
import '@ionic/react/css/core.css';

/* Basic CSS for apps built with Ionic */
import '@ionic/react/css/normalize.css';
import '@ionic/react/css/structure.css'; // Remove if nothing is visible
import '@ionic/react/css/typography.css';

/* Optional CSS utils that can be commented out */
import '@ionic/react/css/padding.css';
import '@ionic/react/css/float-elements.css';
import '@ionic/react/css/text-alignment.css';
import '@ionic/react/css/text-transformation.css';
import '@ionic/react/css/flex-utils.css';
import '@ionic/react/css/display.css';
import { setupIonicReact } from '@ionic/react';

setupIonicReact();
To use Ionic components we need to import them one by one from the package we just installed and use them instead of the div elements we had before.
Learning the Ionic syntax for all of those components takes time, but I’m running an online school called Ionic Academy to help developers learn Ionic in the fastest possible way!
In our case we can re-style our login page to hold some items, labels and input fields and a button with one of those Ionicons.
Additionally there are even some hooks included like useIonAlert or useIonLoading which allow us to call certain Ionic overlays or components directly from code!
This means we can now easily display a loading screen calling present() and showing a native alert modal using alert() with the according values for the elements within the alert.
Go ahead now and change the src/routes/Login.tsx to this:
import {
	IonButton,
	IonCard,
	IonCardContent,
	IonIcon,
	IonInput,
	IonItem,
	IonLabel,
	useIonAlert,
	useIonLoading
} from '@ionic/react';
import { useNavigate } from 'react-router-dom';
import { logIn } from 'ionicons/icons';

function Login() {
	const navigate = useNavigate();
	const [alert] = useIonAlert();
	const [present, dismiss] = useIonLoading();

	const onSubmit = async (event: any) => {
		event.preventDefault();
		await present({ message: 'Loading...' });

		setTimeout(() => {
			dismiss();
			if (Math.random() < 0.5) {
				alert({
					header: 'Invalid credentials',
					message: 'There is no user with that name and password.',
					buttons: [{ text: 'Ok' }]
				});
			} else {
				navigate('/app/dashboard');
			}
		}, 1500);
	};

	return (
		<>
			<IonCard>
				<IonCardContent>
					<form onSubmit={onSubmit}>
						<IonItem>
							<IonLabel position="floating">Email</IonLabel>
							<IonInput type="email"></IonInput>
						</IonItem>

						<IonItem>
							<IonLabel position="floating">Password</IonLabel>
							<IonInput type="password"></IonInput>
						</IonItem>

						<div className="ion-margin-top">
							<IonButton expand="full" type="submit" color="secondary">
								<IonIcon icon={logIn} slot="start" />
								Login
							</IonButton>
						</div>
					</form>
				</IonCardContent>
			</IonCard>
		</>
	);
}

export default Login;
With a little random factor included we can now sometimes see the alert or move to the (yet unstyled) dashboard of our React app!

All of this took us just a few minutes of setup time, and we could now already roll out this app to the native app stores.
Conclusion
Going from a React app to a native mobile app for iOS and Android can be that easy - no need to use React Native and learn a ton of new libraries.
If you now bring the good old performance argument, please stop and take a look at the Ionic vs React Native performance comparison first.
With Capacitor you are betting on web technology, so you benefit from all advancements made in that area and improvements to mobile web views and devices in general.