How to Add Ionic In App Purchases For iOS Last update: 2017-07-18

Many apps offer them, and the most successful apps live from it: In app purchases. Who has never bought some coins, crystals or anything in his favorite game?
In this article we will learn how to create ionic in app purchases for iOS. Perhaps I’ll do a second part on Android as well, the process is very similar so you might even already draw your ideas from the concepts and code inside this article.
We will create 3 dummy items which we can buy, and we will reflect those changes inside our app just like in the image below!

But before we achieve all of this we have to go through a few steps to set up everything accordingly.
Create the In App Purchases on iTunes Connect
Tu offer in app purchases inside your app, you first of all need to create the purchasable item on iTunes Connect. This also means that you need to have an app on iTunes connect!
But if you want you can create one now, for the example I just created the items on one of my apps but never released the items, so you can test all of this without any fear of showing these random purchase options to the users of your app.
Anyway, once you are inside ITC navigate to the Features tab of your app and on the left menu you will now see in App Purchases.
Inside that screen create a new in app purchase and you will get asked what type of item you want to create:
- Consumable: Something you add to the user account like coins
- Non-Consumable: Something that only needs to be used once, like unlocking a level
- Auto-Renewable Subscription: Monthly (or other period) subscription for a service
- Non-Renewing Subscription: Access to something for a specific duration
Pick whatever you like, for the app we will see later I created each one of the first three. On the following screen you will have to insert all kind of information about your purchasable item:
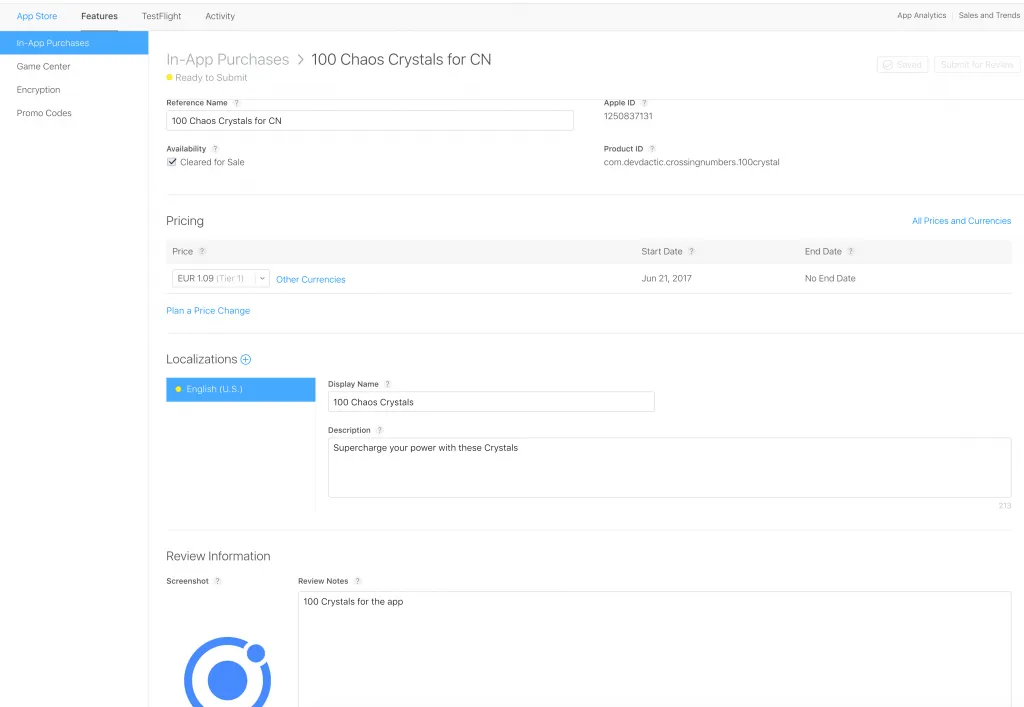
There is nothing really you need to worry about on that screen, just fill in all the fields so that it looks right to you.
After adding my 3 items, the overview of my in app purchase items looked like in the image below. 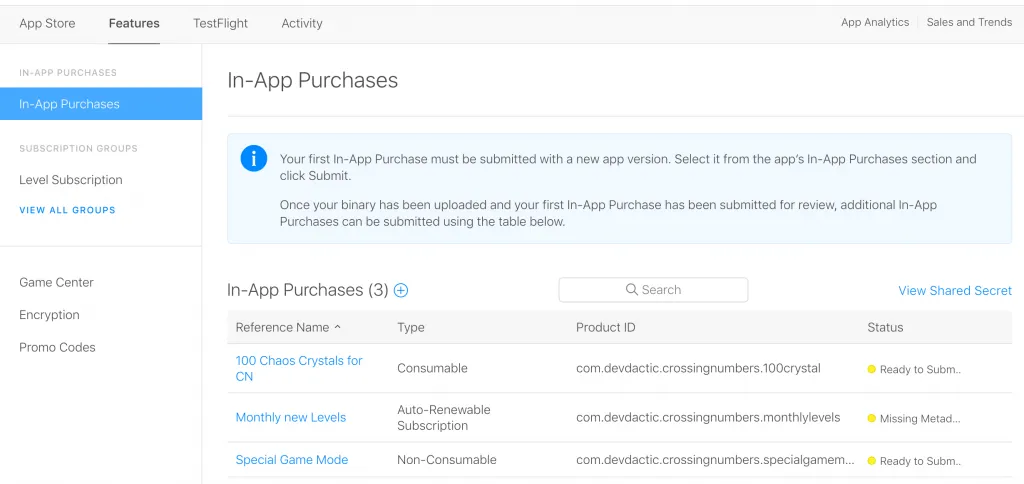
Now we are ready to actually call and purchase these items from our app!
Setup our App
Although I added the items to an app which is already live, I started a blank new Ionic app and later just used the bundle ID from the official app.
For now you can do the same, so start your new app and add the Cordova plugin for in app purchases:
ionic start devdacticPurchase blank
cd devdacticPurchase
ionic cordova plugin add cordova-plugin-inapppurchase
npm install --save @ionic-native/in-app-purchase
To make use of it we also have to include it inside our module in src/app/app.module.ts:
import { BrowserModule } from '@angular/platform-browser';
import { ErrorHandler, NgModule } from '@angular/core';
import { IonicApp, IonicErrorHandler, IonicModule } from 'ionic-angular';
import { SplashScreen } from '@ionic-native/splash-screen';
import { StatusBar } from '@ionic-native/status-bar';

import { MyApp } from './app.component';
import { HomePage } from '../pages/home/home';
import { InAppPurchase } from '@ionic-native/in-app-purchase';

@NgModule({
	declarations: [MyApp, HomePage],
	imports: [BrowserModule, IonicModule.forRoot(MyApp)],
	bootstrap: [IonicApp],
	entryComponents: [MyApp, HomePage],
	providers: [
		StatusBar,
		SplashScreen,
		{ provide: ErrorHandler, useClass: IonicErrorHandler },
		InAppPurchase
	]
})
export class AppModule {}
Now as said before, I created all the purchase items on an app that is already live. You also have to set the right bundle ID inside your config.xml so your app knows where it has to look for your items.
<widget
	id="com.devdactic.crossingnumbers"
	version="0.0.1"
	xmlns="http://www.w3.org/ns/widgets"
	xmlns:cdv="http://cordova.apache.org/ns/1.0"
></widget>
Once your ID looks fine you might need to remove and add the iOS platform, but now we are finally good to go to purchase our own stuff.
Implement Ionic In App Purchase
The flow of an in app purchase is a bit different from what you might think. Actually, we start the process by loading information about our products!
But we still need the Product ID of our in app purchases, not sure why this can’t work without them. You can find it on the overview of your items, it’s the one key you added when creating your product.
So we use these IDs inside an array to query the information about our items. Once this is done, we assign the information to an array so our view can later display all of that information!
When we buy a product, we simply call the buy() function of the plugin and afterwards make sure to handle the successful purchase in our app. This means, enable whatever the user just bought!
Also Apple insist on a ”Restore” button somewhere inside your app to give users the chance to restore their historic purchases, for example if they already unlocked those level before you need to give him access to this feature again but this time without payment.
All of this can be found inside our class below, so open your src/pages/home/home.ts and change it to:
import { Component } from '@angular/core';
import { NavController, Platform } from 'ionic-angular';
import { InAppPurchase } from '@ionic-native/in-app-purchase';

const MONTHLYLVL_KEY = 'com.devdactic.crossingnumbers.monthlylevels';
const CRYSTALS_KEY = 'com.devdactic.crossingnumbers.100crystal';
const GAMEMODE_KEY = 'com.devdactic.crossingnumbers.specialgamemode';

@Component({
	selector: 'page-home',
	templateUrl: 'home.html'
})
export class HomePage {
	products = [];
	previousPurchases = [];
	crystalCount = 0;
	specialGame = false;
	monthlySub = false;

	constructor(private iap: InAppPurchase, private plt: Platform) {
		this.plt.ready().then(() => {
			this.iap
				.getProducts([MONTHLYLVL_KEY, CRYSTALS_KEY, GAMEMODE_KEY])
				.then((products) => {
					this.products = products;
				})
				.catch((err) => {
					console.log(err);
				});
		});
	}

	buy(product) {
		this.iap.buy(product).then((data) => {
			this.enableItems(product);
		});
	}

	restore() {
		this.iap.restorePurchases().then((purchases) => {
			this.previousPurchases = purchases;
			// Unlock the features of the purchases!
			for (let prev of this.previousPurchases) {
				this.enableItems(prev.productId);
			}
		});
	}

	enableItems(id) {
		// Normally store these settings/purchases inside your app or server!
		if (id === CRYSTALS_KEY) {
			this.crystalCount += 100;
		} else if (id === GAMEMODE_KEY) {
			this.specialGame = true;
		} else if (id === MONTHLYLVL_KEY) {
			this.monthlySub = true;
		}
	}
}
Of course you don’t want to use my IDs for the items, they shouldn’t work for you so make sure to insert your own Product IDs here! The last missing piece is the view, which is kinda simple given that our class already holds all the information and functions.
We display each of our in app purchase items as a card with the title and description and the buy button. Here we use the price we get from Apple, so don’t rely on your internal numbers and take the information we receive from the plugin!
The list of previous purchases is just for our own information and some debugging, and at the top I added a few ”resources” that we can purchase/activate like in a classic game.
Go ahead and change your src/pages/home/home.html to:
<ion-header>
	<ion-navbar>
		<ion-title> Ionic In App </ion-title>
	</ion-navbar>
</ion-header>

<ion-content padding>
	<ion-row text-center>
		<ion-col
			>Crystals:<br />
			<b>{{ crystalCount }}</b></ion-col
		>
		<ion-col>Special Mode: <b>{{ specialGame }}</b></ion-col>
		<ion-col>Monthly Subscription: <b>{{ monthlySub }}</b></ion-col>
	</ion-row>

	<ion-card *ngFor="let product of products">
		<ion-card-header>{{ product.title }}</ion-card-header>
		<ion-card-content> {{ product.description }} </ion-card-content>
		<ion-row>
			<ion-col>
				<button ion-button block (click)="buy(product.productId)">
					Buy now - {{ product.price }}
				</button>
			</ion-col>
		</ion-row>
	</ion-card>

	<button ion-button full icon-left color="secondary" (click)="restore()">
		<ion-icon name="refresh"></ion-icon>Restore
	</button>

	<ion-card *ngFor="let prev of previousPurchases">
		<ion-card-header>Purchased {{ prev.date | date:'short' }}</ion-card-header>
		<ion-card-content> {{ prev.productId }} </ion-card-content>
	</ion-card>
</ion-content>
That’s all for the code side! If you run your app on an iOS device now and everything is connected accordingly you will see your Ionic in app purchases right inside your app.
Now we only need a way to test it…
Testing In App Purchases
Of course you don’t want to spend your real money on test purchases, but we can create a Sandbox user for this!
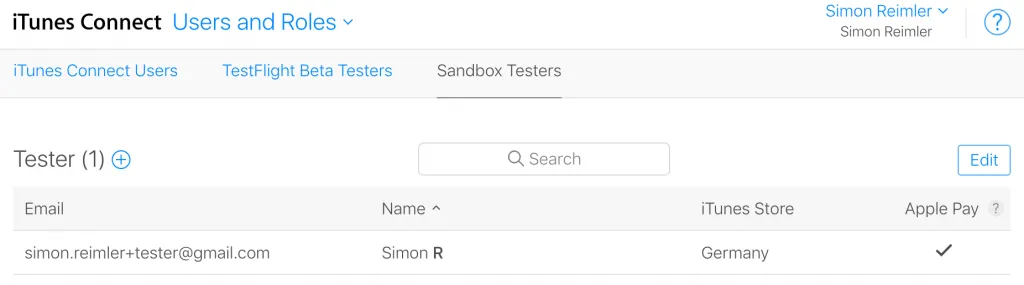
Right inside your iTunes Connect account you can navigate to Users and Roles and at the top select the tab Sandbox Testers.
On this screen you can add new users which are Sandbox users, you can also follow the official guide from Apple.
Once your are done you should have at least one user on this screen.
If you now start your app, you are perhaps still logged in as yourself, so got to iPhone Settings -> iTunes & App Stores and sign out from your account there.
Now you can log in from your app once you purchase something with the new Sandbox user!
Conclusion
There are quite a few steps involved to add Ionic in app purchases using Cordova, but it’s definitely not as hard as you might think.
These purchases are a super efficient way to generate money from your free apps and work better than apps almost ever. So if you have some feature you want to unlock, add it as an in app purchase to your Ionic app now!
You can find a video version of this article below.
Happy Coding, Simon