How To Make A HealthKit App With Ionic and ngCordova Last update: 2015-02-20
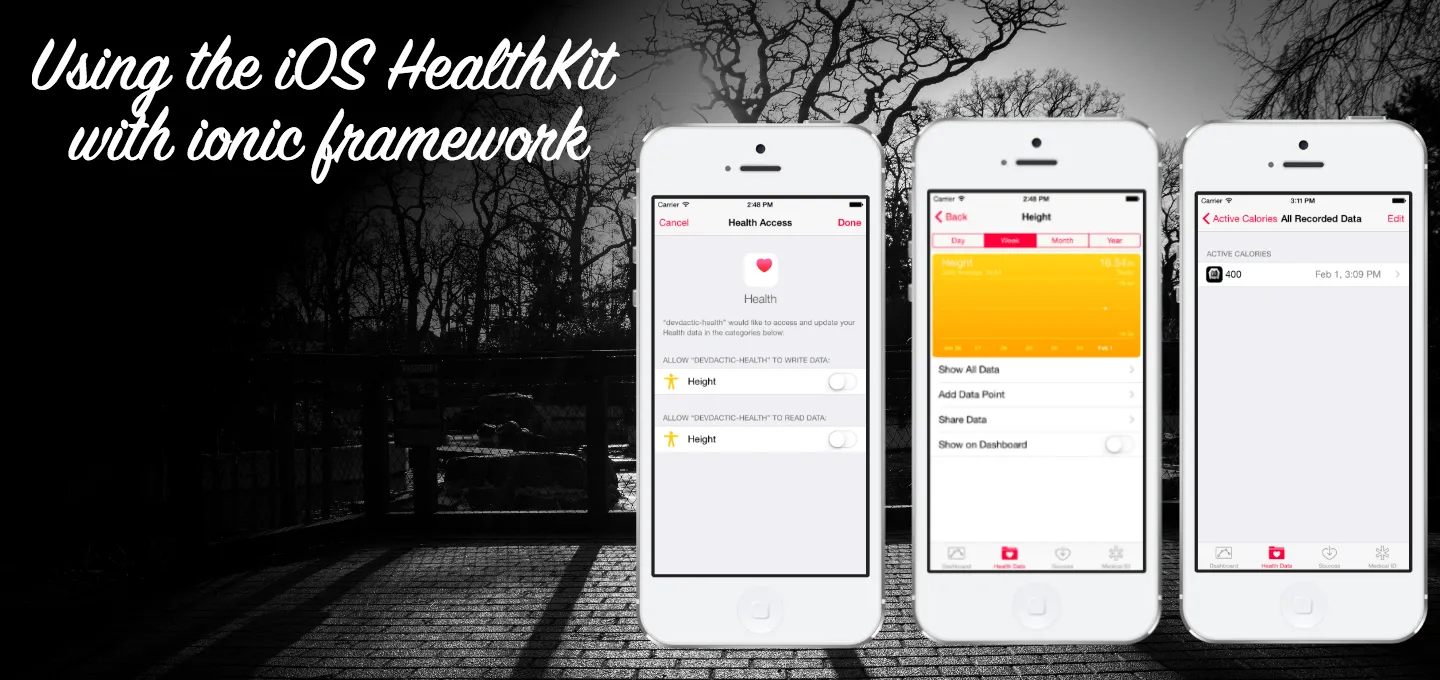
Since the release of the iOS 8 SDK, developers have access to the HealthKit App and its services. Through this service you can read and write body data like weight, height or store a complete sports workout session. To implement this feature in your Ionic app, you can make use of the ngCordova wrapper for cordova plugins, and that’s what I will show you today.
We will make a simple App to write some general data and to submit a complete workout to the Health app, which will then be displayed inside the standard iOS app.
Setup base App and dependencies
We start with a simple blank starter app and add ngCordova via bower, the HealtKit cordova plugin plus the iOS platform:
ionic start devdactic-health blank
cd devdactic-health
bower install --save ngCordova
cordova plugin add https://github.com/Telerik-Verified-Plugins/HealthKit
ionic platform add ios
ionic prepare ios
This tutorial will not work on Android, as there is no such thing (or official app) like the Apple Health app. Next we need to add the ngCordova source to our index.html. Make sure to add this line before the cordova.js import!
<script src="lib/ngCordova/dist/ng-cordova.js"></script>Finally, make sure to add the dependency to your app module:
angular.module('starter', ['ionic', 'ngCordova'])To finally make use of the Healthkit, we need to make a tiny change to our iOS Project. Therefore open the platforms/ios/*.xcodeproj, go to your target, click on the tab ‘capabilities’ and switch the HealthKit to on like in the image below: 
Sending and Receiving Data from Healthkit
For this tutorial we will try to read and update our personal height and set some workout data. First of all, open the index.html to add some general buttons and replace your body with this:
<body ng-app="starter" ng-controller="AppCtrl">
	<ion-pane>
		<ion-header-bar class="bar-positive">
			<h1 class="title">Devdactic Health App</h1>
		</ion-header-bar>
		<ion-content class="has-header padding">
			<!-- Height -->
			<div class="list">
				<div class="item item-input-inset">
					<label class="item-input-wrapper">
						<input type="text" placeholder="Your height" ng-model="body.height" />
					</label>
					<button class="button button-small" ng-click="saveHeight()">Set height</button>
				</div>
			</div>
			<button class="button button-positive" ng-click="getHeight()">Get height</button>
			<br />
			<!-- Workout -->
			<button class="button button-positive" ng-click="saveWorkout()">Set a Workout</button>
			<button class="button button-positive" ng-click="getWorkouts()">Get workout data</button>
		</ion-content>
	</ion-pane>
</body>
Nothing special, just a field for the height and some buttons to perform our actions, and the controller assigned to our body which we will soon create.
Before we can access the data for the Healt app, we must ask the user for some permissions. This can either be done on the fly when we request anything, or you can do it once at startup to set it for all times. We will have both cases here, so open the app.js and add this to the ionicPlatform.ready() function:
$cordovaHealthKit.isAvailable().then(function(yes) {
    // HK is available
    var permissions = ['HKQuantityTypeIdentifierHeight'];

    $cordovaHealthKit.requestAuthorization(
        permissions, // Read permission
        permissions // Write permission
    ).then(function(success) {
        // store that you have permissions
    }, function(err) {
        // handle error
    });

}, function(no) {
    // No HK available
});
First we check if HealthKit is available, and if that’s fine we request read and write permissions for the height of our user. At this point you could save a flag for further actions so you know everything is set up correct.
For all identifiers check Apple official HealthKit Identifiers
Now we will create our Controller which will perform the actions with the HealthKit plugin, therefor go ahead with this:
.controller('AppCtrl', function($scope, $cordovaHealthKit) {
    $scope.body = {
        height: ''
    };

    $scope.saveHeight = function() {
        $cordovaHealthKit.saveHeight($scope.body.height, 'cm').then(function(v) {
        }, function(err) {
            console.log(err);
        });
    };

    $scope.getHeight = function() {
        $cordovaHealthKit.readHeight('cm').then(function(v) {
            alert('Your height: ' + v.value + ' ' + v.unit);
        }, function(err) {
            console.log(err);
        });
    };
});
This is the first part where we set our body height. The interaction with the cordova plugin is very simple through ngCordova as you can see. Our $scope.body will be set by our input field in the index, and on save we just submit the value and the unit to the HealthApp. If you have set your height, you can go to the Health app -> Body Measurements -> Height and should see something similar to this: 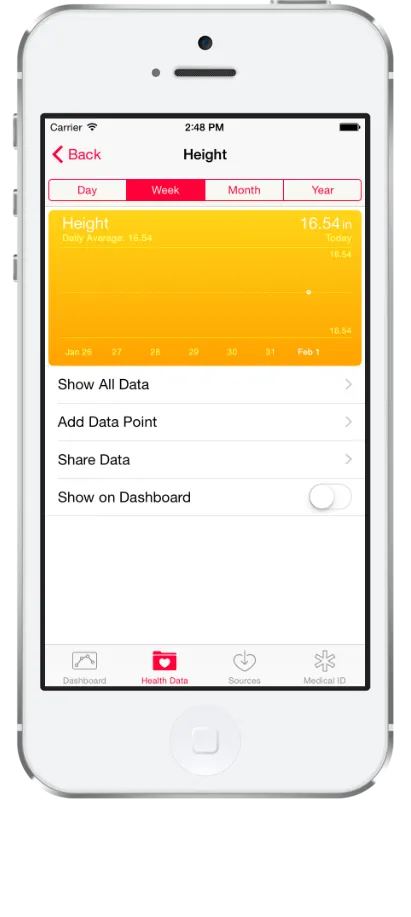
Setting the height is just a basic example, there are more things you can set so take a look at the ngCordova Healthkit documentation.
Storing a Workout Session
After we have seen how to set and read basic data, we will try to create a workout session and submit the values to the Health app. Therefore open your app.js again and insert the last 2 functions to our AppCtrl:
$scope.saveWorkout = function() {
    $cordovaHealthKit.saveWorkout(
        {
            'activityType': 'HKWorkoutActivityTypeCycling',
            'quantityType': 'HKQuantityTypeIdentifierDistanceCycling',
            'startDate': new Date(), // now
            'endDate': null, // not needed when using duration
            'duration': 6000, //in seconds
            'energy': 400, //
            'energyUnit': 'kcal', // J|cal|kcal
            'distance': 5, // optional
            'distanceUnit': 'km'
        }
    ).then(function(v) {
        alert(JSON.stringify(v));
    }, function(err) {
        console.log(err);
    });
};

$scope.getWorkouts = function() {
    $cordovaHealthKit.findWorkouts().then(function(v) {
        alert(JSON.stringify(v));
    }, function(err) {
        console.log(err);
    });
};
To save a workout, we must define an object with some properties. Most important, we must select the Activity Type and the Quantity Type of our session.
For more activities take a look at the Apple documentation about Workout activity types.
Additional we have to set the starting and endpoint (or duration), the burned energy and unit, and finally the distance and unit of the distance. We use some hardcoded values here, if you plan to make a fitness app you should obviously get the data from a real workout session of the user.
The data gets submitted and at this point the user will see the permissions dialog again, as we have not set the permissions for these types by now (same for reading the workout data). If we now try to get the workout data, we will have an array with the one workout we just saved, or more depending on your already stored data in your Health app. Finally, if you go to Health App -> Fitness -> Active Calories -> Show all data you should see your saved workout data like this: 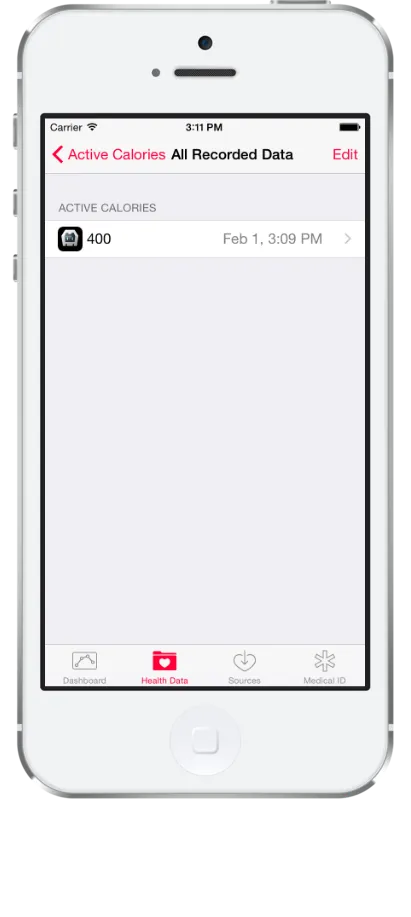
You are now ready to make the next killer sports app!
Conclusion
We have implemented a simple ionic App with HealthKit functionality by the help of ngCordova, which can save and get personal body information and store a complete workout session with specific information regarding sports type, duration or distance.
Have you ever made an app with HealthKit for sports? Maybe even with accessing data from a bluetooth connected device? Let me know and share your knowledge below!
If this tutorial was helpful, follow me on twitter @schlimmson and leave a comment/ tweet it! Don’t forget to subscribe to my newsletter to receive new posts and infos via mail!
Watch a video version of this article below.
So long, Saimon