How to Handle User Roles in Ionic Apps with Guard & Directives Last update: 2021-04-20

When working with user accounts, you sometimes need to handle multiple user roles within your Ionic app or even specific permissions users might have
In this tutorial we will handle both cases with different user roles as well as more fine granulated user permission for specific actions.
We’ll not build a backend and rely on some fake dummy data, but we’ll make sure our Ionic app handles roles and permissions correctly.
That means we will hide certain elements based on roles using directives, or prevents access to pages with detailed role check through a guard!
Starting our Roles App
To get started, we bring up a blank new Ionic app and generate two pages, a service that holds the state of our user, two directives to show/hide elements based on roles or permissions and finally a guard to protect our inside pages:
ionic start devdacticRoles blank --type=angular --capacitor
cd ./devdacticRoles

# Pages for testing
ionic g page pages/login
ionic g page pages/secret

# Handle the current user
ionic g service services/auth

ionic g module directives/SharedDirectives --flat
ionic g directive directives/hasPermission
ionic g directive directives/disableRole

# Guard to protect pages
ionic g guard guards/auth --implements CanActivate
To apply the new routes we can already change our setup inside the src/app/app-routing.module.ts now:
import { NgModule } from '@angular/core';
import { PreloadAllModules, RouterModule, Routes } from '@angular/router';
import { AuthGuard } from './guards/auth.guard';

const routes: Routes = [
  {
    path: '',
    loadChildren: () => import('./pages/login/login.module').then( m => m.LoginPageModule)
  },
  {
    path: 'home',
    loadChildren: () => import('./home/home.module').then( m => m.HomePageModule),
    canActivate: [AuthGuard]
  },
  {
    path: 'secret',
    loadChildren: () => import('./pages/secret/secret.module').then( m => m.SecretPageModule),
    canActivate: [AuthGuard],
    data: {
      role: 'ADMIN'
    }
  }
];

@NgModule({
  imports: [
    RouterModule.forRoot(routes, { preloadingStrategy: PreloadAllModules })
  ],
  exports: [RouterModule]
})
export class AppRoutingModule { }
We already see the first element, the authentication guard applied to our internal area routes. Right now it will allow all access, but we will build this out later so we either allow access only for authorised users (like the home route) or make this even dependent on a user role (like the secret route).
Authentication Service & Dummy Login
Before we dive into our directives and guards, we first need a bit of logic to fake the login process that usually makes a call to your backend and gets back the user information and any potential roles or permissions for a certain user.
Like done before, we will handle the current user information with a BehaviorSubject to which we can easily emit new values.
Here are our functions in detail:
loadUser: Try to load a token or user information from Storage right in the beginning. We have some plain information, but you usually have something like a JWT in there so you can directly log in a usersignIn: Our dummy login function that simply checks the name and fakes information that you would get from a server. We got a standard user with basic permissions and an admin user, but you could of course have even more in your app.hasPermission: Check if inside the array of a user a set of permissions is included
Besides that we only return an Observable of our BehaviourSubject so outside pages can’t change the value and only read and subscribe to the changes. The logout in the end will clear all user information and bring us back to the login.
Go ahead with our dummy service and change the src/app/services/auth.service.ts to:
import { Injectable } from '@angular/core';
import { BehaviorSubject, of } from 'rxjs';
import { tap } from 'rxjs/operators';
import { Plugins } from '@capacitor/core';
import { Router } from '@angular/router';

const { Storage } = Plugins;

const TOKEN_KEY = 'user-token';

export interface User {
  name: string;
  role: string;
  permissions: string[];
}

@Injectable({
  providedIn: 'root'
})
export class AuthService {
  private currentUser: BehaviorSubject<any> = new BehaviorSubject(null);

  constructor(private router: Router) {
    this.loadUser();
  }

  loadUser() {
    // Normally load e.g. JWT at this point
    Storage.get({ key: TOKEN_KEY }).then(res => {
      if (res.value) {
        this.currentUser.next(JSON.parse(res.value));
      } else {
        this.currentUser.next(false);
      }
    });
  }

  signIn(name) {
    // Local Dummy check, usually server request!
    let userObj: User;

    if (name === 'user') {
      userObj = {
        name: 'Tony Test',
        role: 'USER',
        permissions: ['read']
      };
    } else if (name === 'admin') {
      userObj = {
        name: 'Adam Admin',
        role: 'ADMIN',
        permissions: ['read', 'write']
      };
    }

    return of(userObj).pipe(
      tap(user => {
        // Store the user or token
        Storage.set({ key: TOKEN_KEY, value: JSON.stringify(user) })
        this.currentUser.next(user);
      })
    );
  }

  // Access the current user
  getUser() {
    return this.currentUser.asObservable();
  }

  // Remove all information of the previous user
  async logout() {
    await Storage.remove({ key: TOKEN_KEY });
    this.currentUser.next(false);
    this.router.navigateByUrl('/', { replaceUrl: true });
  }

  // Check if a user has a certain permission
  hasPermission(permissions: string[]): boolean {
    for (const permission of permissions) {
      if (!this.currentUser.value || !this.currentUser.value.permissions.includes(permission)) {
        return false;
      }
    }
    return true;
  }
}
Note that we always emit false to the current user when we log out or don’t have stored information, which is necessary to distinguish from the initial null value of our Behaviour Subject!
Now we can create a simple login inside the src/app/pages/login/login.page.ts by using our service:
import { Component, OnInit } from '@angular/core';
import { Router } from '@angular/router';
import { AuthService } from '../../services/auth.service';

@Component({
  selector: 'app-login',
  templateUrl: './login.page.html',
  styleUrls: ['./login.page.scss'],
})
export class LoginPage implements OnInit {

  constructor(private auth: AuthService, private router: Router) { }

  ngOnInit() { }

  signIn(userName) {
    this.auth.signIn(userName).subscribe(user => {
      // You could now route to different pages
      // based on the user role
      // let role = user['role'];

      this.router.navigateByUrl('/home', {replaceUrl: true });
    });
  }
}
We don’t use role based routing in this tutorial, but you could now easily guide users to different pages inside your app based on the role after the login!
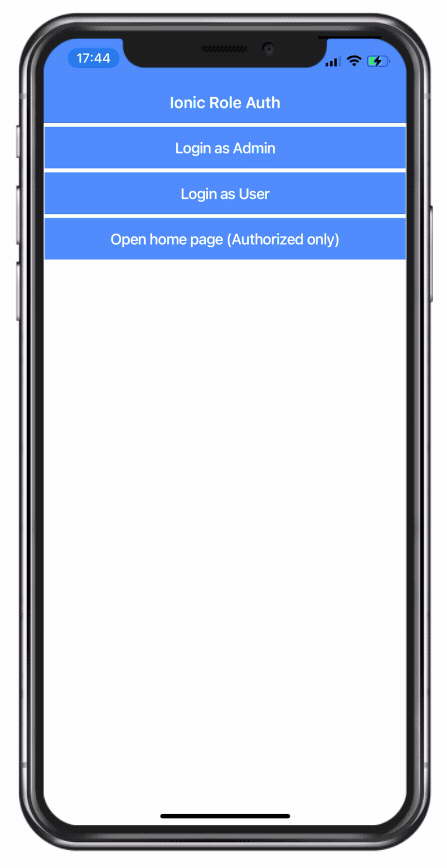
To use the login we finally also need a simple view, so change the src/app/pages/login/login.page.html to:
<ion-header>
  <ion-toolbar color="primary">
    <ion-title>
      Ionic Role Auth
    </ion-title>
  </ion-toolbar>
</ion-header>

<ion-content padding>
  <ion-button expand="full" (click)="signIn('admin')">Login as Admin</ion-button>
  <ion-button expand="full" (click)="signIn('user')">Login as User</ion-button>

  <ion-button expand="full" routerLink="/home">
    Open home page (Authorized only)</ion-button>
</ion-content>
Now we can already navigate inside our app, but we don’t really have any kind of authentication in place yet.
Protecting Pages with a Guard
First of all we will protect the pages that only logged in users should be able to see. Keep in mind that this is only half of the security, the more important security always happens inside your API and all your endpoints should be protected accordingly.
Anyway, we need a way to change between users so let’s start by adding a quick logout to the src/app/home/home.page.ts:
import { Component } from '@angular/core';
import { AuthService } from '../services/auth.service';

@Component({
  selector: 'app-home',
  templateUrl: 'home.page.html',
  styleUrls: ['home.page.scss'],
})
export class HomePage {

  user = this.authService.getUser();

  constructor(private authService: AuthService) {}

  logout() {
    this.authService.logout();
  }
}
To call the function, we will also add a button to the src/app/home/home.page.html and print out some information about the current user for debugging:
<ion-header>
  <ion-toolbar color="primary">
    <ion-title>
      Inside Area
    </ion-title>
    <ion-buttons slot="end">
      <ion-button (click)="logout()">
        <ion-icon slot="icon-only" name="log-out"></ion-icon>
      </ion-button>
    </ion-buttons>
  </ion-toolbar>
</ion-header>

<ion-content>

  <ion-card>
    <ion-card-content>
      <p>Current user: {{ user | async | json }}</p>
    </ion-card-content>
  </ion-card>

  <ion-button expand="full" routerLink="/secret">
    Open secret page (Admin only)</ion-button>

</ion-content>
To complete the navigation you can also add a little back button to the src/app/pages/secret/secret.page.html:
<ion-header>
  <ion-toolbar color="secondary">
    <ion-buttons slot="start">
      <ion-back-button defaultHref="/home"></ion-back-button>
    </ion-buttons>
    <ion-title>Secret Admin Page</ion-title>
  </ion-toolbar>
</ion-header>

<ion-content>

</ion-content>
Now the protection starts: We want to prevent unauthorised access, and if any specific role for a route was supplied (check back the app.routing and the role we added!) we also want to make sure the user has that role.
Within the guard we can now use the Observable from our service, filter out the initial null value and then check if the user is authenticated in general, and if there are any roles specified for this route, we also check if the user has the necessary role.
Go ahead and change the src/app/guards/auth.guard.ts to this now:
import { Injectable } from '@angular/core';
import { ActivatedRouteSnapshot, Router, CanActivate } from '@angular/router';
import { AlertController } from '@ionic/angular';
import { AuthService } from '../services/auth.service';
import { take, map, filter } from 'rxjs/operators';

@Injectable({
  providedIn: 'root'
})
export class AuthGuard implements CanActivate {

  constructor(private router: Router, private authService: AuthService, private alertCtrl: AlertController) { }


  canActivate(route: ActivatedRouteSnapshot) {
    // Get the potentially required role from the route
    const expectedRole = route.data?.role || null;

    return this.authService.getUser().pipe(
      filter(val => val !== null), // Filter out initial Behaviour subject value
      take(1),
      map(user => {

        if (!user) {
          this.showAlert();
          return this.router.parseUrl('/')
        } else {
          let role = user['role'];

          if (!expectedRole || expectedRole == role) {
            return true;
          } else {
            this.showAlert();
            return false;
          }
        }
      })
    )
  }

  async showAlert() {
    let alert = await this.alertCtrl.create({
      header: 'Unauthorized',
      message: 'You are not authorized to visit that page!',
      buttons: ['OK']
    });
    alert.present();
  }
}
Now the guard works and you can test the behaviour with our two users, from which only the admin is allowed to enter the secret page.
Note: We used canActivate for our guard here instead of canLoad. The different is usually that the later prevents loading of the module, while the first will actually load the module but then prevent access to the page.
However, if a user accessed a page that is protected with a canLoad guard, the module loads. If the user now signs out and another user signs in on that same device, that user would always have access to the route as well because the module was now loaded already!
It’s something to keep in mind when picking the right guard functionality for your app.
Custom Role Directives
After protecting full pages, we go into more details about specific elements inside a page. And if you want to change how certain elements work based on user roles and permissions, you can create some cool directives!
First of all we need to make sure that other pages can use the directives we generated in the beginning, so open the src/app/directives/shared-directives.module.ts and add them to the exports and declarations:
import { NgModule } from '@angular/core';
import { CommonModule } from '@angular/common';
import { DisableRoleDirective } from './disable-role.directive';
import { HasPermissionDirective } from './has-permission.directive';

@NgModule({
  declarations: [HasPermissionDirective, DisableRoleDirective],
  imports: [
    CommonModule
  ],
  exports: [HasPermissionDirective, DisableRoleDirective]
})
export class SharedDirectivesModule { }
Now we can dive into the first of our directives that should prevent a user from seeing a certain DOM element. To achieve this, we can use the reference to the template where our directive is attached and either call createEmbeddedView() to embed the element or clear() to remove it, based on the permission of a user.
The permissions will be passed to the directive through the @Input() we defined at the top, and will be checked with the hasPermission() of our service.
Get started with the first directive by changing the src/app/directives/has-permission.directive.ts to:
import { Directive, Input, TemplateRef, ViewContainerRef } from '@angular/core';
import { AuthService } from '../services/auth.service';

@Directive({
  selector: '[appHasPermission]'
})
export class HasPermissionDirective {

  @Input('appHasPermission') permissions: string[];

  constructor(private authService: AuthService,
    private templateRef: TemplateRef<any>,
    private viewContainer: ViewContainerRef) { }

  ngOnInit() {
    this.authService.getUser().subscribe(_ => {
      if (this.authService.hasPermission(this.permissions)) {
        this.viewContainer.createEmbeddedView(this.templateRef);
      } else {
        this.viewContainer.clear();
      }
    });
  }
}
The second directive should disabled a view element for a specific role of a user, which will again be passed to the directive. Tip: If you name the input exactly like the directive itself you can later pass that value quite easily to the directive!
We follow mostly the same approach but use the Renderer2 to directly change the appearance of the host element where the directive is attached.
Go ahead now and also change the src/app/directives/disable-role.directive.ts to:
import { Directive, ElementRef, Input, Renderer2 } from '@angular/core';
import { AuthService } from '../services/auth.service';

@Directive({
  selector: '[appDisableRole]'
})
export class DisableRoleDirective {

  @Input() disableForRole: string;

  constructor(private authService: AuthService,
    private renderer: Renderer2,
    public element: ElementRef) { }

  ngAfterViewInit() {
    this.authService.getUser().subscribe(user => {
      const userRole = user['role'];

      if (userRole == this.disableForRole) {
        this.renderer.setStyle(this.element.nativeElement, 'pointer-events', 'none');
        this.renderer.setStyle(this.element.nativeElement, 'opacity', 0.4);
      }
    });
  }
}
With our directives in place we now need to load the module which exports the directives in the module where we plan to use them, in our case that’s the src/app/home/home.module.ts:
import { NgModule } from '@angular/core';
import { CommonModule } from '@angular/common';
import { IonicModule } from '@ionic/angular';
import { FormsModule } from '@angular/forms';
import { HomePage } from './home.page';

import { HomePageRoutingModule } from './home-routing.module';
import { SharedDirectivesModule } from '../directives/shared-directives.module';

@NgModule({
  imports: [
    CommonModule,
    FormsModule,
    IonicModule,
    HomePageRoutingModule,
    SharedDirectivesModule
  ],
  declarations: [HomePage]
})
export class HomePageModule {}
Finally we can attach our new directives to DOM elements to either hide them completely based on a permission (*appHasPermission) or otherwise disabled them based on a specific role (appDisableRole).
Wrap up our code by changing the src/app/home/home.page.html to:
<ion-header>
  <ion-toolbar color="primary">
    <ion-title>
      Inside Area
    </ion-title>
    <ion-buttons slot="end">
      <ion-button (click)="logout()">
        <ion-icon slot="icon-only" name="log-out"></ion-icon>
      </ion-button>
    </ion-buttons>
  </ion-toolbar>
</ion-header>

<ion-content>

  <!-- Everything from before... -->

  <ion-card *appHasPermission="['read']">
    <ion-card-header>
      <ion-card-title>My Content</ion-card-title>
    </ion-card-header>
    <ion-card-content>
      Everyone can read this
      <ion-button expand="full" *appHasPermission="['write']">
        Admin action
      </ion-button>
    </ion-card-content>
  </ion-card>

  <ion-button expand="full" appDisableRole disableForRole="USER">Action for Admins</ion-button>
  <ion-button expand="full" appDisableRole disableForRole="ADMIN">Action for Users</ion-button>
</ion-content>
Now the button inside the card is only visible to users with the “write” permission, and the button below is only active for a specific role!
Conclusion
To protect your Ionic app based on user roles and permissions you can introduce guards and directives to control access to pages and even to specific view elements.
On top of that you could route after a login to different pages or set up menu items based on the user role as well to create applications with different functionality for different users without having if statements all over your apps code!
You can also find a video version of this tutorial below.