Getting Started with Ionic 4 and Socket.io Last update: 2019-07-23

Working with Sockets has become super easy over the years, and although it might sound intimidating first we’ll learn how to easily use it in combination with Ionic 4!
In this tutorial we will craft a super simple Node server which allows socket connections and also an Ionic app that connects to our server.

We will then be able to send messages to a chatgroup from our app where everyone inside is an anonymous user. You can find more detailed courses inside my Ionic Academy, the learning platform for everything Ionic!
Creating a simple Node Server with Socket.io
Because we need two parts in this tutorial, we start with a simple server. You can create a new node project by running the below commands:
mkdir SocketServer && cd SocketServer
npm init
npm install express socket.io
Now you got a folder with a package.json file, but not really a server yet. Therefore, create a new index.js file and insert:
let app = require('express')();
let server = require('http').createServer(app);
let io = require('socket.io')(server);

io.on('connection', (socket) => {

  socket.on('disconnect', function(){
    io.emit('users-changed', {user: socket.username, event: 'left'});
  });

  socket.on('set-name', (name) => {
    socket.username = name;
    io.emit('users-changed', {user: name, event: 'joined'});
  });

  socket.on('send-message', (message) => {
    io.emit('message', {msg: message.text, user: socket.username, createdAt: new Date()});
  });
});

var port = process.env.PORT || 3001;

server.listen(port, function(){
   console.log('listening in http://localhost:' + port);
});
This is our basic Socket implementation on the server-side.
All of our functions are wrapped inside the io.on('connection') block, so these will only happen once a client connects to the server. You could also add authentication to the process, but today we want to keep things easy.
We set a function for the events disconnect, set-name and add-message which means whenever our app sends out these events the server reacts.
If we send a new message, we emit that message to everyone connected as a new object with text, the name of the sending user and a date. Also, we set the name of the socket connection if a users send his nickname.
You can imagine storing more information that way like a real user ID of your backend to couple the information closely.
There’s also a tool to test your socket implementation but I haven’t worked that much with it before. Just wanted to mention it here since it can be hard to test and debug it, so check out the Socket.io Tester!
Your node backend with Socket.io is now ready! You can start it by running the command below and you should be able to reach it at http://localhost:3001
node index.jsThis backend won’t store the messages, so they are only available to online users. At this point you could plug in your database and store all new messages in there so you have the functionality of a real chat!
Creating the Ionic Socket Chat App
Now we get into the perhaps better known territory for you, the Ionic app. Actually we don’t need a lot, just a blank app to get started and additionally the ngx-socket-io package to create the connection to our server:
ionic start devdacticSocket blank
cd ./devdacticSocket
npm install ngx-socket-io
At the time writing this I also encountered problems with the package, and the easiest way to fix it (as recommended only for other cases as well) is to change your app/polyfills.ts at the end to add one more line:
/***************************************************************************************************
 * APPLICATION IMPORTS
 */
(window as any).global = window;
Now that the problems are gone, we can simply add the information for socket to our app/app.module.ts. You need to supply your server URL and you could add a lot more options in there that you might need in special scenarios later, but for now we don’t have to change a lot and only need the URL from the server we created before, so go ahead and change your app module to:
import { NgModule } from '@angular/core';
import { BrowserModule } from '@angular/platform-browser';
import { RouteReuseStrategy } from '@angular/router';

import { IonicModule, IonicRouteStrategy } from '@ionic/angular';
import { SplashScreen } from '@ionic-native/splash-screen/ngx';
import { StatusBar } from '@ionic-native/status-bar/ngx';

import { AppComponent } from './app.component';
import { AppRoutingModule } from './app-routing.module';

import { SocketIoModule, SocketIoConfig } from 'ngx-socket-io';
const config: SocketIoConfig = { url: 'http://localhost:3001', options: {} };

@NgModule({
  declarations: [AppComponent],
  entryComponents: [],
  imports: [BrowserModule, IonicModule.forRoot(), AppRoutingModule,
    SocketIoModule.forRoot(config)
  ],
  providers: [
    StatusBar,
    SplashScreen,
    { provide: RouteReuseStrategy, useClass: IonicRouteStrategy }
  ],
  bootstrap: [AppComponent]
})
export class AppModule {}
Now the app is able to make a connection to our server and we simply call a connect() function to establish that connection.
When you add only the connect block, you can also see a new connection on your server if you put in some logs!
But we don’t want to stop there, so here’s what we want and do as well:
- Create a random name when the app starts
- Emit the name with the set-name event so the server knows our nickname
- React to the incoming users-changed events in order to show a toast for users that joined/left the chat
- Subscribe to the message event just like before to the user change and add new messages to our arry
Because the package returns Observable the implementation is super handy and matches our regular style as well.
Also, sending a new message is as easy as emitting the data to socket - the server will handle the rest and know who sent the information based on the internal socket connection information.
Now go ahead and change your app/home/home.page.ts to:
import { Component, OnInit } from '@angular/core';
import { Socket } from 'ngx-socket-io';
import { ToastController } from '@ionic/angular';

@Component({
  selector: 'app-home',
  templateUrl: 'home.page.html',
  styleUrls: ['home.page.scss'],
})
export class HomePage implements OnInit {
  message = '';
  messages = [];
  currentUser = '';

  constructor(private socket: Socket, private toastCtrl: ToastController) { }

  ngOnInit() {
    this.socket.connect();

    let name = `user-${new Date().getTime()}`;
    this.currentUser = name;

    this.socket.emit('set-name', name);

    this.socket.fromEvent('users-changed').subscribe(data => {
      let user = data['user'];
      if (data['event'] === 'left') {
        this.showToast('User left: ' + user);
      } else {
        this.showToast('User joined: ' + user);
      }
    });

    this.socket.fromEvent('message').subscribe(message => {
      this.messages.push(message);
    });
  }

  sendMessage() {
    this.socket.emit('send-message', { text: this.message });
    this.message = '';
  }

  ionViewWillLeave() {
    this.socket.disconnect();
  }

  async showToast(msg) {
    let toast = await this.toastCtrl.create({
      message: msg,
      position: 'top',
      duration: 2000
    });
    toast.present();
  }
}
Finally it’s a good idea to disconnect once you are done - perhaps not always when you leave the page but maybe when the user logs out again.
Now we need to build our view and most of the following code is copied from one of the Ionic Academy Quick Wins on creating an Elastic Chat view.
We only need to iterate our messages array and have an area for composing the new message at the bottom, so open your home/home.page.html and change it to:
<ion-header>
  <ion-toolbar>
    <ion-title>
      Devdactic Chat
    </ion-title>
  </ion-toolbar>
</ion-header>

<ion-content>

  <ion-grid>
    <ion-text color="medium" text-center>
      <p>You joined the chat as {{ currentUser }}</p>
    </ion-text>
    <ion-row *ngFor="let message of messages">

      <ion-col size="9" *ngIf="message.user !== currentUser" class="message other-message">
        <b>{{ message.user }}</b><br>
        <span>{{ message.msg }}</span>
        <div class="time" text-right><br>{{ message.createdAt | date:'short' }}</div>
      </ion-col>

      <ion-col offset="3" size="9" *ngIf="message.user === currentUser" class="message my-message">
        <b>{{ message.user }}</b><br>
        <span>{{ message.msg }}</span>
        <div class="time" text-right><br>{{ message.createdAt | date:'short' }}</div>
      </ion-col>

    </ion-row>
  </ion-grid>

</ion-content>

<ion-footer>
  <ion-toolbar color="light">
    <ion-row align-items-center>
      <ion-col size="10">
        <ion-textarea auto-grow class="message-input" rows="1" [(ngModel)]="message"></ion-textarea>
      </ion-col>
      <ion-col size="2">
        <ion-button expand="block" fill="clear" color="primary" [disabled]="message === ''" class="msg-btn"
          (click)="sendMessage()">
          <ion-icon name="ios-send" slot="icon-only"></ion-icon>
        </ion-button>
      </ion-col>
    </ion-row>
  </ion-toolbar>
</ion-footer>
Because we have a basic example everything works fine, but if you have a real chat application with a lot of messages it might make sense to also optimise your list performance with a different Ionic component!
To achieve a chat like look we also need a bit of additional CSS so copy the following into your home/home.page.scss:
.message {
    padding: 10px;
    border-radius: 10px;
    margin-bottom: 4px;
    white-space: pre-wrap;
  }

  .my-message {
    background: var(--ion-color-tertiary);
    color: #fff;
  }

  .other-message {
    background: var(--ion-color-secondary);
    color: #fff;
  }

  .time {
    color: #dfdfdf;
    float: right;
    font-size: small;
  }

  .message-input {
    margin-top: 0px;
    border: 1px solid var(--ion-color-medium);
    border-radius: 10px;
    background: #fff;
  }

  .msg-btn {
    --padding-start: 0.5em;
    --padding-end: 0.5em;
  }
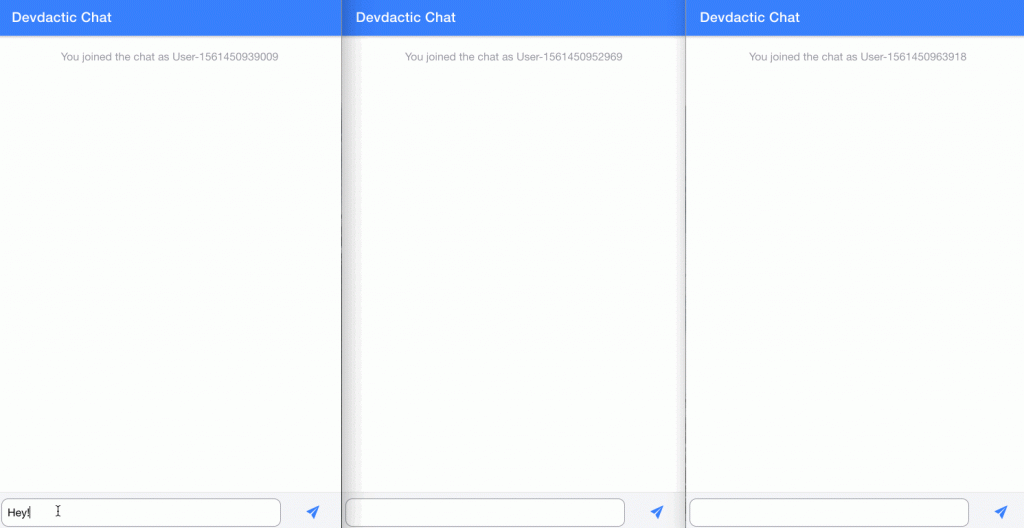
Now you can run your chat and open for example a few more incognito windows so you have different users connected to your socket chat. Then go ahead and enjoy chatting with yourself (forever alone).
Conclusion
Getting started with Socket and Ionic isn’t that hard - creating a basic server and the needed app functionality only takes minutes, and you can expand this example to a full-blown chat application as well!
You can also find a video version of this tutorial below.
