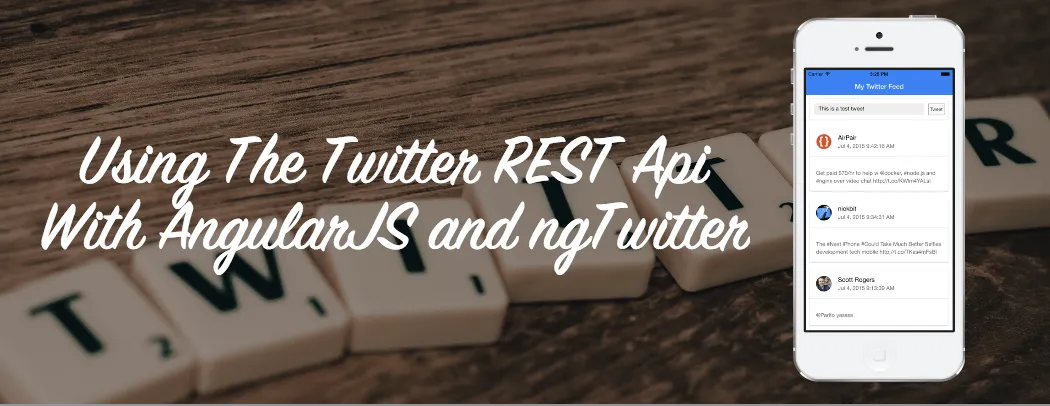
How To Easily Use The Twitter REST Api With AngularJS Last update: 2015-07-07
The Twitter REST Api is quite well documented, still there are many problems how to to call the routes, how to authenticate and in general how to use it. I wanted to simplify the Twitter integration, so I created a AngularJS library acting as a wrapper: ngTwitter.
Some time ago I had a post on the official Ionic blog on Displaying the Twitter Feed within Your Ionic App where everything had to be done by yourself. Now with ngTwitter you only need to call it once with your Consumer Key, your Consumer Secret and a valid OAuth token.
If ngTwitter is configured, you can use the wrapper methods to get the Twitter REST response and don’t have to worry about any more authentication or request signing!
In this tutorial I will show you how to use ngTwitter to access the Twitter REST Api, especially we will grab the home timeline and make a post.
As I am a big Ionic fan, I will use a simple Ionic Framework project as base for this tutorial. To grab the OAuth token I will use ngCordova which is a wrapper for cordova plugins. You can use ngTwitter in any AngularJS app, just maker sure you configure it with the keys and token and everything should work!
Setup an Ionic demo project
We start with a blank Ionic project and install ngTwitter and ngCordova with bower. If you have no experience with the Ionic Framework, I recommend to take a look at my course How To Create Apps With The Ionic Framework!
ionic start devdactic-twitter blank
cd devdactic-twitter
bower install ng-twitter-api --save
bower install ngCordova#c3634c64090fa11c3e6bab3fcdc29712d3ecb965 --save
At the time of writing this post we have to take the master branch of ngCordova, as there are critical changes regarding a cordova update.
After installing the libraries we also need 2 plugins which will help us to display the social login in our app. This is only needed for our example, not if you use ngTwitter outside of Ionic.
cordova plugin add https://git-wip-us.apache.org/repos/asf/cordova-plugin-inappbrowser.git
cordova plugin add cordova-plugin-whitelist
To sign our request we nee the help of the jsSHA library. Please use the tag 1.6 as version 2.0 is currently not working with the Twitter REST Api! Download the project and copy the sha1.js file to your www/lib folder.
After we have all the files inside our project, open the index.html and load all those files before the cordova import line!
<script src="lib/ngCordova/dist/ng-cordova.js"></script>
<script src="lib/ng-twitter-api/dist/ng-twitter-api.min.js"></script>
<script src="lib/sha1.js"></script>
Finally, we have to add the dependencies to our Angular module, so open the app.js and append ngCordova and ngTwitter to the array:
angular.module('starter', ['ionic', 'ngCordova', 'ngTwitter'])Our app is now ready to connect with Twitter. The last thing we must do is to create an app on Twitter that will give us the credentials we need. Go to the Twitter Application Management page and create a simple app.
After creation, we need to change the callback URL of our Twitter app to http://localhost/callback. As this is currently not possible via Twitter, make yourself a tiny URL, and insert that one instead. Leave the created app for now; we will need to copy some keys from it in a later step.
Creating our Timeline view
Our app is empty, so let’s change that. We want to have a timeline like you might know from the Twitter app, plus a short text input field to submit a tweet. The view is not very special, so replace the body of your index.html with everything below:
<body ng-app="starter" ng-controller="AppCtrl">
	<ion-pane>
		<ion-header-bar class="bar-positive">
			<h1 class="title">My Twitter Feed</h1>
		</ion-header-bar>
		<ion-content class="has-header padding">
			<div class="list">
				<div class="item item-input-inset">
					<label class="item-input-wrapper">
						<input
							type="text"
							placeholder="My tweet..."
							ng-model="tweet.message"
							ng-maxlength="140"
						/>
					</label>
					<button class="button button-small" ng-click="submitTweet()">Tweet</button>
				</div>
			</div>
			<ion-refresher on-refresh="doRefresh()"></ion-refresher>

			<div ng-show="home_timeline.length == 0">Loading tweets...</div>

			<div ng-repeat="entry in home_timeline" class="list card">
				<div class="item item-avatar">
					<img ng-src="{{entry.user.profile_image_url}}" />
					<h2>{{entry.user.name}}</h2>
					<p>{{correctTimestring(entry.created_at) | date:'medium'}}</p>
				</div>

				<div class="item item-body">
					<p ng-bind-html="entry.text"></p>
					<img
						ng-if="entry.extended_entities"
						ng-src="{{"
						entry.extended_entities.media[0].media_url
						}}
						style="width: 100%;"
					/>
				</div>
			</div>
		</ion-content>
	</ion-pane>
</body>
Our input field is connected to a scope variable and will call submitTweet() when we click on Tweet.
At the top we also have a pull-to-refresh so we can manually update our timeline whenever we want to. Our ng-repeat will take the information from our scope variable home_timeline, which we will fill in our AppCtrl.
The tweets are displayed in very simple cards. The Twitter response contains a lot more data, but that’s up to you and how you need it, so here just a simple demo. If you got any questions regarding the view, just leave a comment below!
Now we just need to perform the real work so we can finally see Twitter stuff inside our own app!
Calling the Twitter REST api with ngTwitter
We have already assigned a controller to our body, so now we need to finally implement it.Open the app.js and add a simple (currently empty) controller:
.controller('AppCtrl', function($scope, $ionicPlatform, $twitterApi, $cordovaOauth) {});We will use $ionicPlatform to automatically open the social login on app start, and $cordovaOauth for grabbing the needed OAuth token. The dependency $twitterApi is from the ngTwitter library.
At this point you need your personal Consumer and Consumer Secret Key from the Twitter app you created in the setup step. Insert the code below in your just created controller and insert your keys:
var twitterKey = 'STORAGE.TWITTER.KEY';
var clientId = 'yourConsumerKey';
var clientSecret = 'yourConsumerSecretKey';
var myToken = '';

$scope.tweet = {};

$ionicPlatform.ready(function() {
  myToken = JSON.parse(window.localStorage.getItem(twitterKey));
  if (myToken === '' || myToken === null) {
    $cordovaOauth.twitter(clientId, clientSecret).then(function (succ) {
      myToken = succ;
      window.localStorage.setItem(twitterKey, JSON.stringify(succ));
      $twitterApi.configure(clientId, clientSecret, succ);
      $scope.showHomeTimeline();
    }, function(error) {
      console.log(error);
    });
  } else {
    $twitterApi.configure(clientId, clientSecret, myToken);
    $scope.showHomeTimeline();
  }
});
The point here is to check if we already have a OAuth token stored. If we don’t have, we need to validate the user so we can get one. At this point we call the \$twitterApi.configure to set up the library for our use. Finally, we call our showHomeTimeline function to update the view.
As I wanted ngTwitter to be as simple as possible, there is not very much we have to do now. Receiving the timeline data is a simple call and submitting our input field as a new Tweet is also just one call.
Additional we need our refresh function which is called from our pull-to-refresh, and a helper method to generate a human readable string from the Twitter timestamp. Append the next lines to your AppCtrl:
$scope.showHomeTimeline = function() {
  $twitterApi.getHomeTimeline().then(function(data) {
    $scope.home_timeline = data;
  });
};

$scope.submitTweet = function() {
  $twitterApi.postStatusUpdate($scope.tweet.message).then(function(result) {
    $scope.showHomeTimeline();
  });
}

$scope.doRefresh = function() {
  $scope.showHomeTimeline();
  $scope.$broadcast('scroll.refreshComplete');
};

$scope.correctTimestring = function(string) {
  return new Date(Date.parse(string));
};
If you run your app, you should see a login view and upon succesful login you should see a timeline like this: 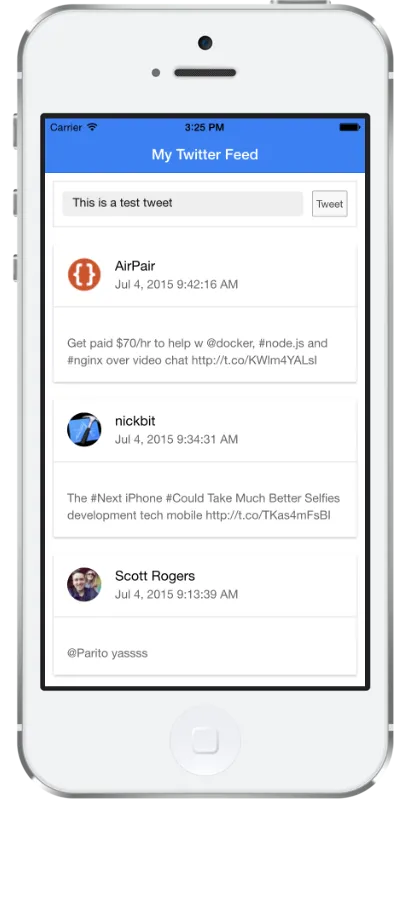
Final words
Using the Twitter REST Api can be challenging, but hopefully my ngTwitter will make things a bit easier for you. I will work on this in the next time to include more endpoints, and you are invited to submit pull requests or open issues as well!
Let’s work on this together for an easy Twitter wrapper library.
See a video version of this article below, and make sure to follow my YouTube channel for more great video tutorials.
If all of this was helpful, I would be happy to see a follower more on @schlimmson and leave a comment/ tweet it!
Also make sure to subscribe to my mailing list to receive new posts and updates by mail!
So long, Simon